Last Update: March 08, 2012
EC12 Building Home Page
Special Presentation Home
Custom Decks for the EC12 without sacrificing performance
This is a photo essay building instruction in the format as used on the Class Building Website. It is photo intensive with little text but quite effective. This piece will be moved to the building site later in the year. - Rick West
The EC12
offers builders opportunities to use their skills and craftsmanship. While hulls
must be obtained from a class approved manufacturer, much is open to the builder
within the class rules. Tom Germer is a long time EC12 sailor and builds
structured decks that are every bit as light and strong as any, and beautiful as
well. He has done many decks and developed a method for strip wood construction
and upside down deck installation. - Tom Phillips
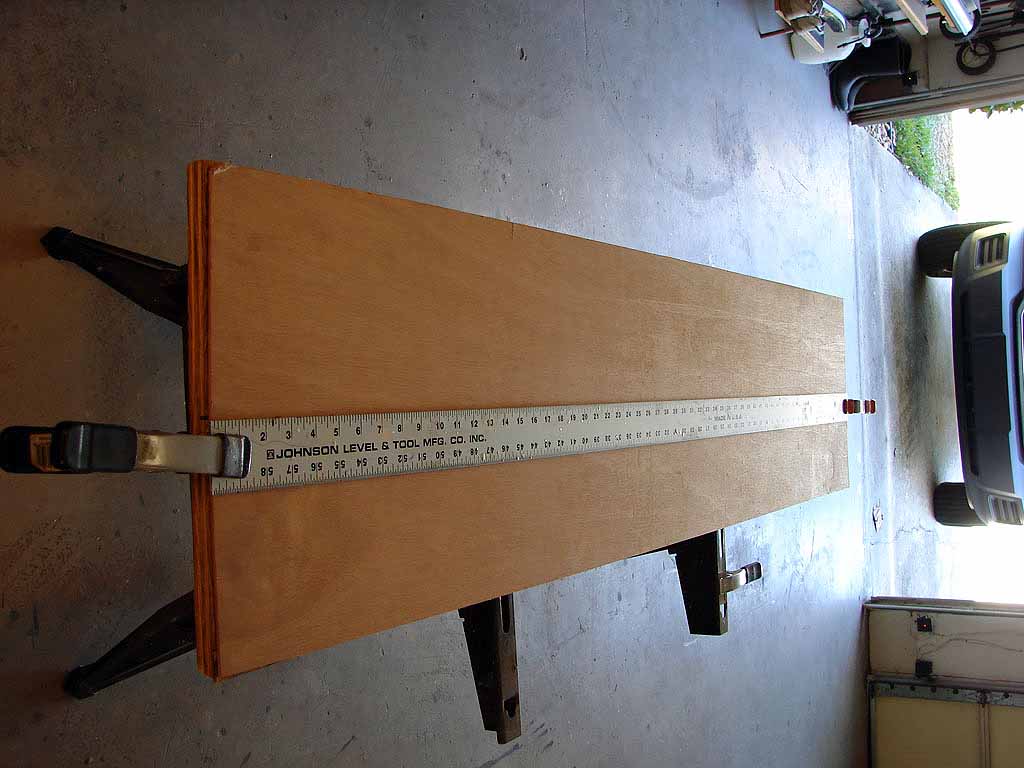
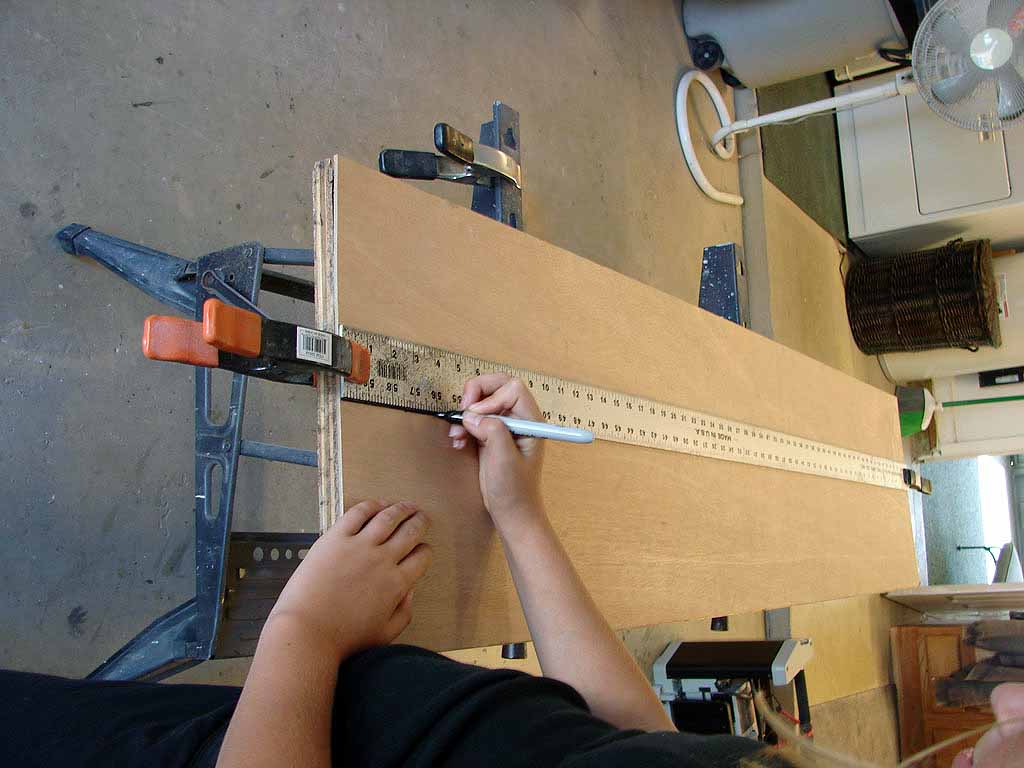
 1. The deck will be constructed on a 3/4" plywood board
14" wide and 5' long. I reinforce the plywood with a 2X4 under the plywood. The
2X4 can be clamped into a workmate which allows you to clamp along the edges of
the plywood.
1. The deck will be constructed on a 3/4" plywood board
14" wide and 5' long. I reinforce the plywood with a 2X4 under the plywood. The
2X4 can be clamped into a workmate which allows you to clamp along the edges of
the plywood.
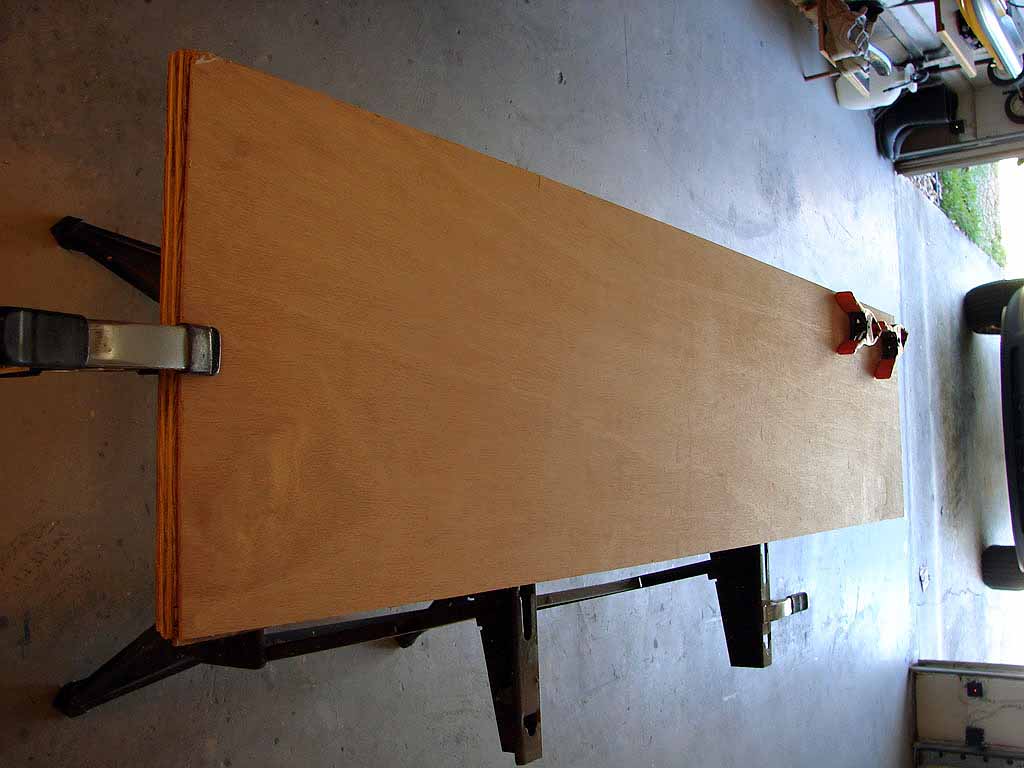
2. A piece of Luan (door skin) can be cut to the same dimensions as the 3/4" plywood. I use Luan because it is easy to bend and is cheap!
3. Use a 5' straight edge to draw a line down the center of the Luan and 3/4" plywood.

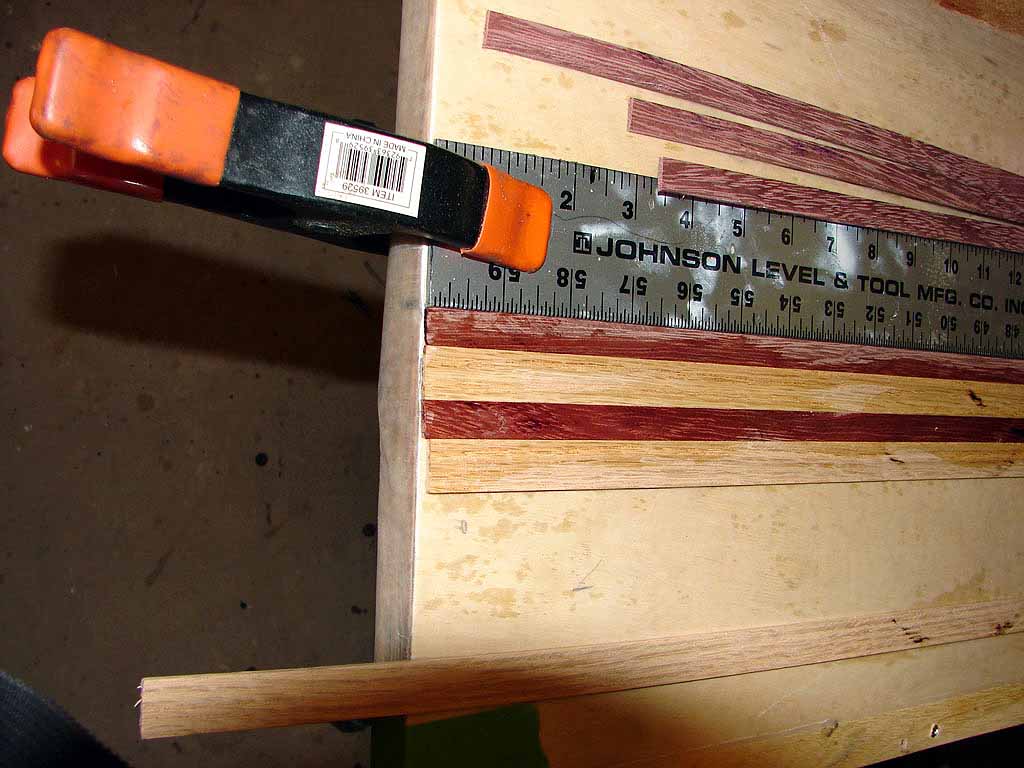
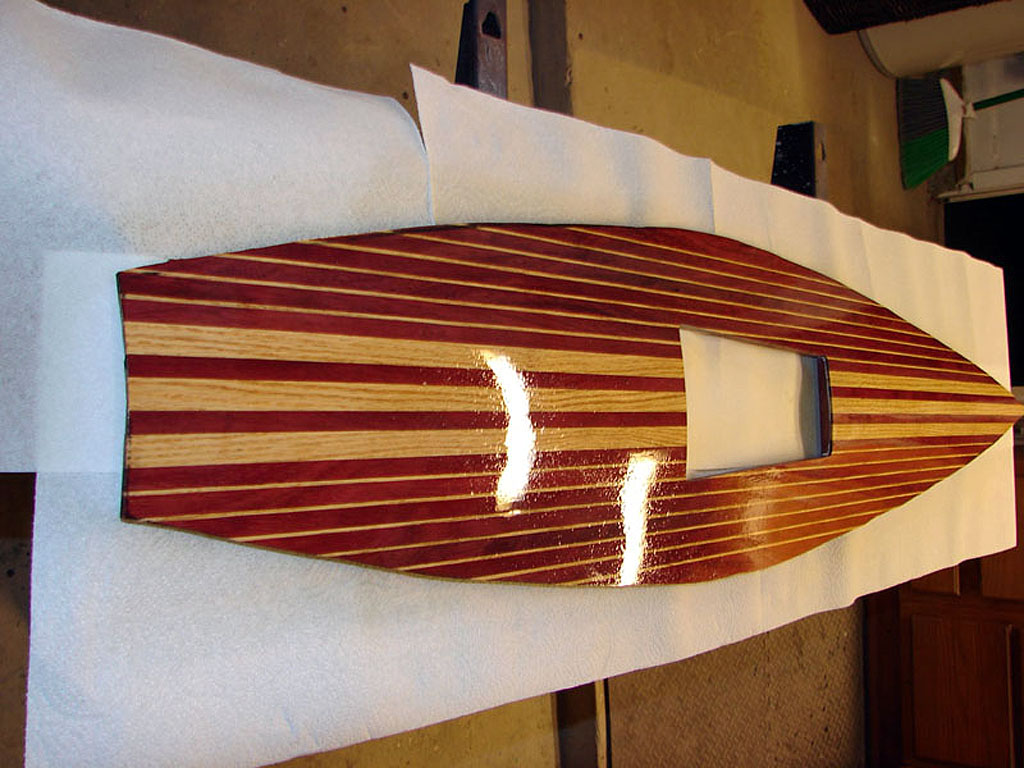
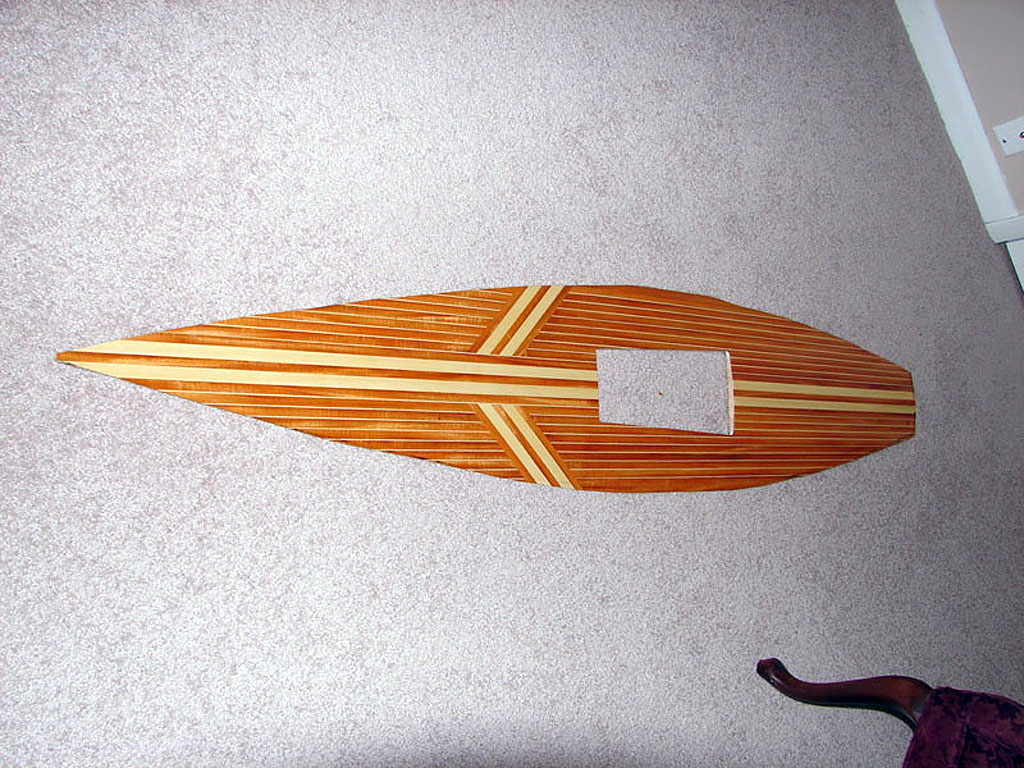
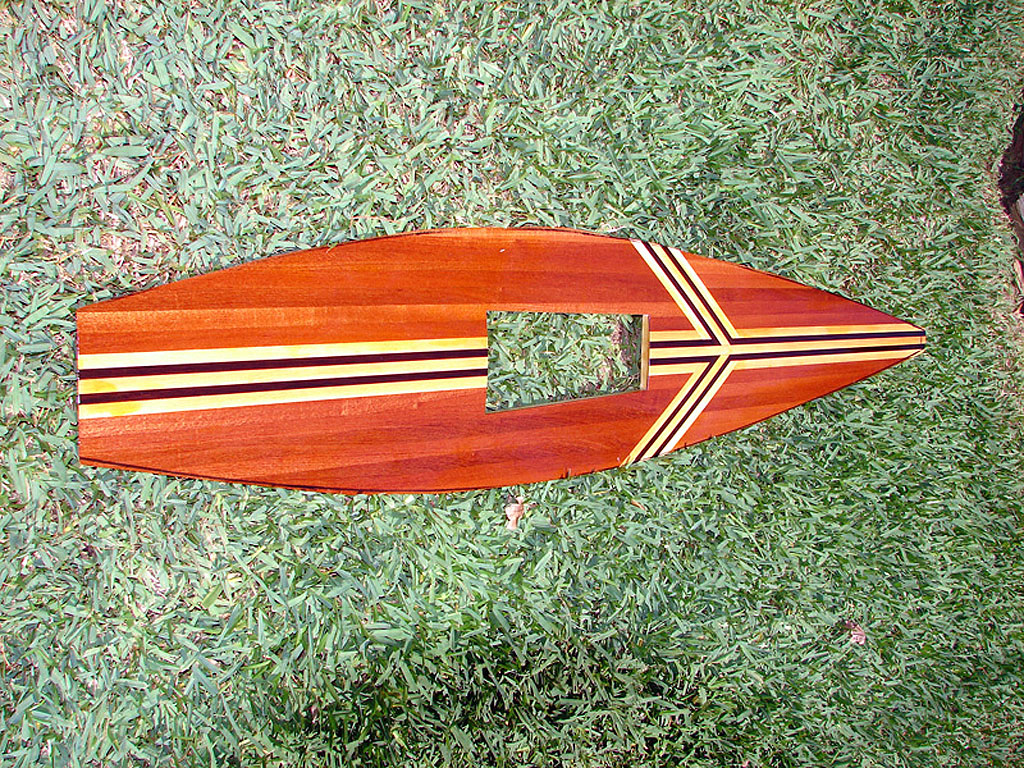
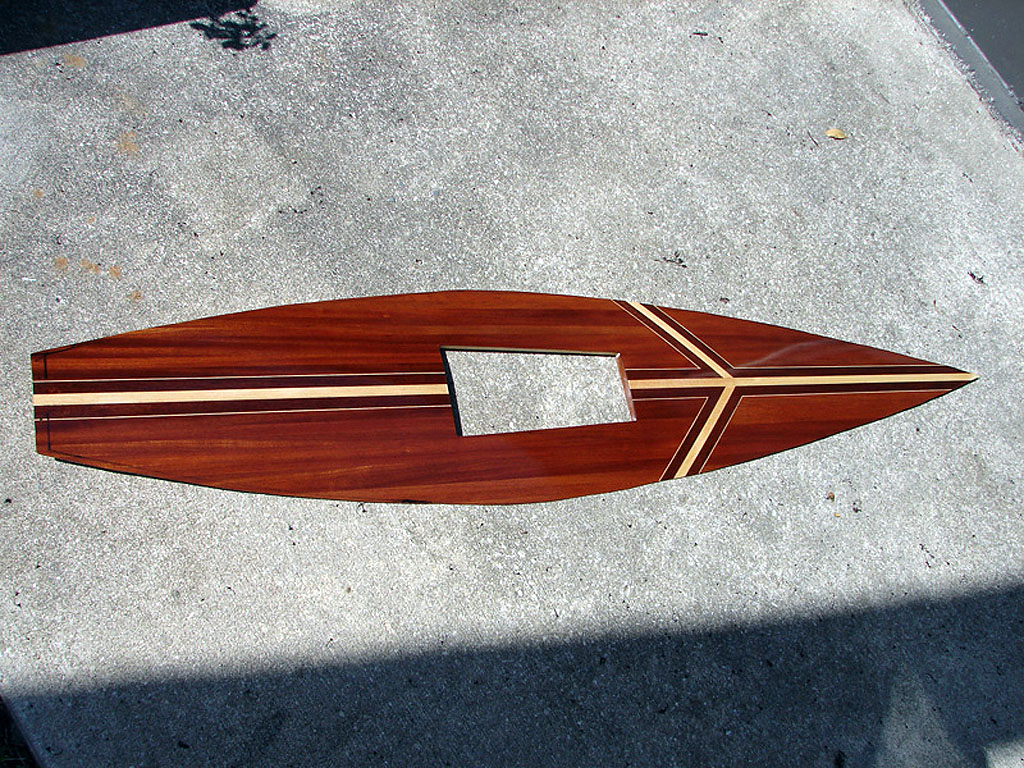
4. Planks are cut from your choice of wood. The dense wood will create a heavier deck than less dense woods. I have used a variety of woods with the lightest deck (9 1/2 oz) was made from cedar and the heaviest deck was a hardwood called Wenge (15 oz). First cut your wood stock down to approximately 2 1/2" wide (planks1). Then, using a planer, plane the wood to the desired width of your plank. The thickness of your stock will determine the width of your planks. I prefer 1/2" width for the planks, but have used planks up to 3/4" width for deck construction. The planed sides of your stock will be the edges of the planks.
5. Construct a jig for your table saw that will allow you to cut the 1/16" thick planks from the stock you have prepared. My jig is made of 1/2" plywood with a guide to align the jig on the bottom and a 3/4" X 2" fence on the top to guide the stock through the saw blade and support for the 1/16" plank. The aluminum piece on the fence is 1/16" aluminum to guide the cut plank as it is cut. This is most helpful when you do this alone!
6. Cut enough planks to cover 12" deck width and 5' length of your deck. Cut a few extra just to be sure! This can be a combination of different wood planks if you want.
7. Mount the Luan board onto the plywood base with a screw in each corner. Clamp a 5' straight edge onto the Luan and draw a centerline down the length of the Luan.

8. Cover the Luan board with wax paper. Use tape to hold it in place on the ends. This is to prevent the deck planks from sticking to the Luan and helps hold the deck together until it has been glassed.
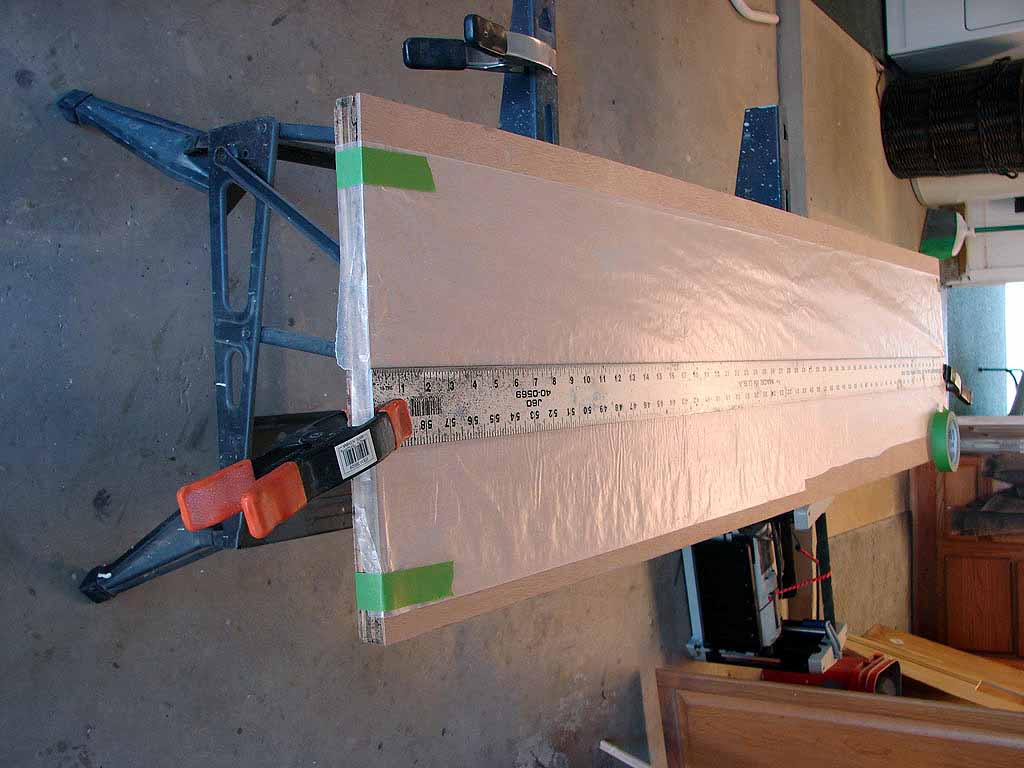
9. Clamp the 5' straight edge onto the assemble board so that one edge is on the center line you have drawn on the Luan.
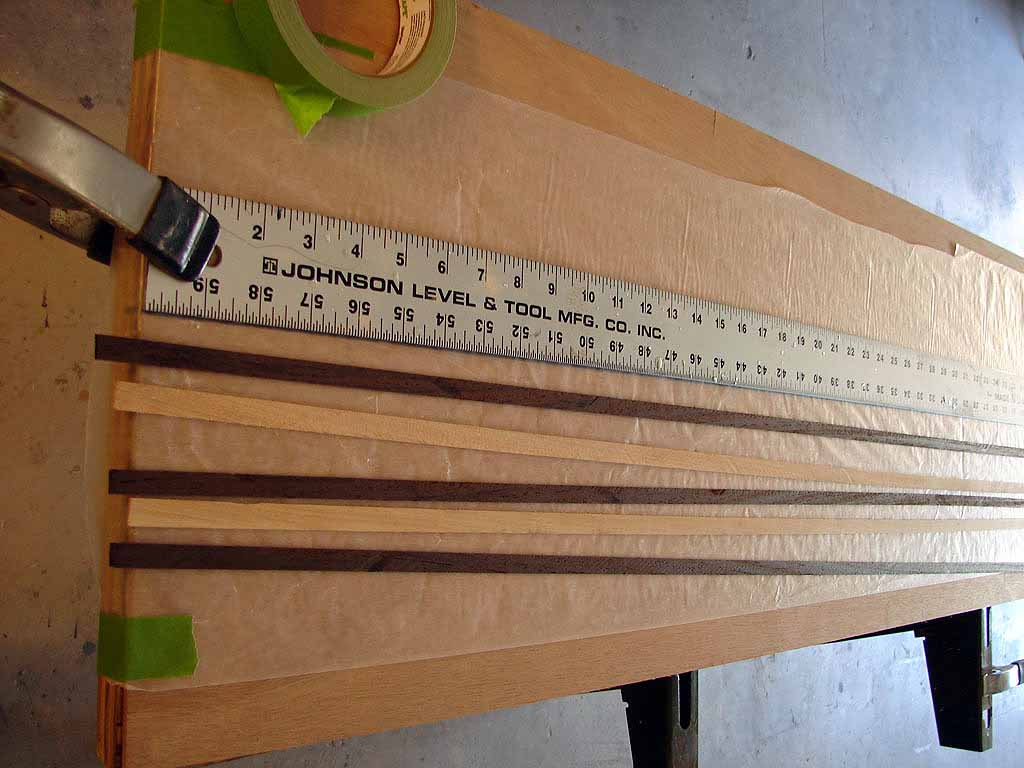
10. Select the planks that you will use for the center of your deck. This can be a single 3/4" wide plank or a group of different boards.


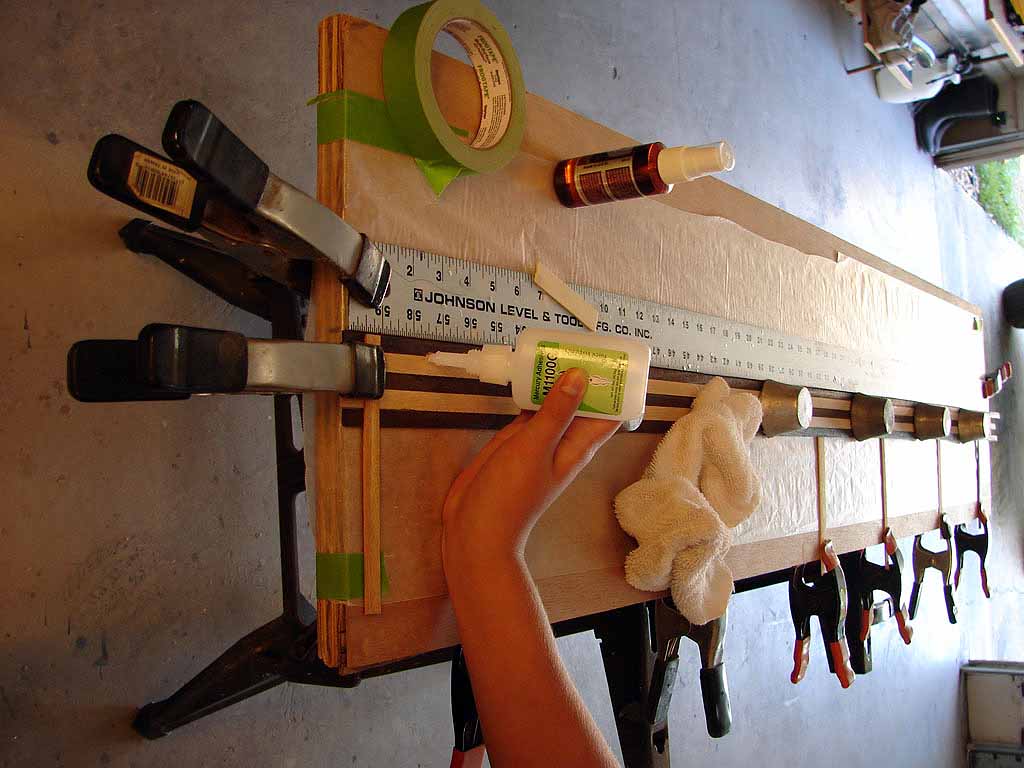
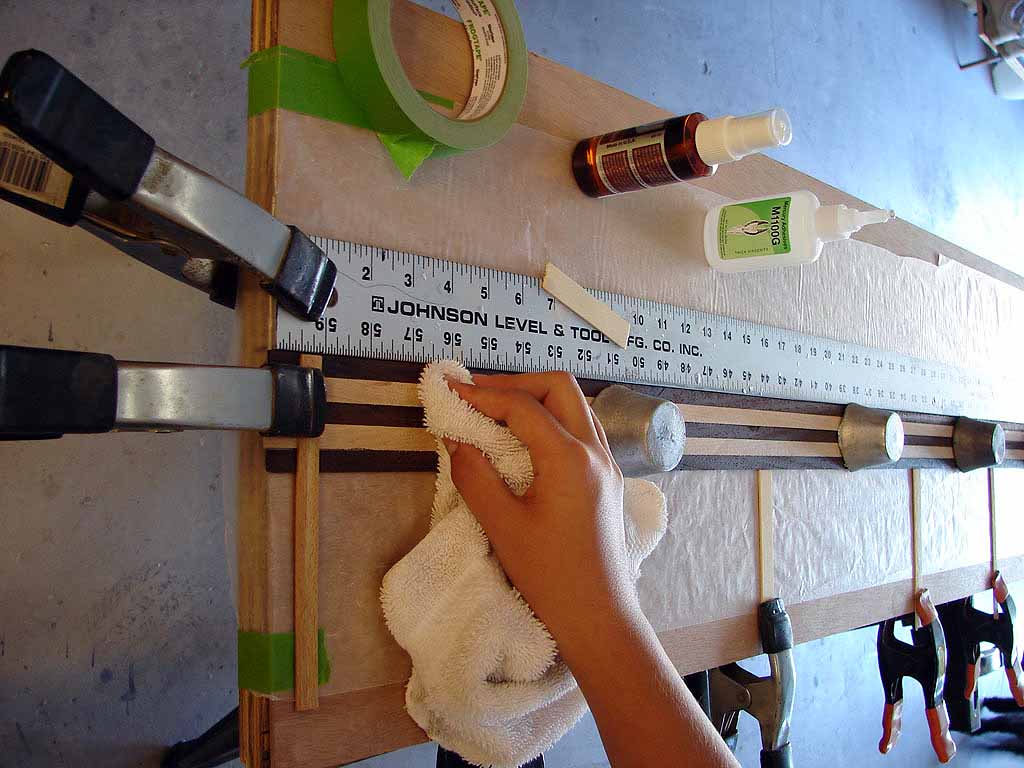
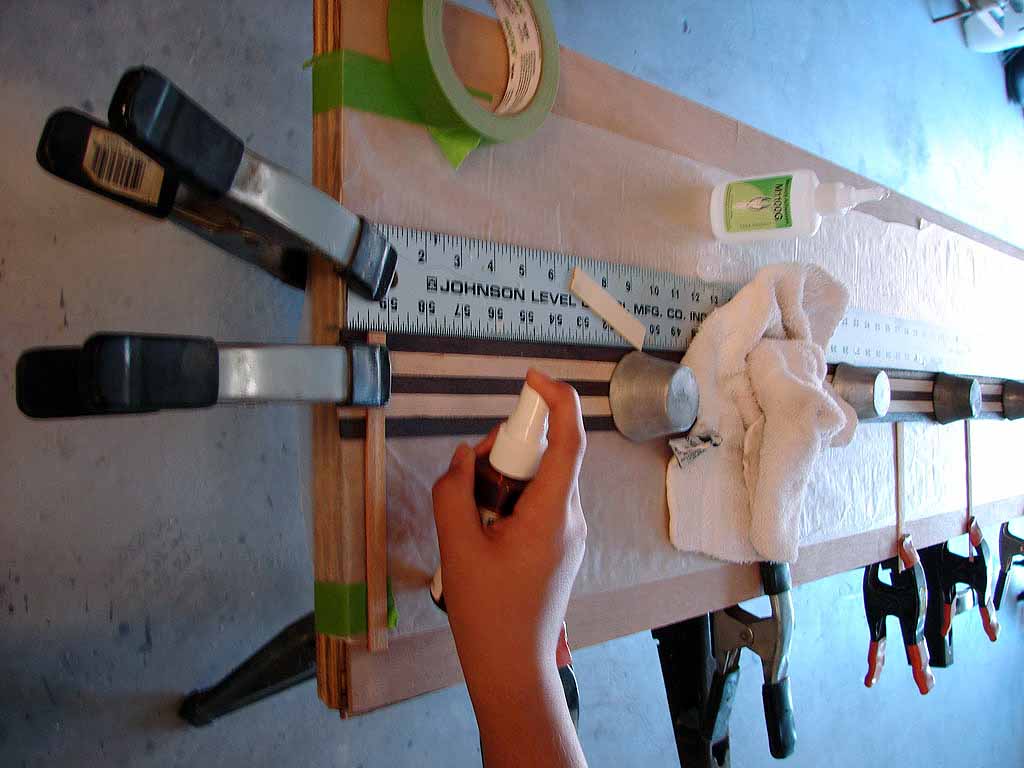
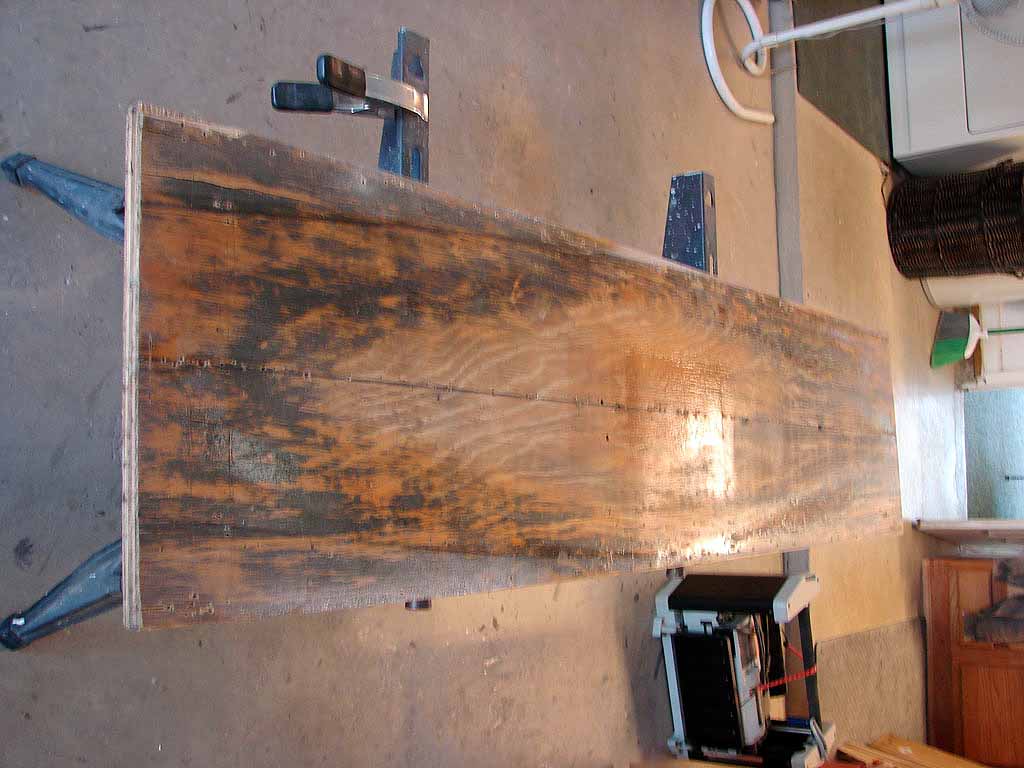
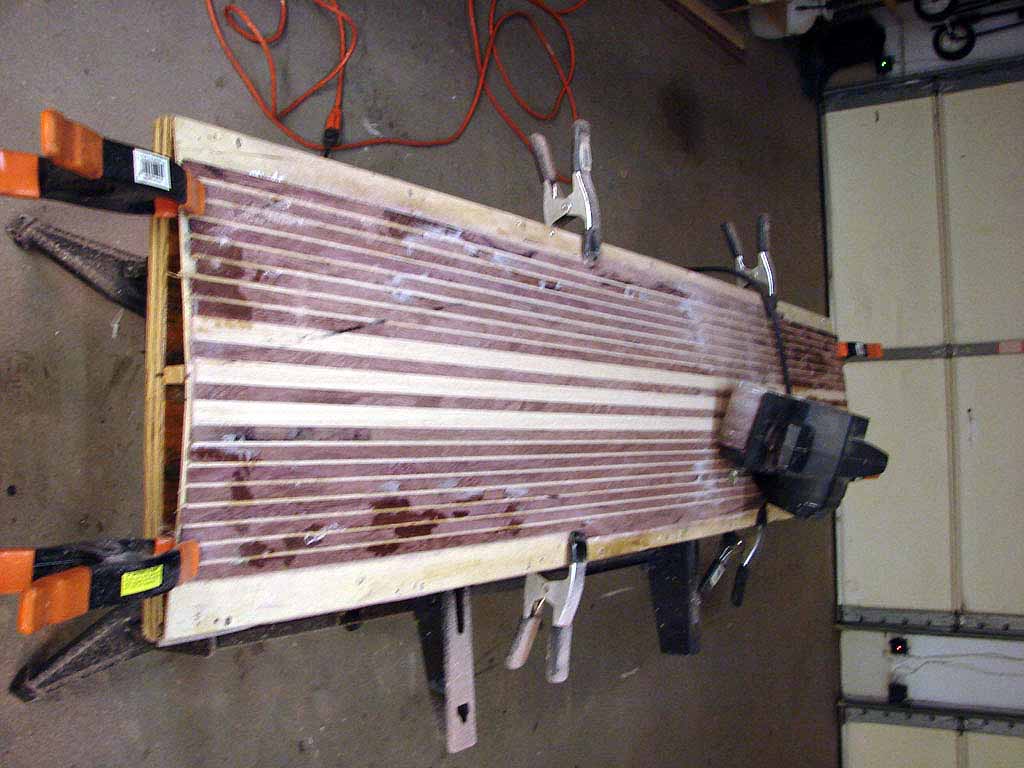
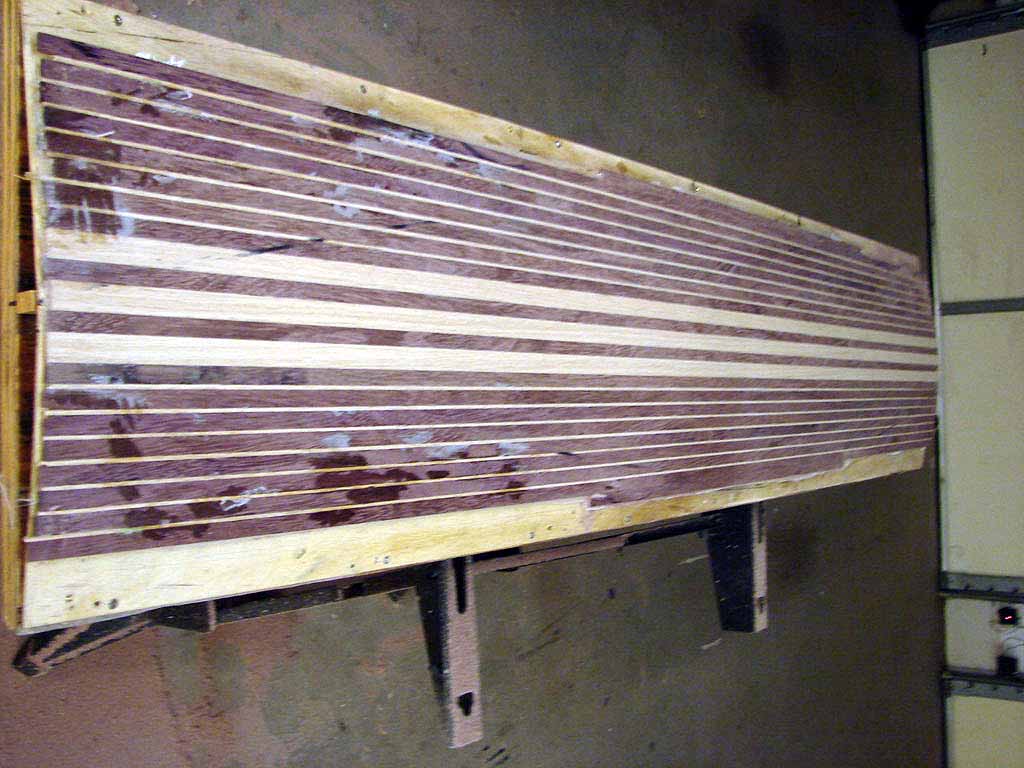
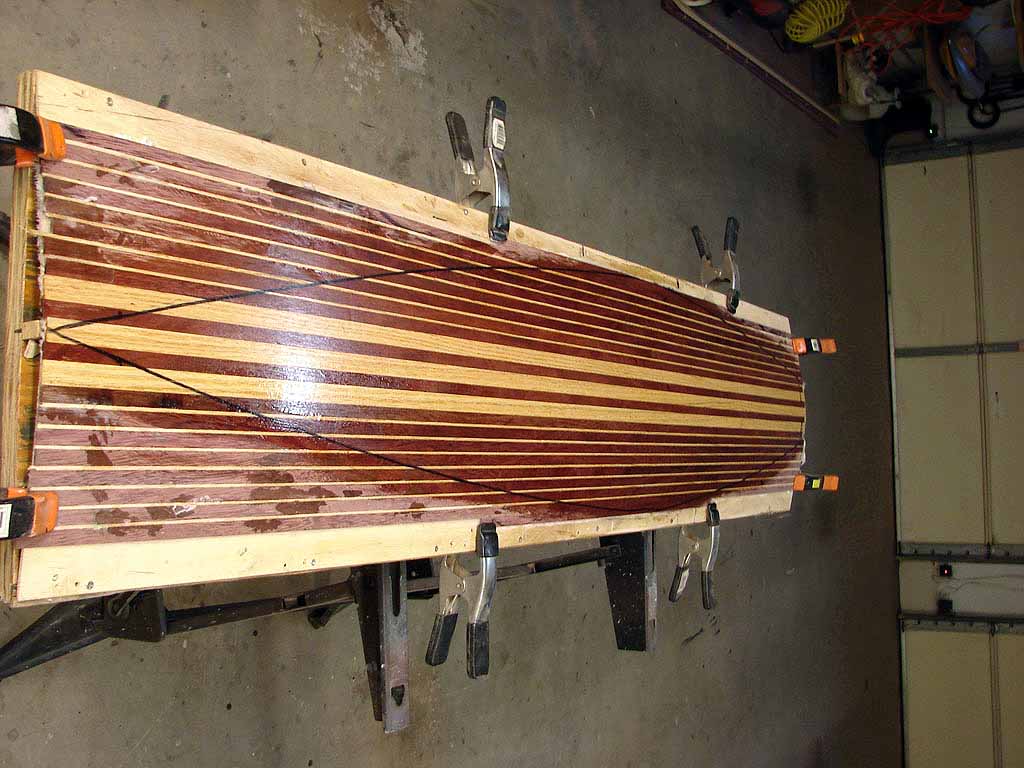
11. The first group of planks (4 - 6 planks) will be use to create a straight center center section. Select the best finished side of each plank and place that side down. With the first group of planks in place, use clamps and weights to hold them in position prior to gluing. Use thick CA glue and glue about 4 - 5" between each plank. Use a rag to rub the CA glue into the joints between the planks and then spray the glue with quick set followed by another quick rag rub!. Work your way down the length of the deck doing about 4-5" at a time. It is important that the underside of the planks are as close as possible in alignment to minimize sanding.
12. Once you glued the first center plank(s) section, you remove the straight edge and the center plank section you have just glued. The wax paper will probably be sticking to the planks you have just glued. After removing the straight edge and center planks, cover the luan with more wax paper. Don't remove the wax paper stuck to the center planks!
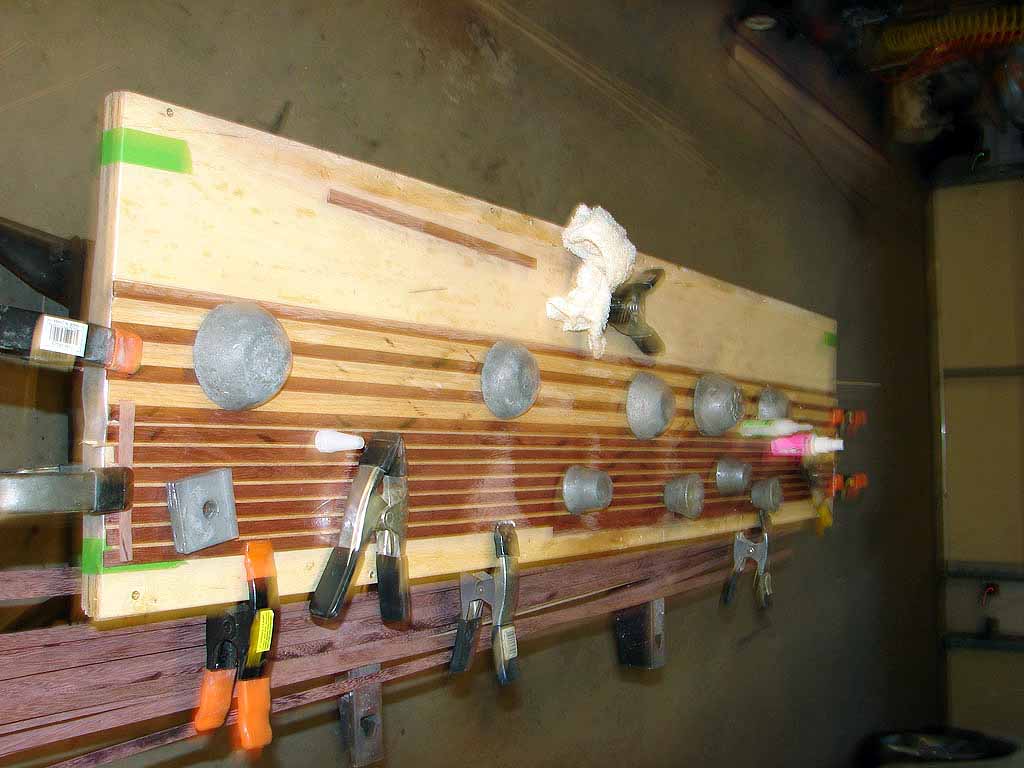
13. Reinstall the center plank section by aligning the center plank with the center line on the Luan. Use a spring clamp on the ends to keep it in place. Reinstall the straight edge to keep the planks straight as you install one side of the deck planks. You need to install enough planks to create approx. 6" from the center line. Use weights and clamps to keep your deck flat and straight.
14. After completing one side of planks, remove the straight edge and install the other side planks as before, to the total width of the deck is approx 12".
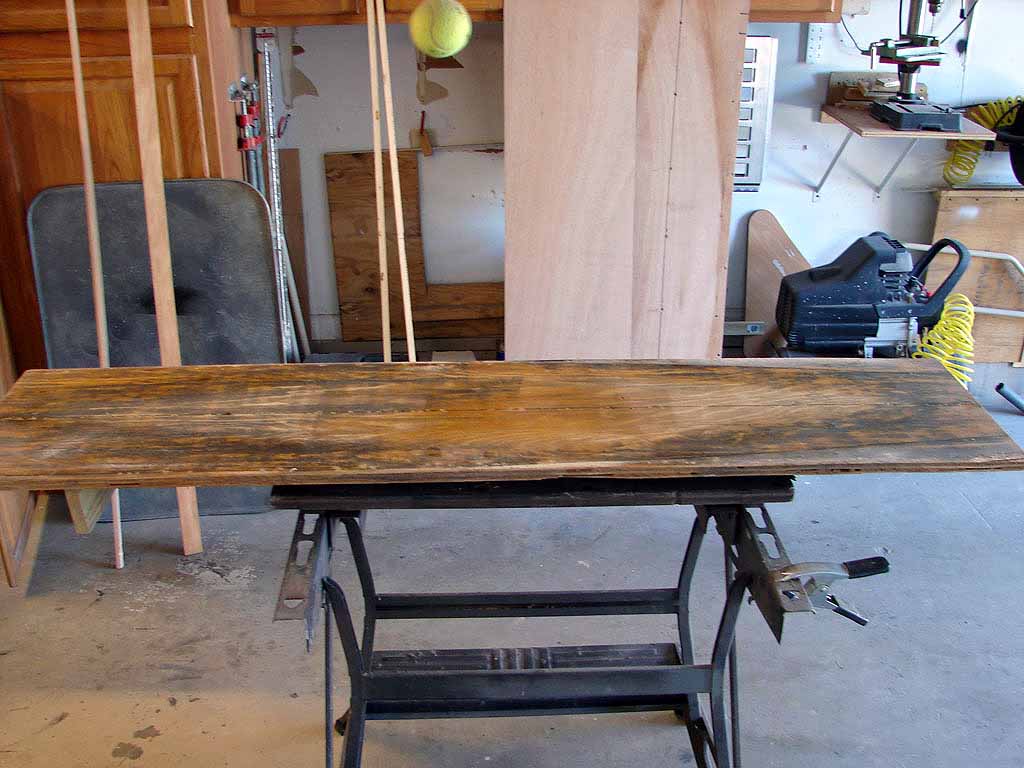
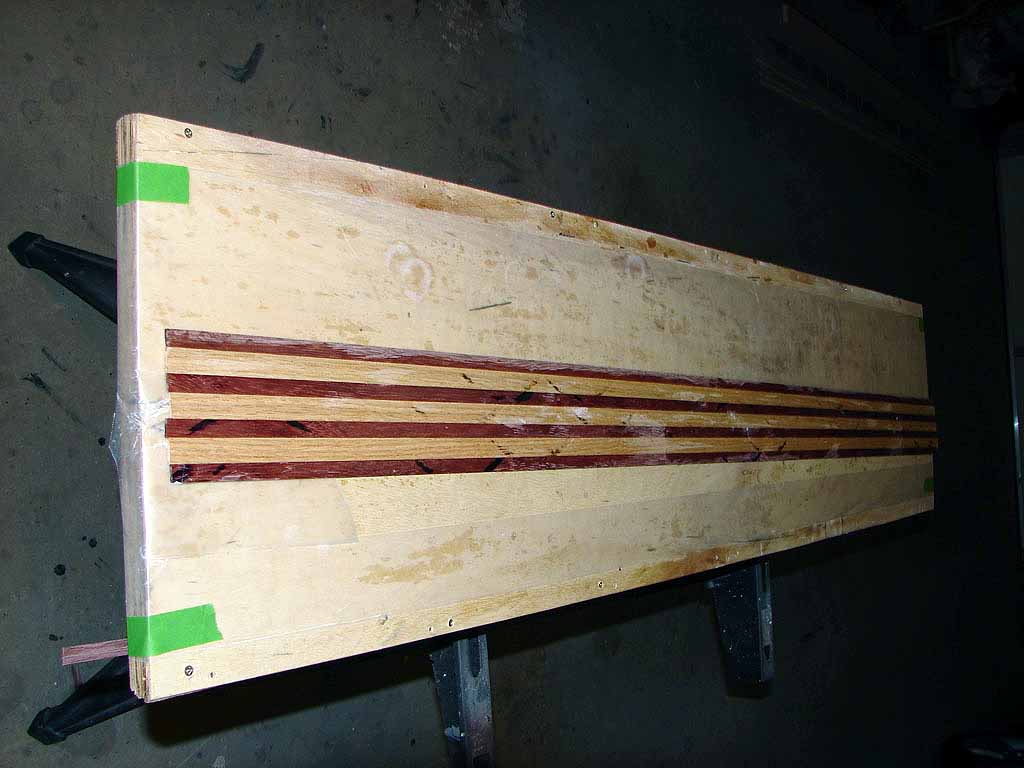
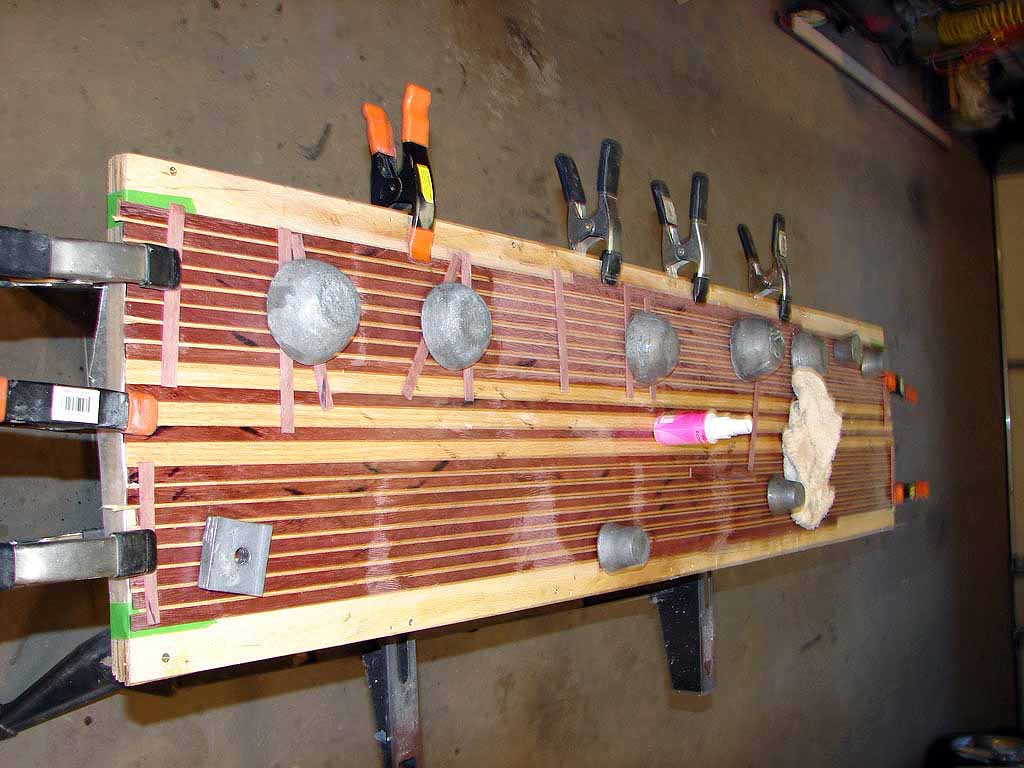
15. Once all planks are glued, use a course grit sand paper and rough up the surface. Remove the entire deck from the Luan with the wax paper and set aside.

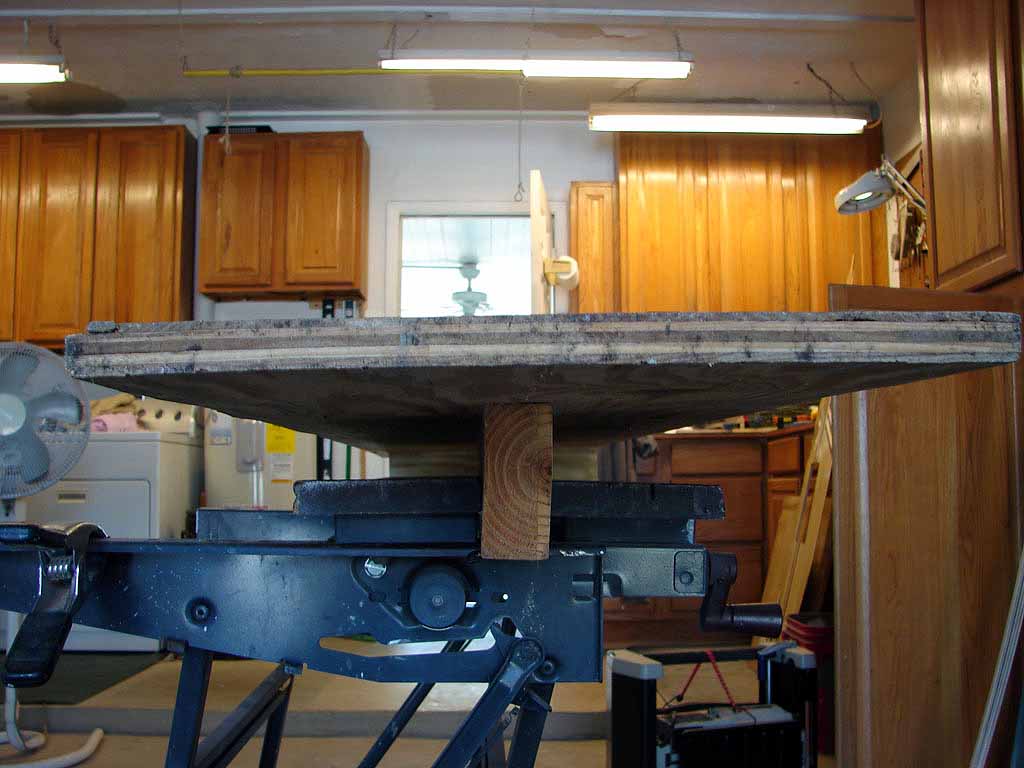
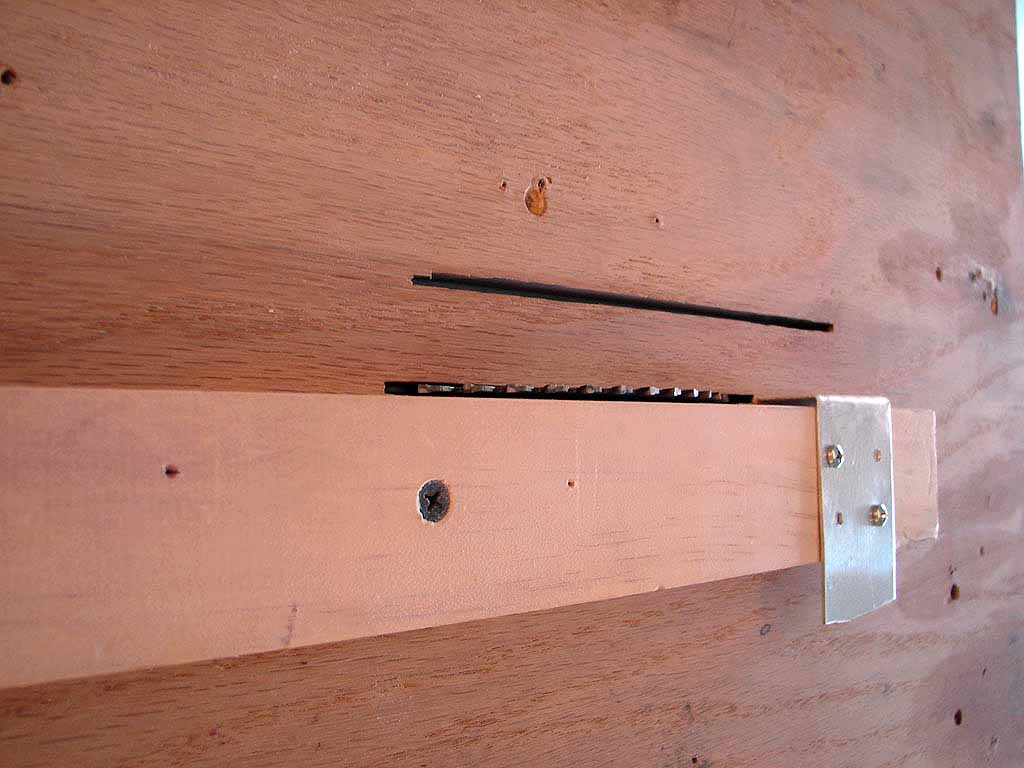
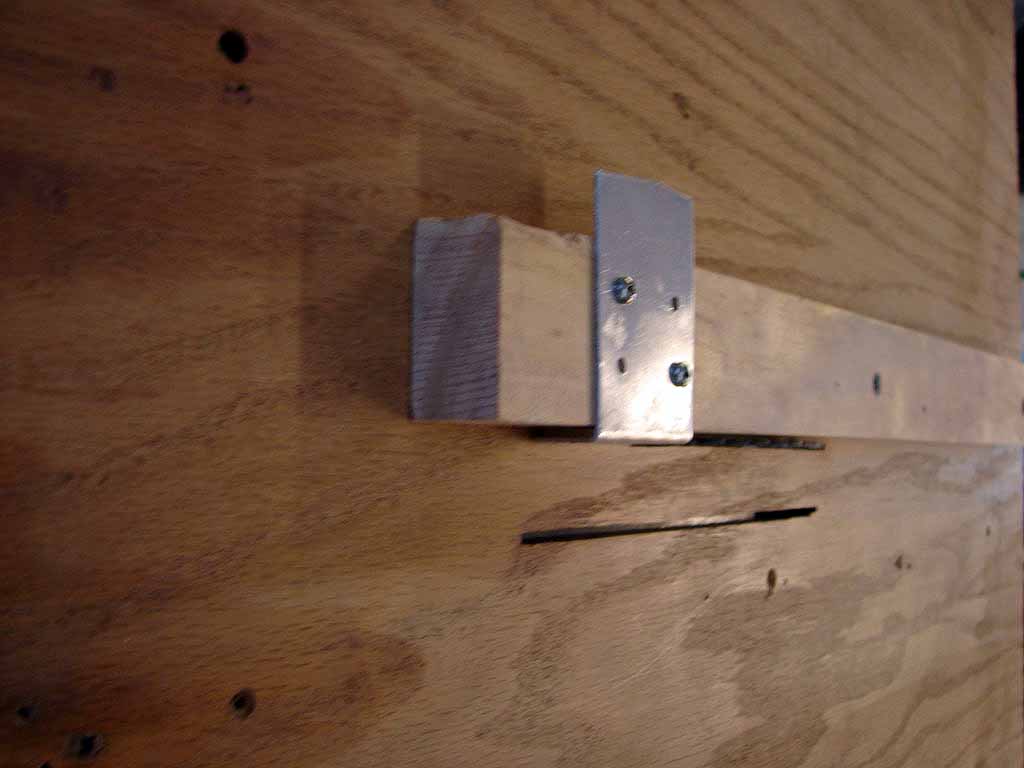
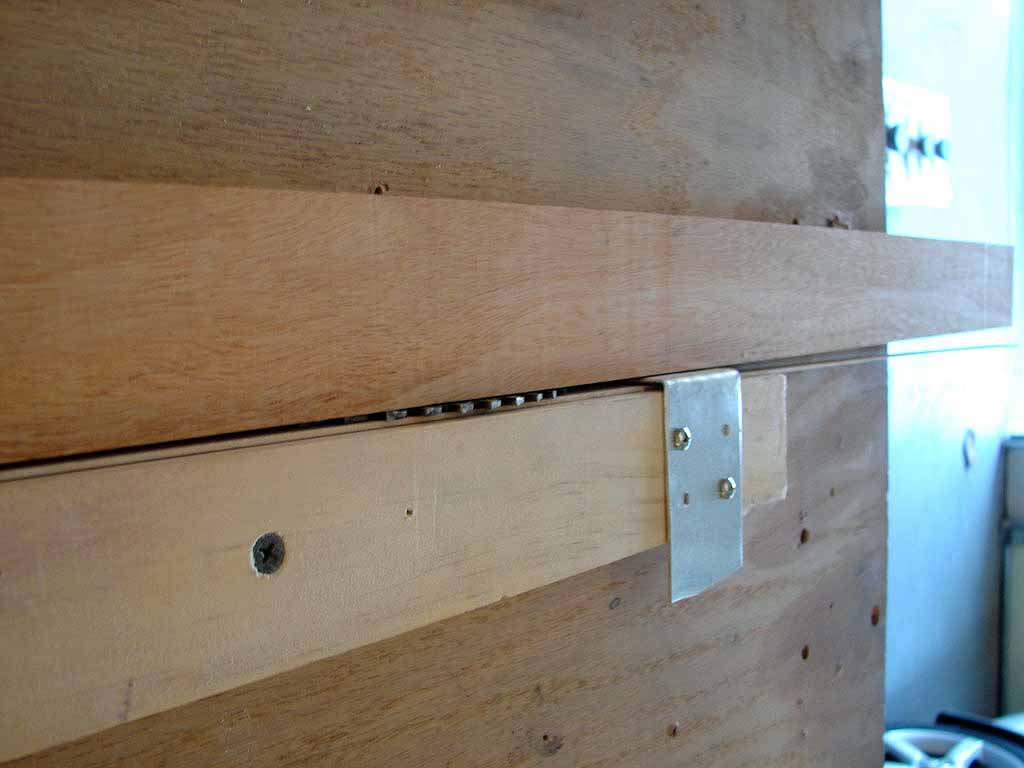
16. Unscrew the Luan at the corners and install 2 strips of wood 9/16" X 1/2" X 5'long on either side of the plywood base. You can adjust the amount of deck camber by moving the strips closer to the center. I place the strips approx. 1/2" from the edge of the plywood. I use 3 screws to anchor the strips. At the stern end of the jig, I bend the strips in little closer to add camber to the very stern of the deck.
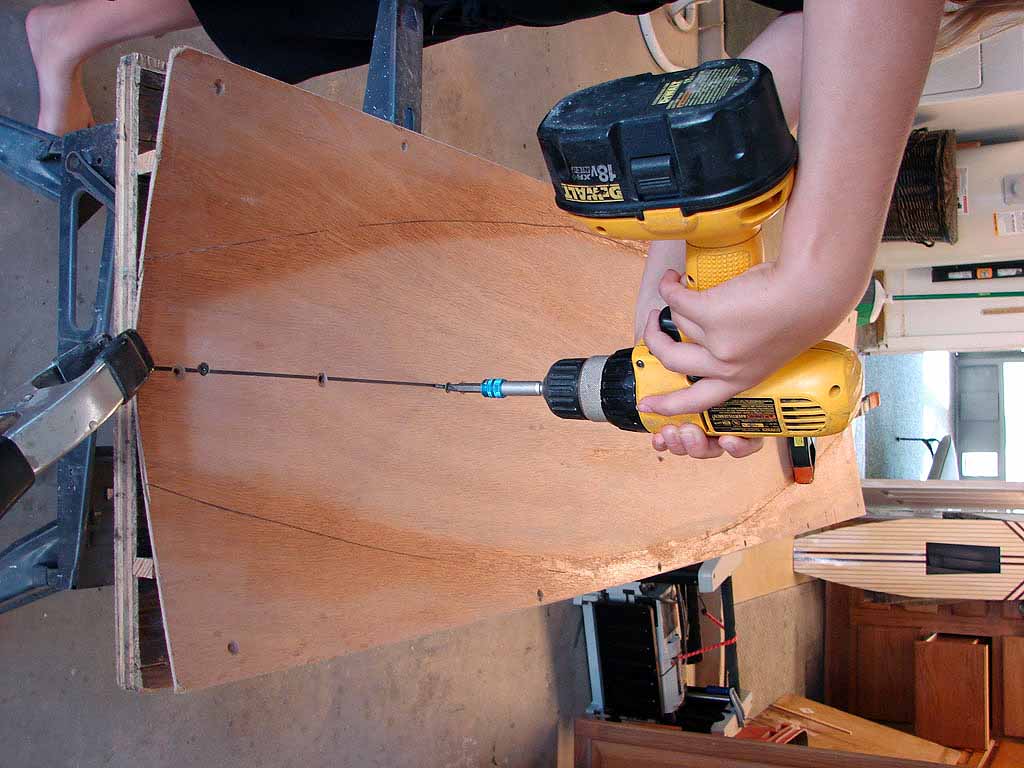
17. Place the Luan back on the plywood and align the center line of the Luan with the center line of the plywood. Place a spring clamp at both ends of the Luan on the center line. Use drywall screws and anchor the Luan down the center line approximately every 6 inches. Make sure that the screw heads are counter sunk.

18. Cover the Luan with wax paper again and place the deck on the Luan. Place a couple of weights on the center line and check that you have enough camber in the deck. Remember, the finished side of the deck is still face Down!
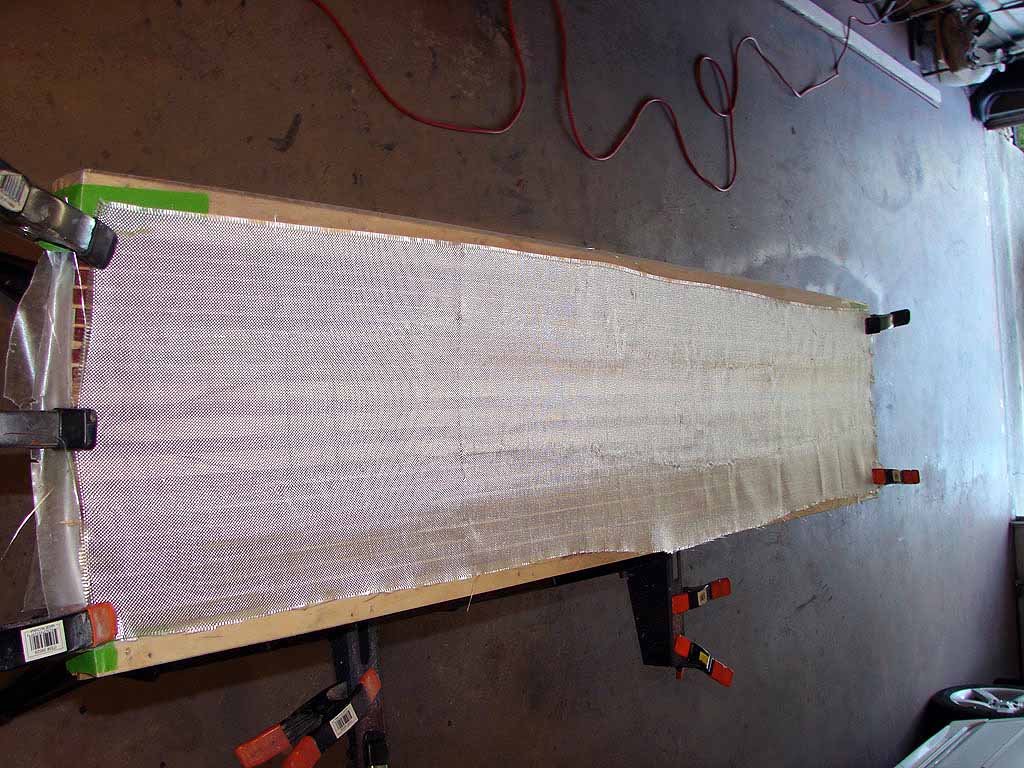
19. Cut enough 6 oz fiberglass cloth to cover the entire deck. Lay out the cloth and use spring clamps to hold it in position. Mix your West System epoxy resin and hardener (Approx 3-4 oz). Use a good rubber spatula to wet the cloth and force the resin into any spaces in the deck planks. Use weights to ensure that the entire length of the deck is held down during curing. I use 1-2 lb lead weights with finish nails driven into the lead to hold down the deck. Allow resin to set up a couple of days.

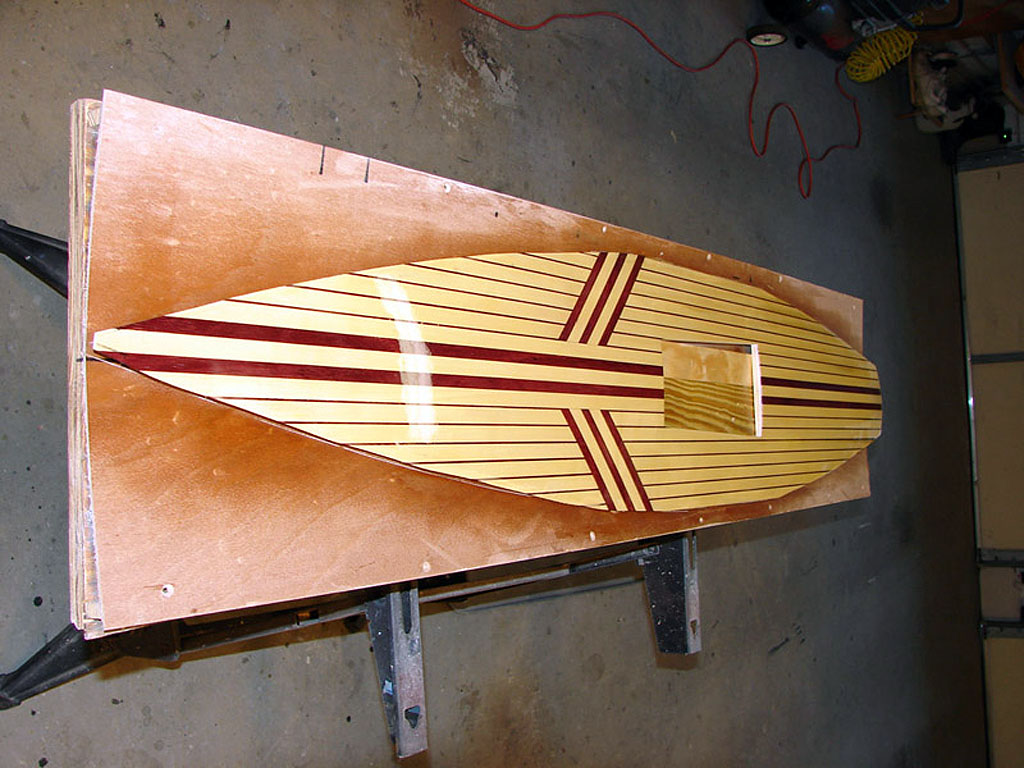
19. Use the EC-12 plans and draw outline of the hull onto the underside of the deck. You should allow around 3/4" oversize that will be trimmed off after installing the deck on the hull.


20. Remove the deck and Luan from the plywood base along with the strips of wood that formed the camber. Install one of the strips of wood down the center line of the plywood base using the same 3 screws as before. Place the Luan back on top of the plywood and anchor it down the sides with clamps. With dry wall screws every 6-7", anchor the Luan down each side. This will form the Luan into the jig that will allow you to prep the top of the deck.
21. With 100 grit paper, use a belt sander and sand the deck level. Remember that the wood you have selected will determine how much sanding you can do. The planks are only 1/16" thick!! I like to draw the cutout line (3/4" wider than the hull lines) on the top surface also and that way, I only have to sand the area that will be used for the deck. After sanding with the belt sander, finish sanding with 220 Grit orbital sander until smooth.
22. If you have sanded out your outline of the hull, redraw it now. Apply a coat of Helmsman Spar Varnish to the deck. Let it dry overnight.


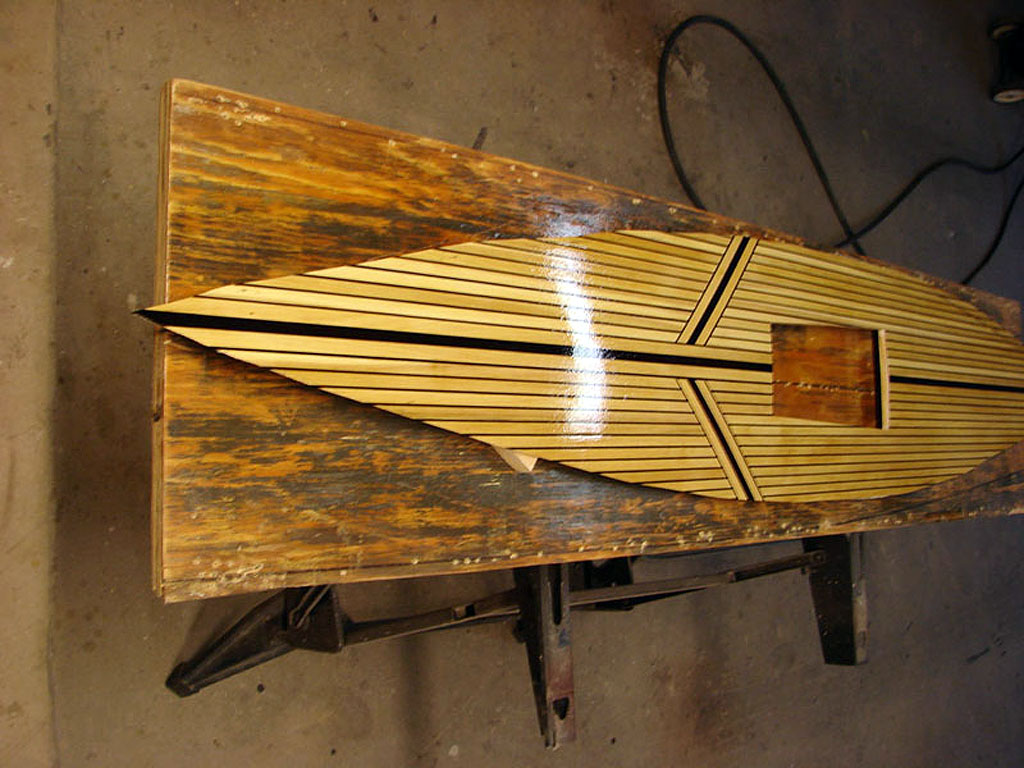
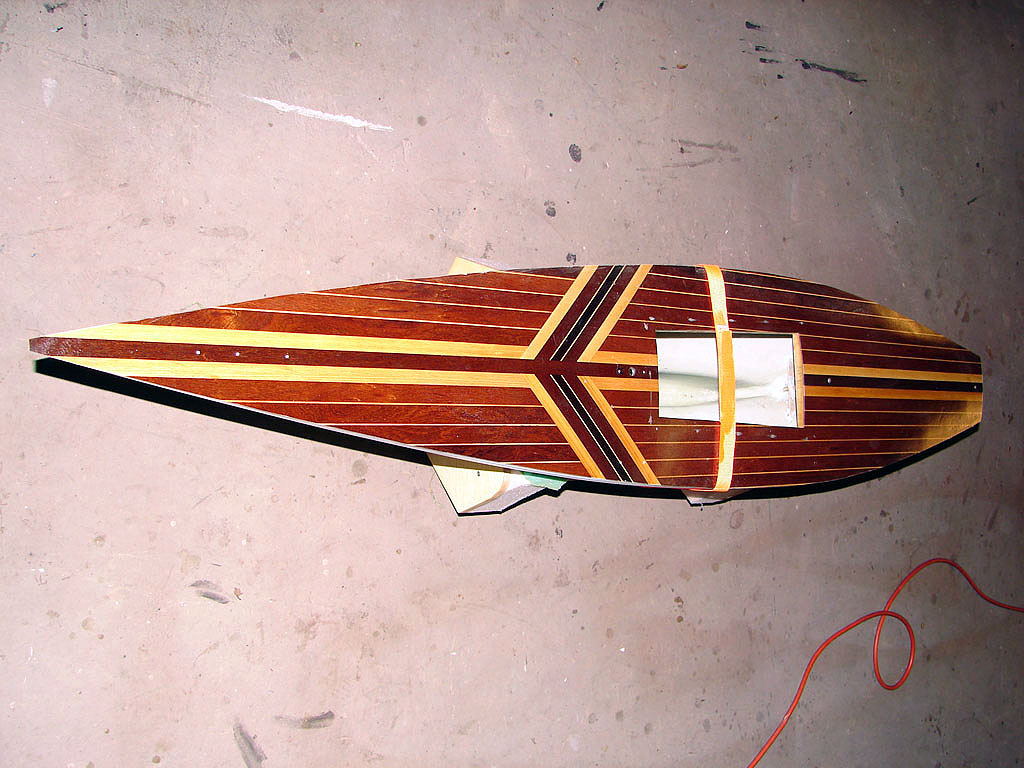
23. Once the 1st coat of varnish has dried, you must remove the deck from the mold and reassemble the deck jig as pictured in. Remove the Luan, remove center wood strip, install the wood strips to the side of the plywood base as before, reinstall the Luan and anchor the center line of the Luan with dry wall screws as before.
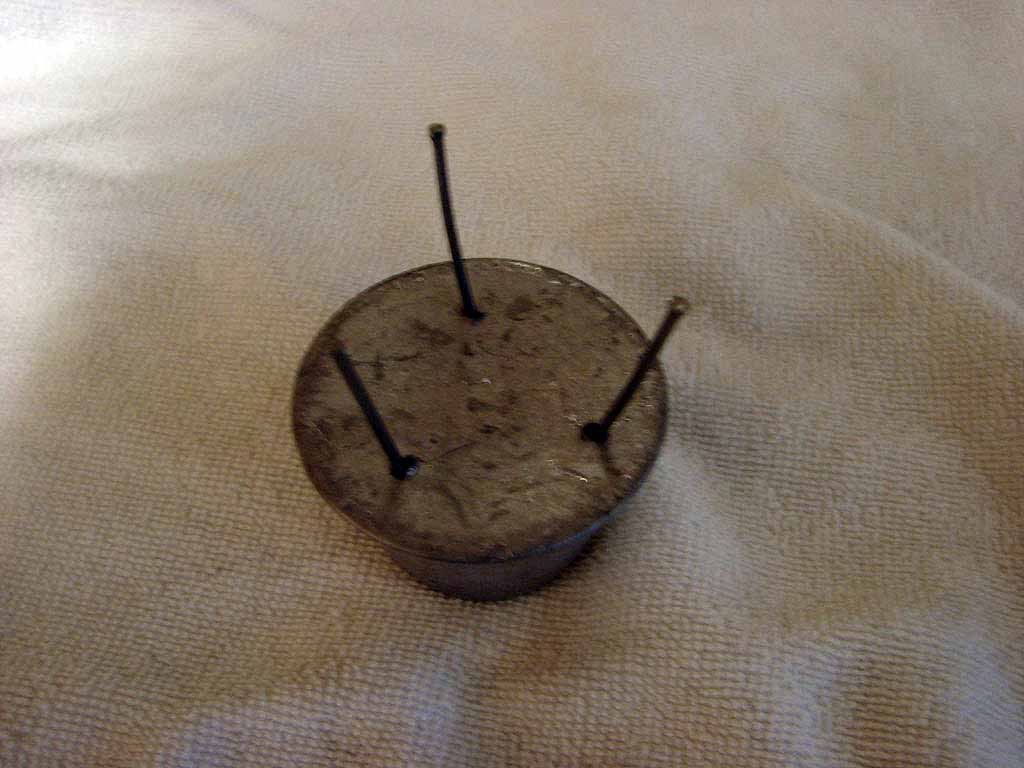
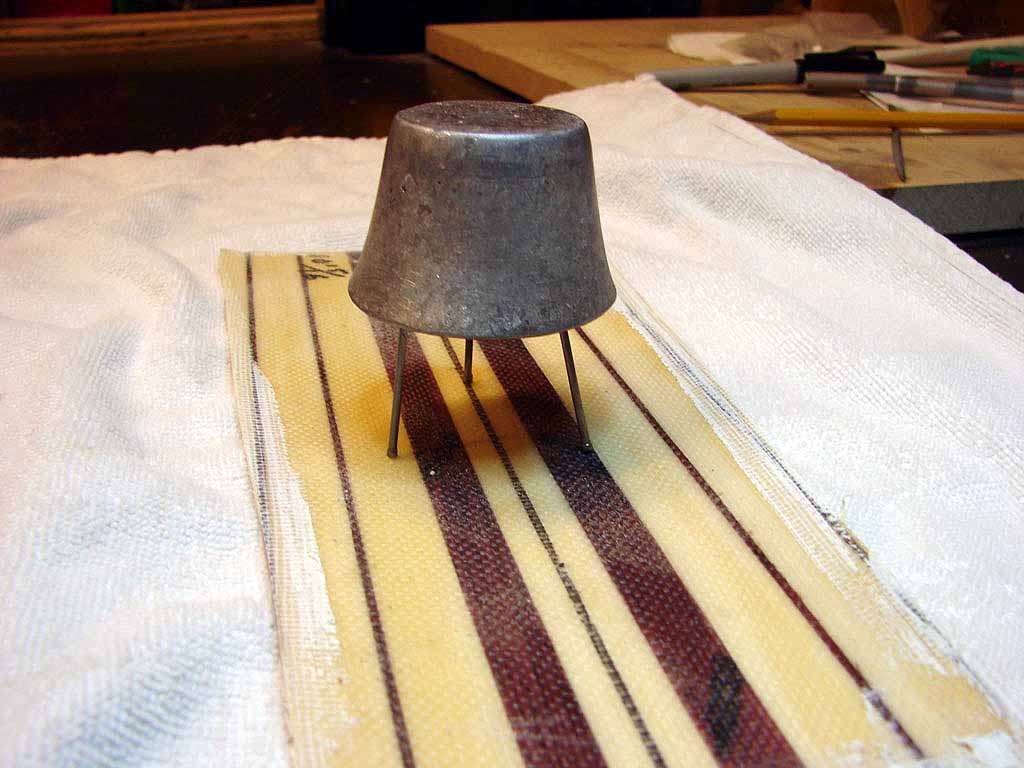
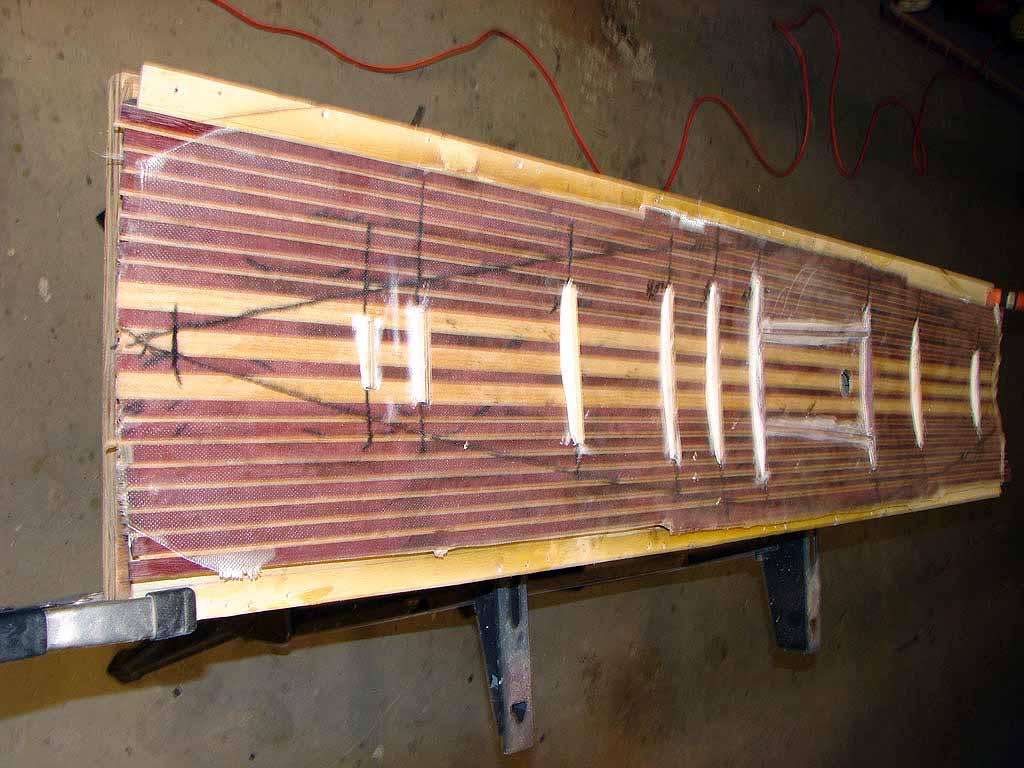
24. Reinstall the deck, top side down and use a couple of lead weights to ensure that is all the way down in the mold (Deck26) and on the centerline of the Luan. Cut strips of 5/16" aircraft plywood (hobby shop). These strips should be approx. 1/4" thick and 12" long.
Mark the underside of the deck with all the frame lines as per the EC-12 plans and add one at the 15" and 50" location.
Start at the first rib location and cut a length of the plywood strip to the frame beam measurement minus 3/4". The first frame goes at 6" from the bow. Use a table sander or file to shape the plywood strip to fit the camber of the deck. The length of the plywood strip should be short enough to fit between the hull flanges. Work your way down the deck and make a frame for each station you have marked. Make sure that each frame is centered on the center of the center plank of the deck. At frame 27 1/2, and 38 1/2, mark these frames for the center and the location for the side hatch frames.


25. Mix up some waterproof epoxy to bonding the frames to the deck. I use a two part waterproof epoxy paste. Epoxy all the frames into position. Mark the location of the side hatch reinforcement frames and glue them is place between frame 27 1/2" and 38 1/2". Use lead weights and scrap wood to hold the frames in place. The deck pictured does not have a frame for 15 and 50. I highly recommend that you include the two frames. Let epoxy cure overnight.

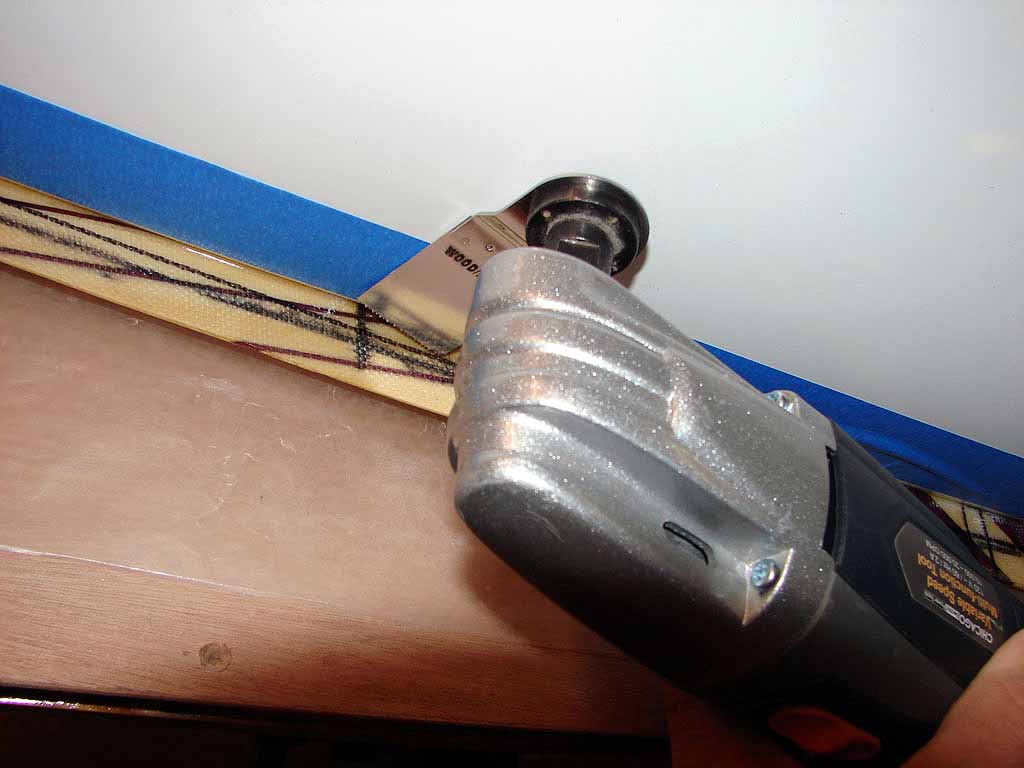
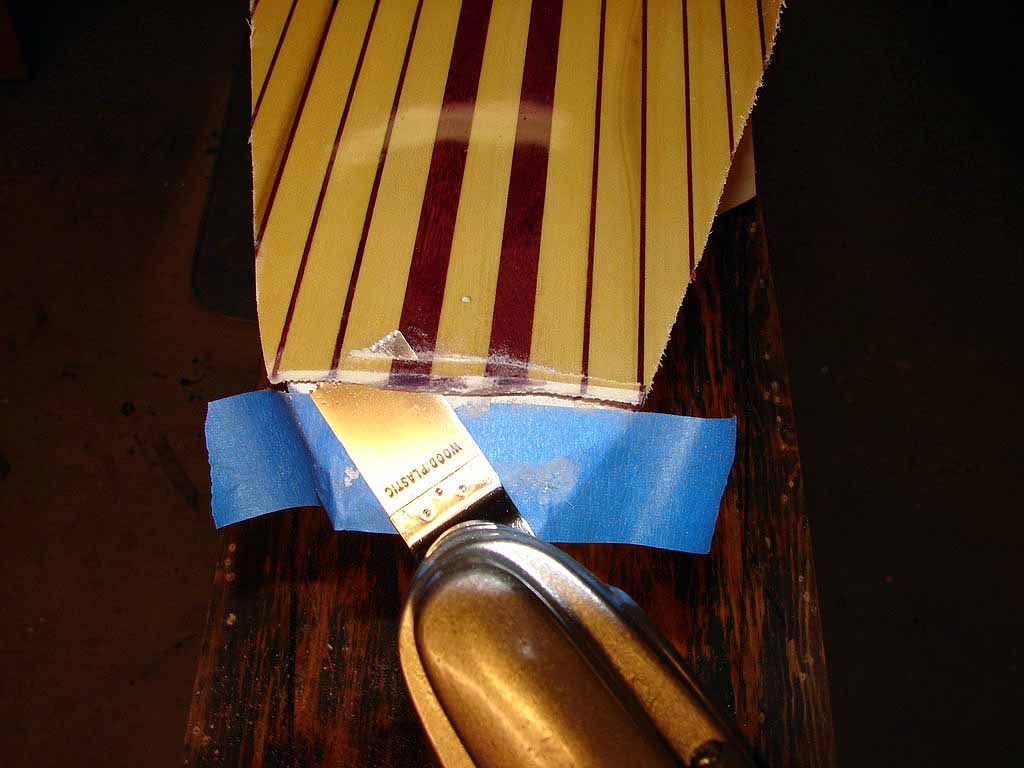
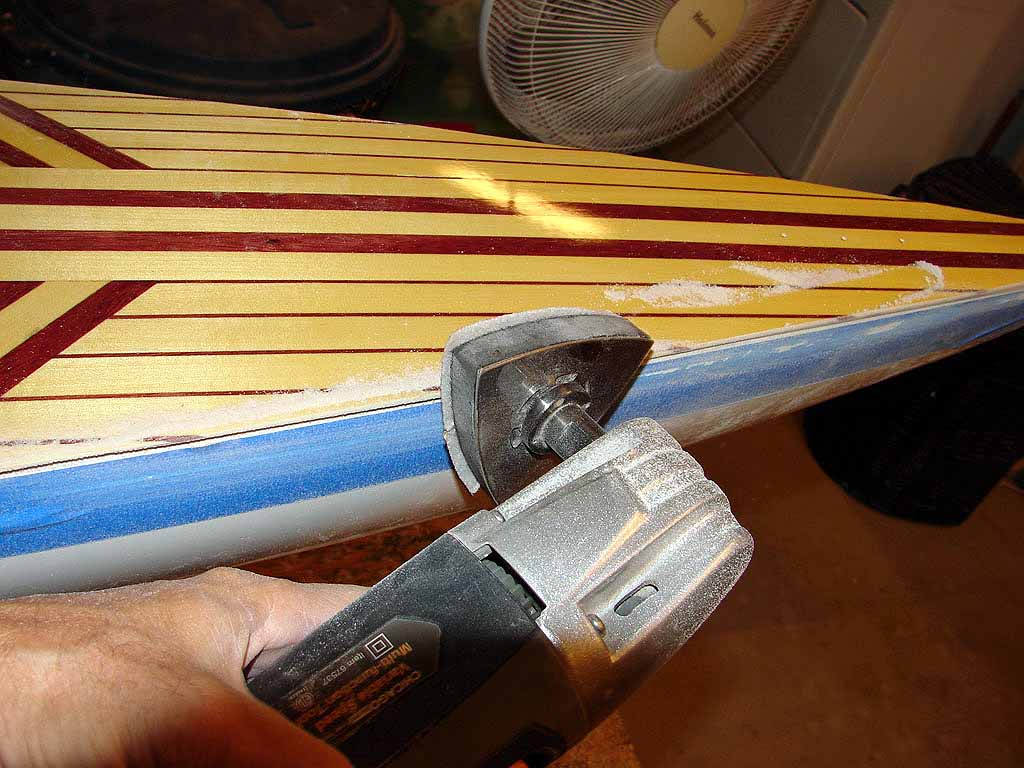
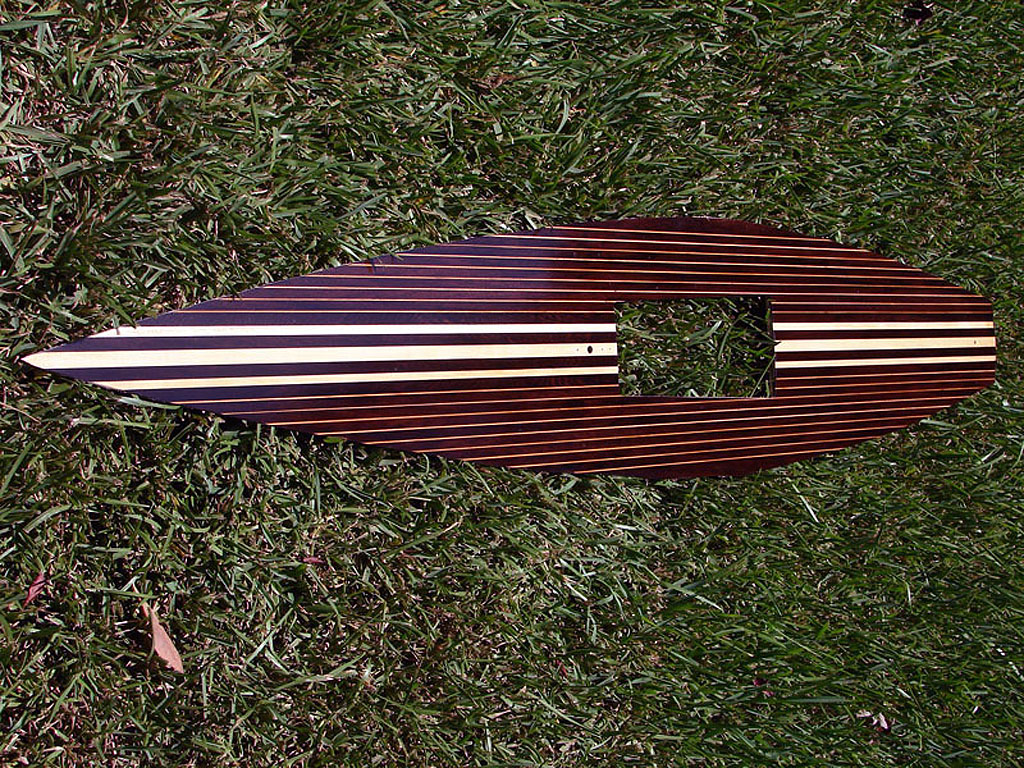
26. Use a dremel cutoff tool and cut out the deck on the lines that allow for approx. 3/4" overhang on the hull.
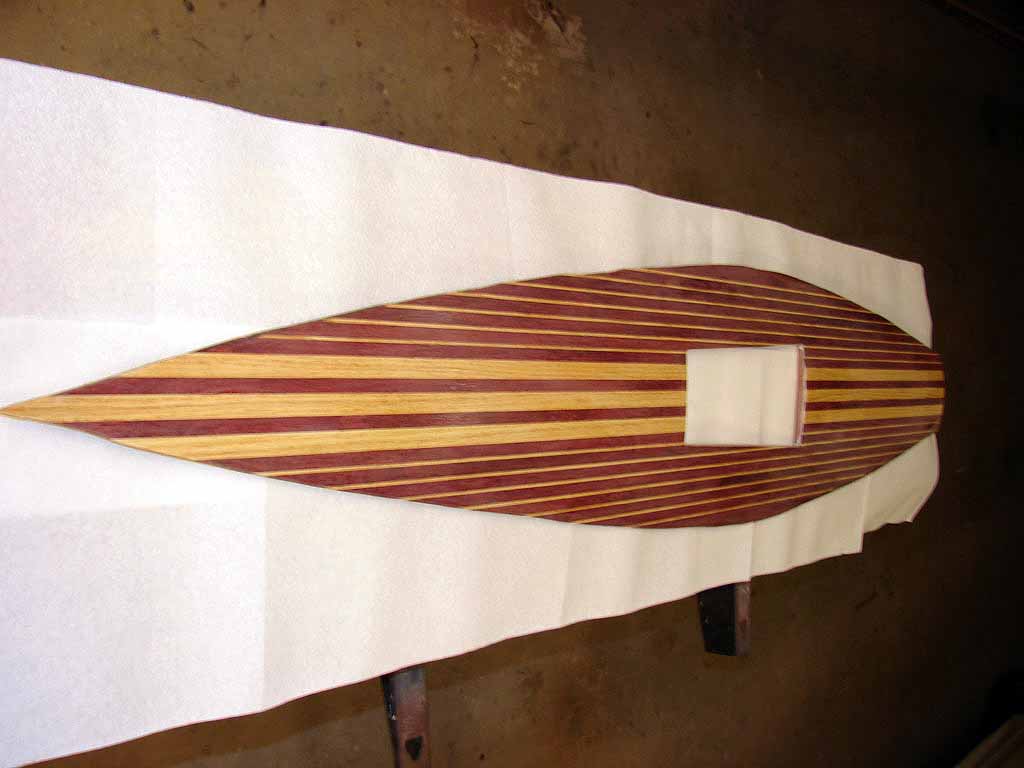
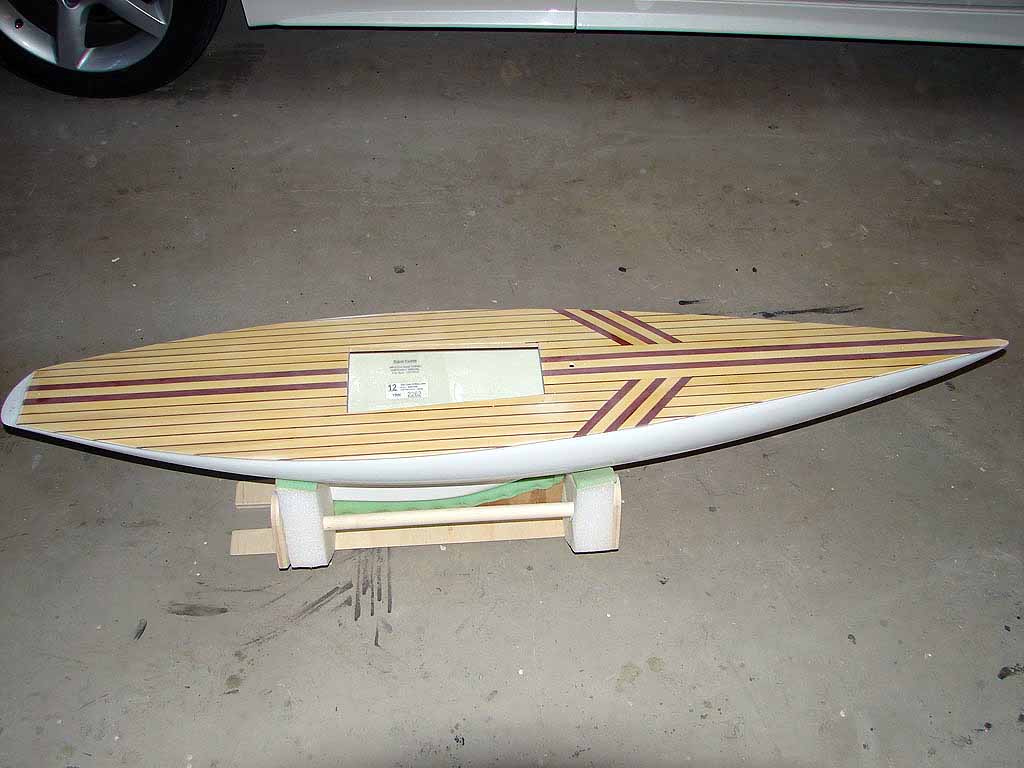
27. Use a router to cutout the hatch opening.
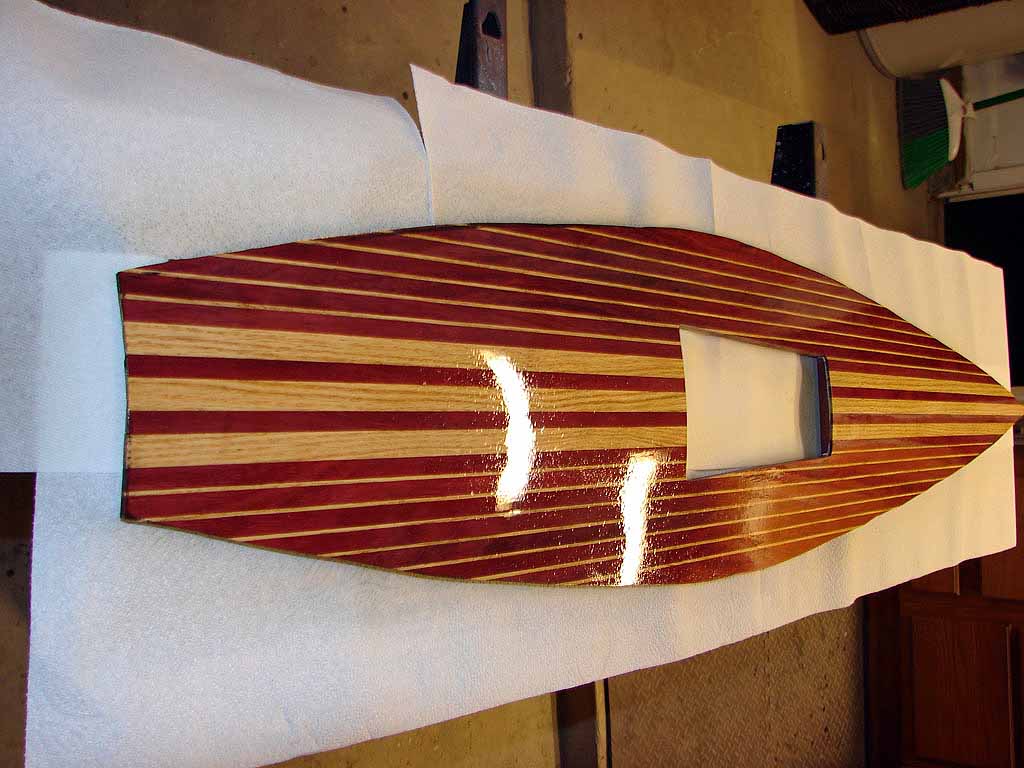
28. Sand and apply another heavy coat of Helmsman Spar Varnish to the deck. After the varnish dries, lightly sand and mount your hardware. Make a mark, to locate the bow, 27 1/2" from the front of the hatch to the bow. From the bow mark, you can position all of the deck hardware. After you have finished mounting the hardware, remove all the hardware and sand again and apply a couple of coats of spray Helmsman Spar Varnish.

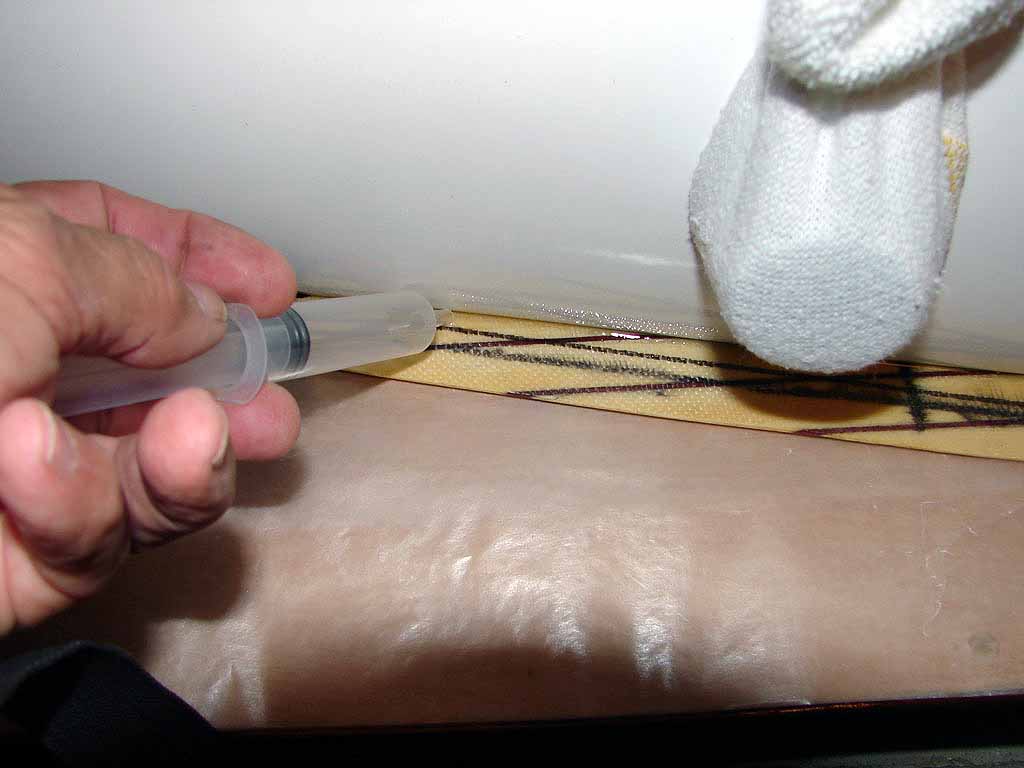
Mount the Hull onto the deck. Prepare the hull with temporary spreaders and line to hold the beam measurements. Cover the deck construction jig with wax paper and place the deck in the jig upside down. Place the hull onto the deck with the bow at the 27.5" mark on the forward end of the deck. Line up the stern so the planks are even on both sides of the hull. If your hull does not have the ballast installed, place 2 - 3 lb lead ingots into tube socks and tie the two socks together and hang the weight over the hull as pictured. With a Sharpie marker, trace the outline of the hull on the deck. Remove the hull. Prepare about 2 oz. of West Marine Epoxy and paint on a small amount just inside the line you have just traced. Replace the hull onto the deck and ensure that is lined up on your marks. Place the weights on the hull and use some tape to make a couple of wraps around the bow area and stern to prevent anything from moving. Use shim stock to ensure that you have good contact with the hull and deck seam. Use a syringe filled with the West Marine Epoxy and place a bead of epoxy around the entire hull / deck joint. Let cure for 24 hours.
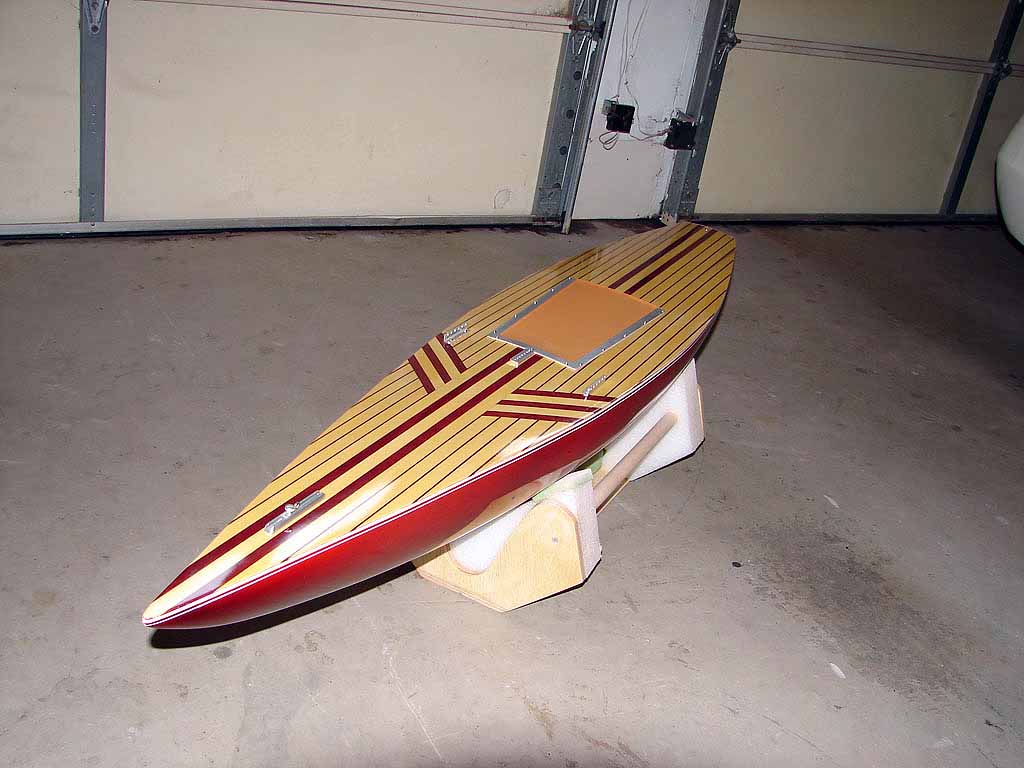
Once the deck is mounted and trimmed on the hull, sand the deck with fine grit paper and use spray Helmsman Spar Varnish, 1 or two coats.
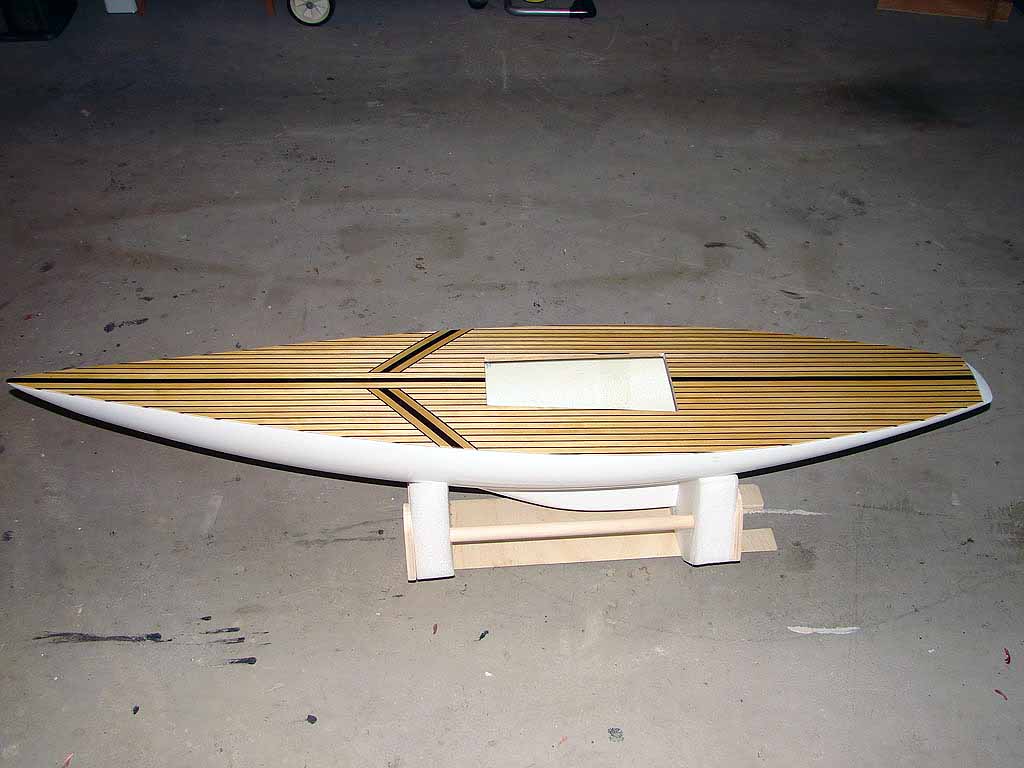
Decks by Tom Germer:
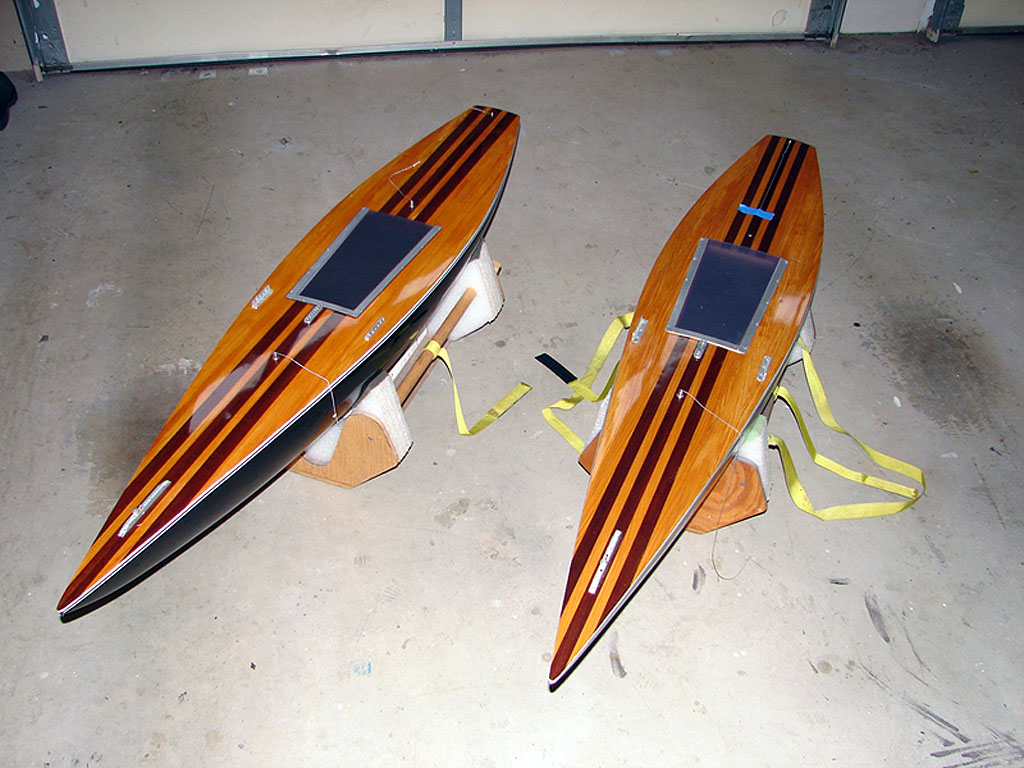


Nice