Last update, December 21, 2002
Building shown in this section is for reference in the Classic Build. Some links may no longer have a source and suppliers may not exist...Rick West, December 2009
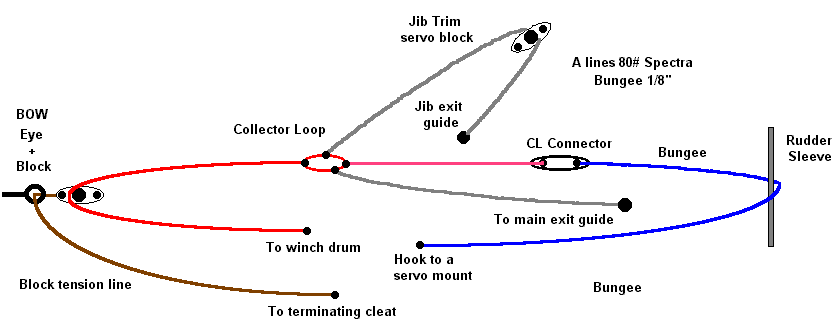
Installing the RMG Line System
Parts:
Equipment board
Radio receiver and charged battery
Radio transmitter and charged battery
6" Futaba servo extension wire, 2, Stock Item
#161 (Pekabe 515) single block, 1 MMY
80# Spiderwire or Spectra line, Stock Item
#30 Spiderwire line, Stock Item
#283 jam cleat, 1 and two #2 sheet metal screws, Great Basin
1/16" elastic cord, fabric store, Stock Item
#B4 wire sleeve connector (swage), Berkley Fishing, Stock Item
#280 sheet hook, Great Basin, Stock Item
CL connectors, medium, 1, Stock Item
Tools:
Nylon ties
Velcro
Silicon sealant
Razor knife
Pliers
Blue tape
Screw driver
Scissors
Here, you will install the bow turning block and the winch tension and emergency lines. Then the sheet and bungee lines are connected to the winch line and stored in the hull till the deck is complete.
We cannot comment on the 32mm dual spooled drum that has been the standard drum shipped by RMG. If you would like to read more about the models, drum, line resolution and why we have made the recommendations stated, please go to this discussion link. The process here is following the prime recommendation, which is the 280DL 7.2-turn model with the 26mm spiral step down drum. The Houtz 3/4" drum would be very close to the same. The Thoresen drum requires the standard 5.5-turn winch.
Installing the Winch Line and Setting Full Sheet Out
Now that the board is on the mounts, fire it up and run your winch to full out, stick up. During the session when it was calibrated, she did about 7.2 turns. You can count the turns if you have marked the drum. If you are not sure that the winch is providing its full turn capability, re-program it now. (You might make a print of the programming checklist in case you forget. (If you are over 60, you will forget!)
Installing the Winch Line and Re-calibration for the 280c, 7.2-turn Model
Cut a piece of 80# Spiderwire or Spectra long enough to run from the winch to the bow and back. Put the line through the hole in the winch drum. On the end that went through, inside the hub, tie a ball of knots that will not go through the hole, ever. Make sure it won't! Place the 26mm SDS drum on the winch so the hole and line is pointing forward. Run the line under the stringers and out after station 6. Tape something to the end of the line to weight it and hang it over the side of the hull and bench. Mark the line on the flange of the hull. It is hard to see in the photo here but there is one there.
Lay the line down the side of the gunwale and measure from the mark to 16.5 inches and mark again. At this point that is the length of travel we want to verify. Starting sheeting in the line, stick toward down, till the 16.5 mark reaches the gunwale flange where the outhaul mark was. Good! Now continue to close haul, stick down, till it stops. The mark may now be inside the hull. You will see that at close haul there are several wraps around the axel, step down portion of the drum. This is good for it is where you will be making small adjustments on the water and good resolution is desired.
Note about the 5.5 turn models. You want maximum turns all the time on these models. So, here verify that you are getting the 16.5 inches of travel. If you have a drum that gives you more than that, continue with the calibration of the out haul position below.
Calibration: Turn off the boat and then turn off the TX. Now run the winch calibration checklist again. What will be done this time is to set the outhaul of the winch to 16.5 inches. When you reach step 15, pause to think. You are about to outhaul the winch in step 16. As you do that, you want to outhaul till the 16.5 mark reaches the center of the gunwale flange. Stop! Turn off the TX and you will get 3 quick beeps, which means the winch has saved that as the outhaul position. Continue with step 19.
You may need to do this again during the Pre-Tune when the rig is stepped on the deck. However, it is thought that is a good time for you to see how this winch programming works to set the outhaul. Everything is very visible now.
When you are finished, outhaul the line, let it hang out of the hull and turn off the boat and then the TX.
Note: We have found that it is a good habit to always leave the sheet lines out hauled when not in use. This prevents unraveling of the drum wraps, loosing tension on the bungee and easier to connect and remove the sheet line connections at the booms.
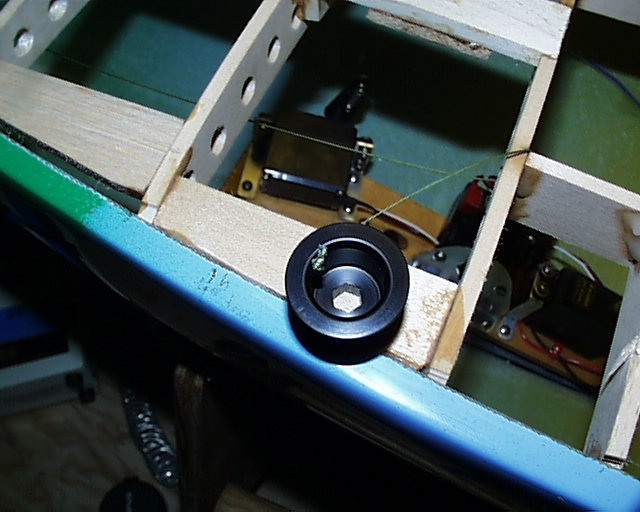
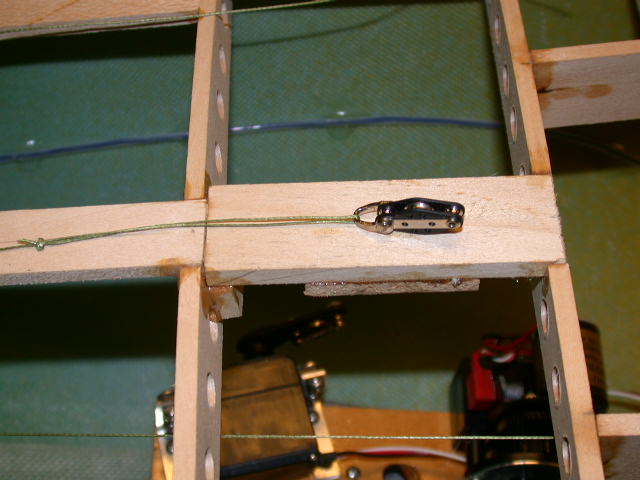
Install the Bow Turning Block and Tension Line
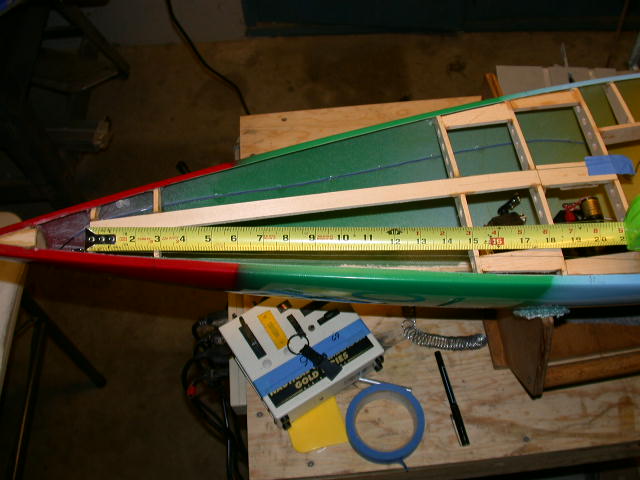
Cut a piece of 80# Spiderwire or Spectra around 4 feet long. Tie a 3 or 4 inch loop in the line with a Bowline and overhand knot and then lock it. Remove the horseshoe from the turning block, install the loop and reconnect the horseshoe. Run the single end through the eye bolt and route it to the cockpit under all the stringers. Install a cleat near the rear of the port hatch liner with two screws. Bend the cleat tabs up a bit. Draw in the line till the block is just off the eye bolt and secure the line to the cleat. Tie an over hand knot loop on the tag end off the cleat and let it hang down in the hull. Another line will be clipped here during the maintenance checks. If you have put station 4 at 4" or less from the bow, you will have 16 or more inches from the end of the block to the 22" inch place where the jib exit guide will be. See how good you are! That's it.

Install the Winch Line
Thread the winch line forward and through the block. A pair of tweezers might help. Run the line back to the mast area on top of the ribs and secure it with a piece of tape. Put tension on the line and observe the block alignment is not twisted. Good.
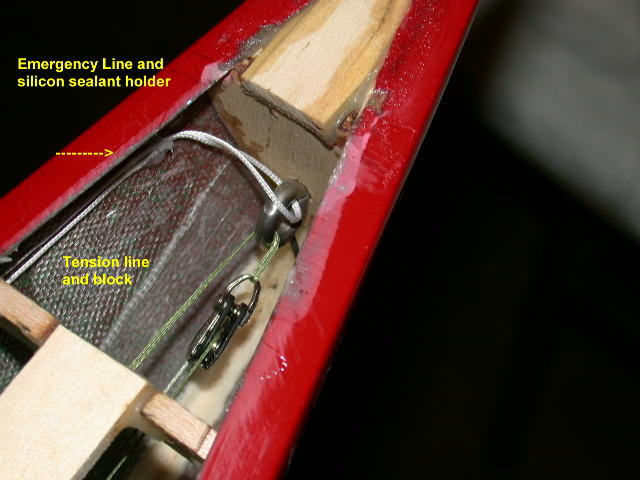
Install the Emergency Line
If you follow the standard pre-regatta maintenance check, you may never need this line. The line will be used to thread a new tension line through the eye bolt if you loose the connection you just make above.
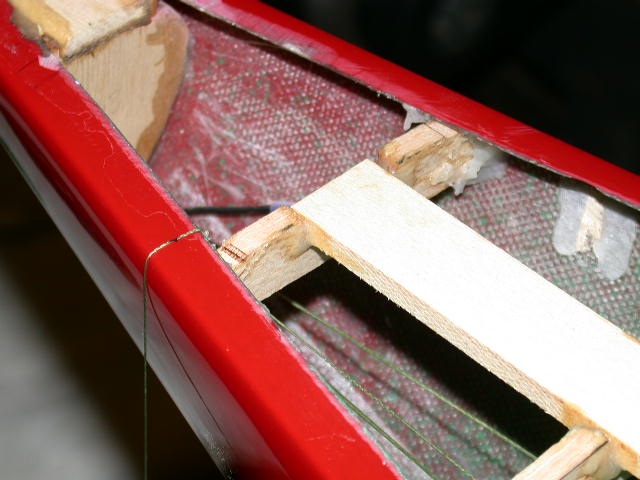
Prepare a line loop that will reach into the cockpit. Make a small loop in the line for connecting a longer line should it ever be needed. Secure this line along the port side with tape at about three places. Bond a dab of silicon sealant across the loop like shown above in front of station 4. Make sure it is sealant and not adhesive. This material will break away when the line is pulled hard. Because it may be there a long time, tape is not used.
This is at the end of the winch line and where both sails and the bungee lines are connected. This loop is to be placed so that at full out haul it will not pass the jib exit guide to aft. Likewise, when fully sheeted in, it will not enter the block spindle. It should not if everything is right to this point.

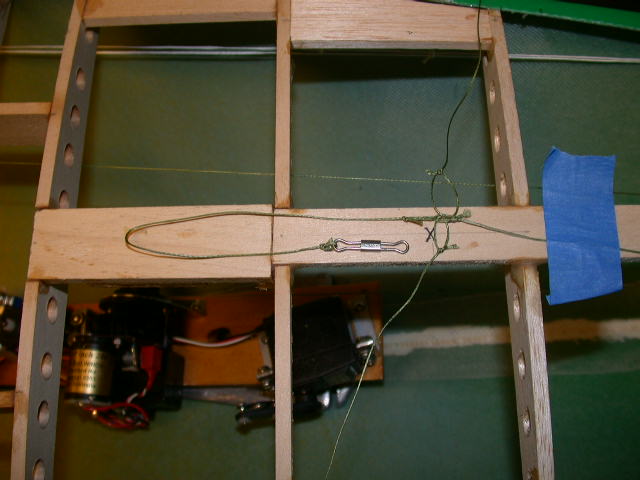
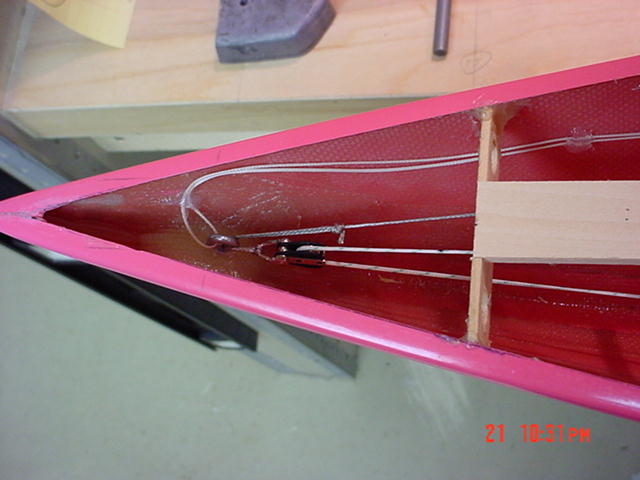
Make sure the block is in the standoff position set above and the tension line secured to the cleat. Pull the line snug, over the ribs, and mark at the 22" jib exit guide location. Make a very small loop, about 1/4" in length, so that the aft end of the loop is very close to the 22" location. Most loops here are tied with a Bowline knot and an overhand knot finish.
Bungee Line: Connect a line to the collector loop with a Bowline. Mark the line at station 29 and tie another small loop at about that point. Connect a medium CL connector to this loop and you should be able to reach this easily from within the hatch liner. The bungee will be connected here and will be an item you will change seasonally.
Jib and Mainsail Sheet Lines: Cut a line long enough for the jib to route onto the boom and a foot or so longer. Connect the line to the collector loop with a Bowline. Follow the same procedure for the main sheet line only with a longer line. Use 80# Spectra or 30# Spiderwire for the sheetlines.
Bungee: Cut a piece of elastic cord that will reach easily from the CL connector, around the rudder sleeve and back to the rudder servo mount. Make a loop in the cord and connect it to the CL connector. Make another loop with a sheet hook in it. Refer to Rigging Tips for how to make these loops with swages. Start adjusting the line length till the line will just sag when the hook is connected to the mount. The winch is sheeted out? Good. Because when you move toward close hauled this cord will get very tight.
Now, put all this under the ribs and back to the cockpit. Locate the jib line and route it through the block on the trim servo arm. From the loop the line will pass, toward aft, under the spindle, around and back over the spindle. Be sure it is over the spindle and not the top becket spacer. It will slip off there. The visualization is that, holding the end of the line toward the jib exit guide, the line will be coming from the top of the arm. This will be maximum throw.
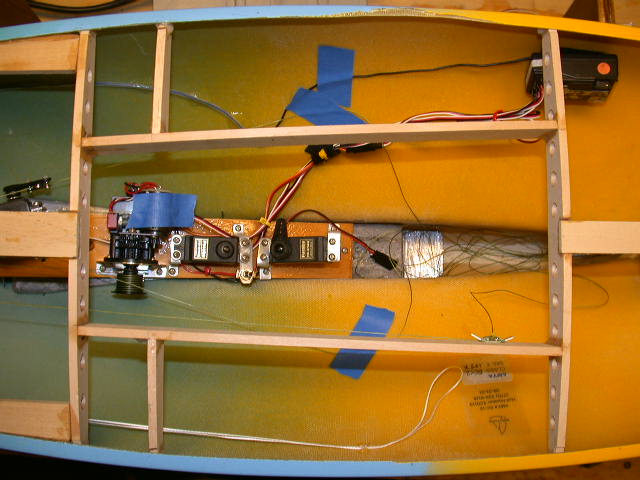
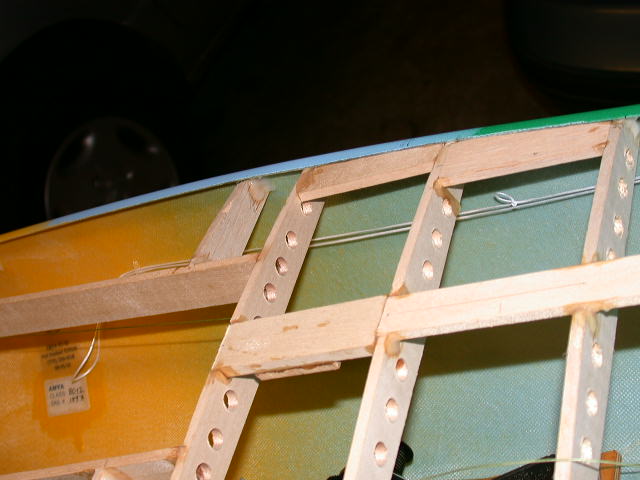
Place the lines in the cockpit area of the hull. To organize, shown here, the jib was taped to starboard, main to port and bungee line on the winch. The line tags are in the keel area. They will remain here during the decking process.
The twitcher lines are to be installed during the rig assembly.
This completes the section. Pretty simple, huh? And, it works well.