Rigging Tips
![]()
![]()
![]()
![]()
![]()
![]()
![]()
![]()
|
Rigging Tips
|
|
|
Last update, May 13, 2003
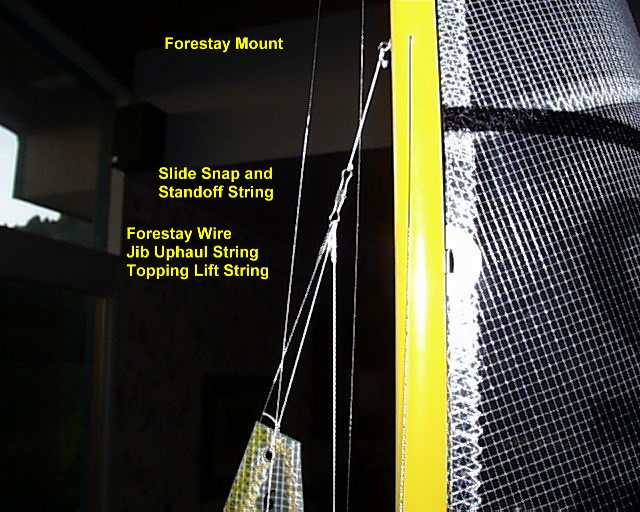
Needs to be updated Some Rigging Basics That Come To Mind
This section will grow as the mind remembers
The Bowsie Adjuster The bowsie is a non-mechanical "Come-Along" winch. If you are dyslexic like our shop hangout Vern, the diagram below might help. When Vern and us got together there were few pictures. Then one day came a drawing deep in The Manual For The East Coast 12-Meter manual. "Ah-ha! That's how the blasted thing works." There will be many uses for this device.
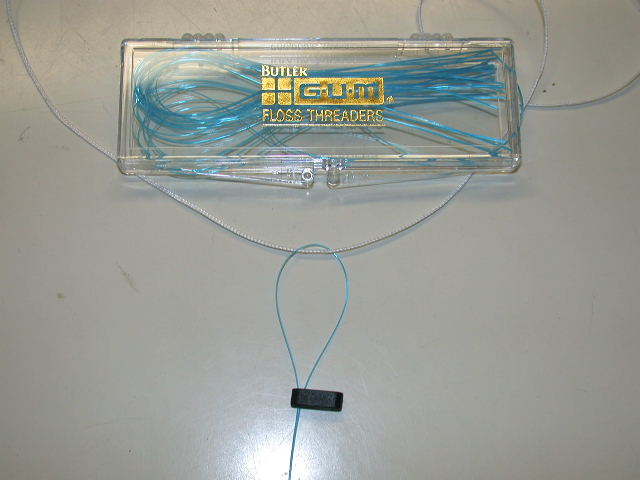
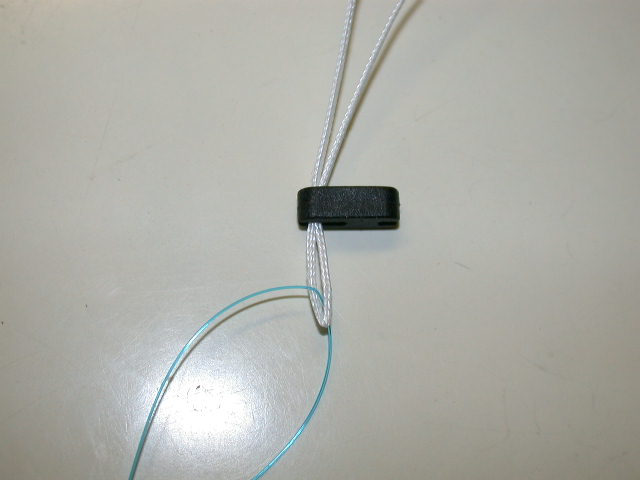
Some of the smaller bowsies are difficult to thread with heavier Dacron line like the boom travel bowsie setup. Floss threaders will help you out and are useful in other applications where a closed loop is workable. They can be found in dental drug sections of major outlets.
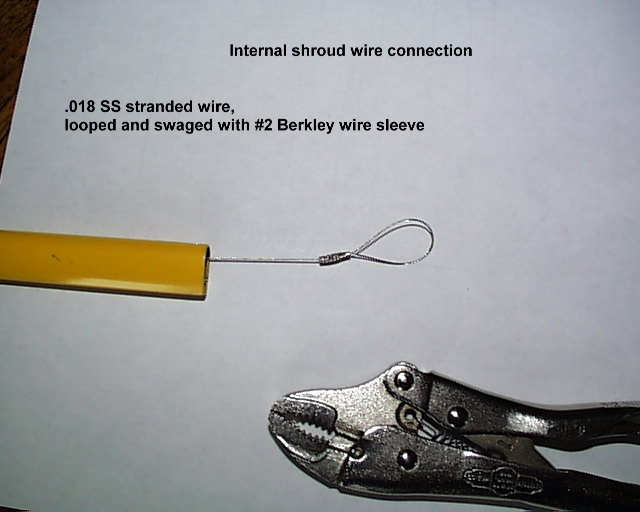
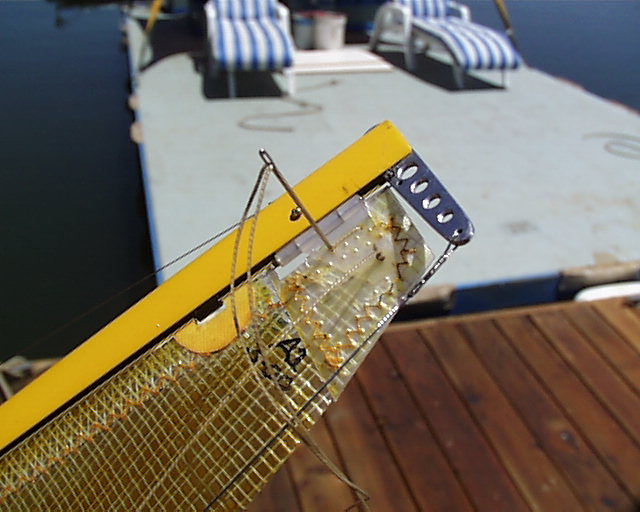
Internal Tang Termination .018 Stainless Steel rigging wire is passed through a #2 Berkley wire sleeve connector (swage) and then back into the swage again forming a small loop. This is then crimped with 5" Visegrip pliers in the center of the swage so the ends are not crushed. 1/3 of this is then cut away. Generally, the #2 swage will hold with a single wire, however, here is a good place to add some mass.
These are used for connecters in the rigging or for terminating at a mounting point. .018 Stainless Steel rigging wire is passed through a #2 Berkley wire sleeve connector (swage) and then back into the swage again forming a small loop. This is then crimped with 5" Visegrip pliers in the center of the swage so the ends are not crushed. Trim off the excess wire with cutters.
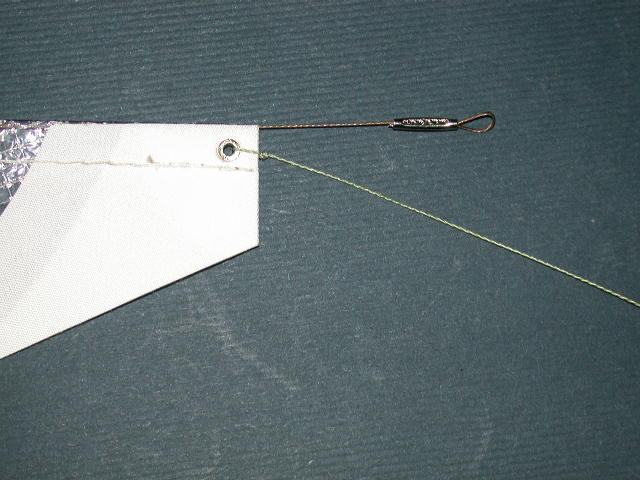
If you are terminating at a mount, begin with a very large loop so that you can tug on the excess end to firm the working portion of the wire around the mount. While holding this firm, slide the swage down to close the loop at the mount. While still holding the excess end firmly, crimp the swage. Now that the wire will hold in place, re-crimp if need be and cut off the excess end.
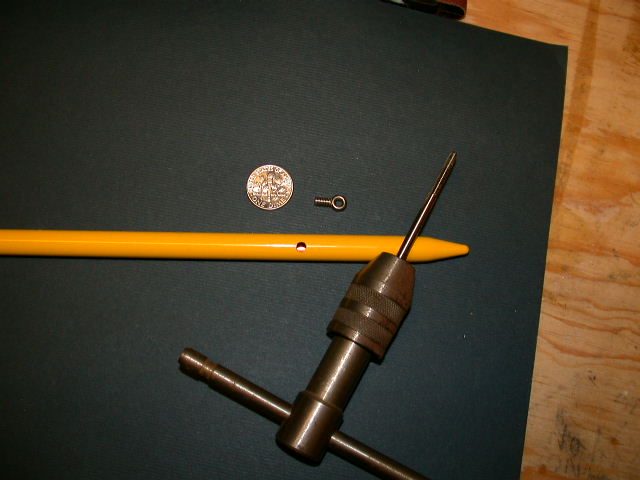
Eye Bolt Mounts The photos are on a test section of a boom. These bolts are too long for our needs and should be cut. Run the nut to the hilt of the bolt at the eyelet. Cut the bolt with cutters so that there is just a small amount of threads left beyond the bolt. Then work the nut carefully to repair the threads. Put the nut into your stuff as it will not be needed.
The Great Basin #140 eye bolt is shorter with 3.5mm threads. It is generally used only for the sheetline guides as it has the larger eyelet. #144 eye bolt is the longer one with 3.0mm threads. This piece has lower wind drag and is used for mounts and control line guides.
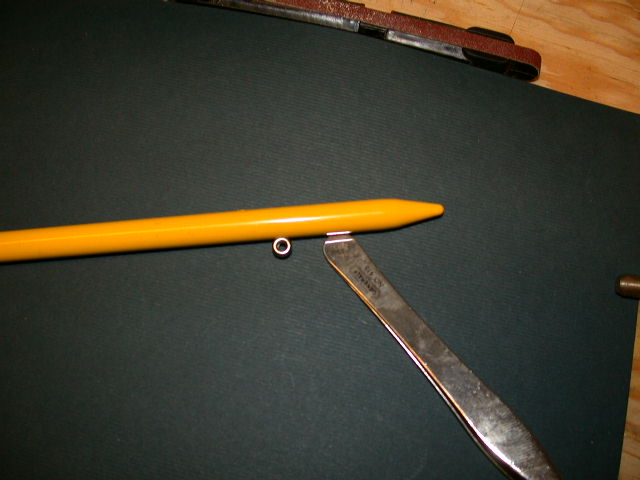
A hole is drilled with a #44 bit and then threaded with a 3.0mm or 3.5mm tap as needed. A bit of epoxy resin is placed in the hole. Thread the bolt into the hole and then place a bit more glue on the threads of the bolt. Finish the threading for the orientation on the mast or boom that is wanted. Do not over tighten so as to strip the threads in the metal. This was allowed to cure with the eye downward so the resin would flow toward the eye on the inside of the boom.
Some mounts are made where there is an insert, like on the ends of a boom. You would omit the glue and use silicone if you like. Either will work in these situations.
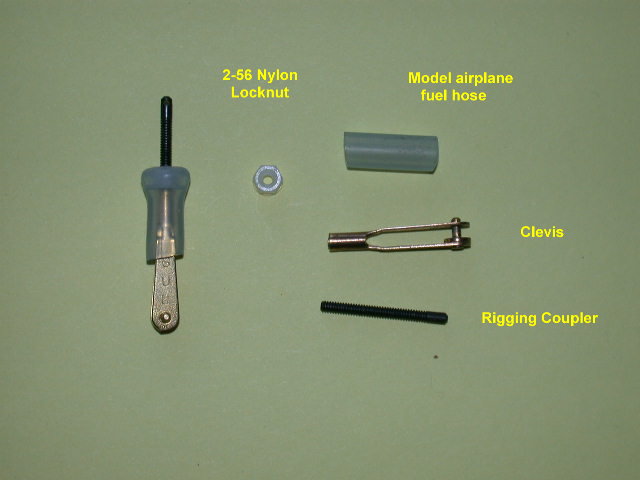
The connectors are assembled from the parts shown. The lock nut is a Nylon 2-56 stock item from Small Parts. Any model airplane fuel hose is used to prevent the clevis from loosening or disappearing in your sail case. The clevis is by Sullivan and can be found at Tower Hobbies. The rigging coupler is a Du-Bro #201.
Thread the lock nut onto the coupler with the flange toward the clevis. Place it so the shaft of the coupler just reaches the inside hilt of the clevis. Install the hose on the clevis and then thread in the coupler with the lock nut attached. Push the hose up over the lock nut.
Please review the Heavy Weather page for additional information on the shroud clevis. |