Main Boom Assembly
![]()
![]()
![]()
![]()
![]()
![]()
![]()
![]()
|
Main Boom Assembly
|
|
Last update, December 27, 2009
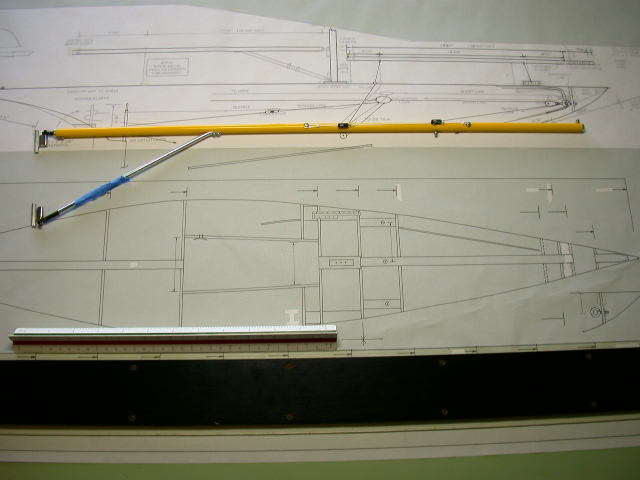
Preparing and Installing the Main Boom and Vang as an Assembled Unit
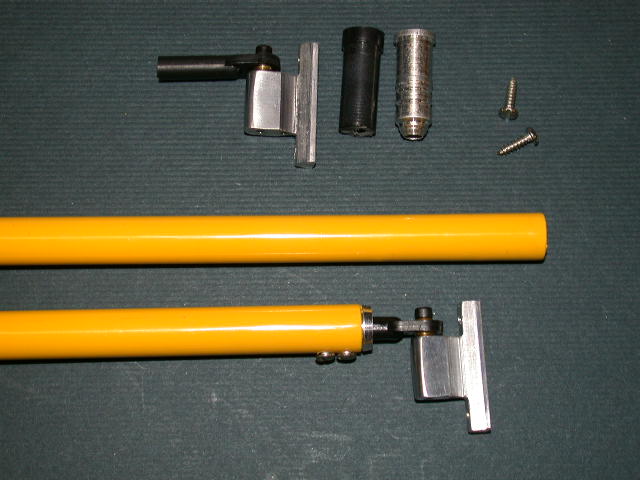
Preparing the Main Boom The Zellanack boom set is sleeved in a consistent manner. Slide a stir stick into the ends of the boom and you will find that on one end you will hit the sleeve 4" inside. That is the mast side of the boom for purposes of building here. Measure from this end and cut the boom at 23-1/4 inches. Use a needle file to deburr the edges, inside and out.
The main boom gooseneck kit comes with a black plastic insert that will fit inside the boom. You can get these from an archery supply for the Easton 2219 arrow shaft if you need some in the future. If you do not have a supplier nearby, ask Mike to provide some extras as part of your order. The insert is also available in aluminum at these suppliers. Push the insert into the mast end of the boom. You may need to seat it with a small hammer.
Push the gooseneck of the aluminum slide mount into the the insert firmly. Drill a hole with a #50 bit in what will be the bottom of the boom and thread a single #2 screw into it. Drill deep enough to penetrate the gooseneck but not through the other side of the boom.
If you would like to use the aluminum insert to receive the gooseneck, drill the boom wall and the insert with a #44 bit but not into the gooseneck. Insert the gooseneck then drill again with a #50 bit. This way you will not have to force the #2 screw through all that metal when it is not needed.
The main boom is easy in that there are only two of these. Place an insert in the aft end of the boom. Mark the boom to make sure you will drill down into the top of the shaft. Prepare and install the #144 eye bolt. Finish with the eyelet adjacent to the boom length. Because the tap will be through the insert, glue is not needed. Place a dab of silicone on the threads inside the boom. This will be the guide for the clew adjustment to the camber.
Measure from the insert at the gooseneck, aft and mark the boom at 16-1/2 inches. Install the #140 eye bolt directly under the boom. This will be the sheetline guide. There is no backing of an insert here so place a bit of epoxy in the hole and on the threads when you thread it on. Finish the eye bolt adjacent the length of the boom.
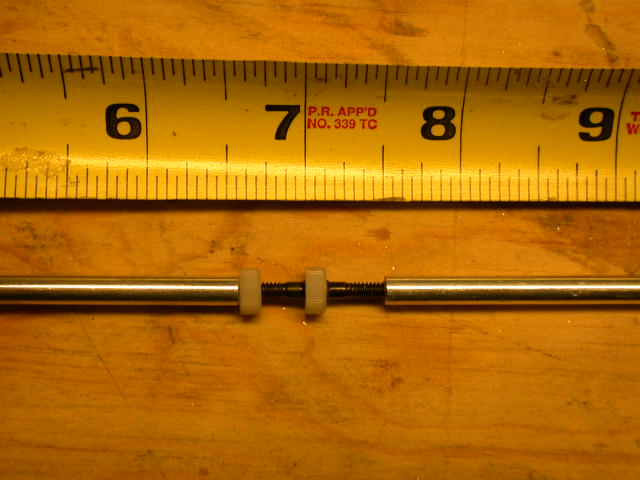
Vang Mount This is for the Zellanack vang only. Measure 7" on the boom from the gooseneck. That is on the boom, not from the mast. Place a piece of blue tape directly on the underside of the boom and mark the measurement. Use the vang mounting holes to mark for drilling. Drill the two holes with a #50 bit. You will install the vang shortly.
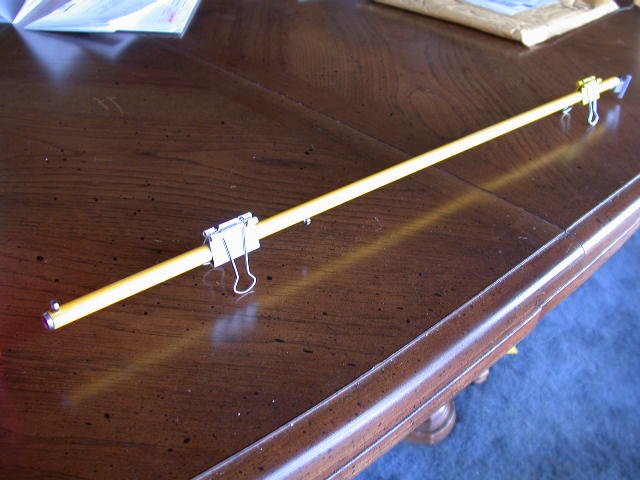
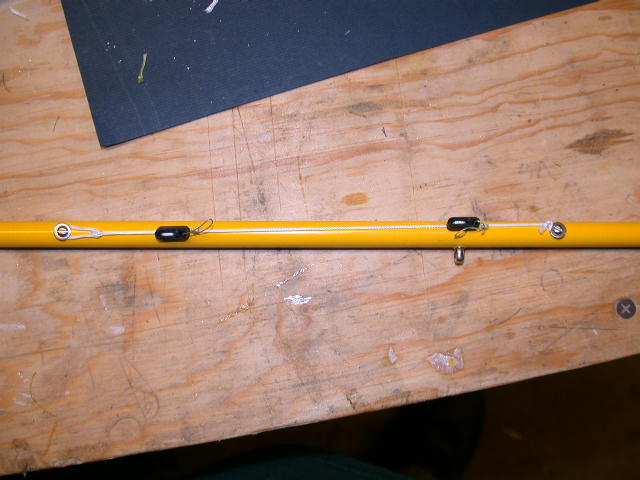
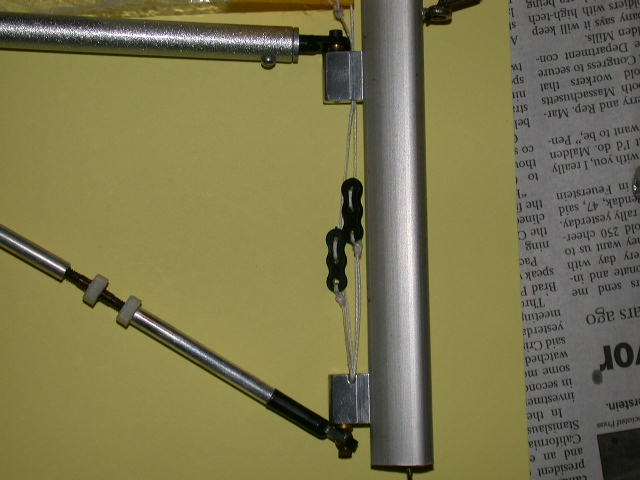
The Clew and Sheetline Adjusters The bowsie adjusters will be mounted on a single travel line as shown. Study the bowsies. You will note there is one large beveled hole on one side. That is the top of the bowsie. Beside it are two smaller holes with a recessed area on top. A large diameter line is used to create a travel line for the bowsies.
Before you begin, think about what side of the boat you would like to have all the adjustments. If you have not done this before then it is suggested the port side for right-handed folks and starboard for the lefties. This has been an observation and really not based on research. The photos here will be for the port side.
Lay the boom with the port side up and mark two measurements from the gooseneck on the boom at 11" and 18 inches. Drill these marks with a #50 bit. Thread on #2 screws with washers but do not tighten. Cut a piece of the Dacron line about 18" long. Thread this through the #1 and #3 holes of a bowsie as shown (See Floss Threaders). Slide this down the line and thread on the other bowsie in the same manner. Tie a small loop in the mast end. Now, check your picture to the drawing above. Good.
Referring to the Brawner Thread diagram, make a loop by threading Spectra up through the #2 hole, over the travel line and back down through the hole. Tie off the ends finishing the loop.
Take the aft end of the Dacron or Spectra line underneath the washer on the 18" screw. Tighten the screws so that it will just fit under the washer. Pull it as tight as you can. Do a turn around the screw and hold this tension while you thread three half hitches to secure the line. You work it out. Tweezers will work fine. However is fine, as long as that line is very tight. It has to be tight!
The main sheetline will be connected to the forward bowsie during the rigging with a connector. The clew line to the aft one will be connected below.
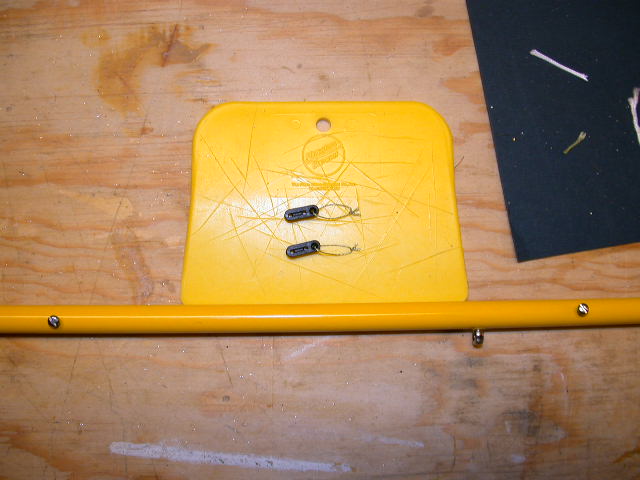
You will note that the bowsies are flush against the boom surface and you can move them in small increments. They need to be hard to move when pulling on the loops. Testing here indicates 5-3/4 to 6 pounds is needed to move them. This is fine for most weather (when wet) that you will encounter.
The Vang and Installation As you move about the playground and browse set-ups on other boats, you will see several vang designs. Vangs were needed on sailboats to keep the main boom from lifting beyond a desired setting as wind pressures change. Wind pressure will fill the mainsail and the vang can be adjusted to dictate a preference in twist to the upper parts of the sail. If the pressure lessens the boom would lower by gravity and change the set of the sail, usually not to your liking. So, came along the solid vang. Once set, while at close hauled, the twist of the mainsail would essentially remain constant. There is always some increase in twist as the wind increases.
The drawback to the solid vang on our EC12 is that, to adjust the twist, we lengthen and shorten the vang with a threaded shaft. While this raises and lowers the boom to control the twist, it also places structural pressure on the boom gooseneck attachment to the mast. This in turn will effect the bend to the lower section of the mast. This bend will change the shape of the lower parts of the mainsail. Often this is not desired.
The Zellanack vang is as good as they come for this rig. Within the package is an installation procedure. You will note that a middle range for sail set is sought. This is to allow an adjustment range while sailing without adverse effect on sail shape due to unwanted mast bend. That is the quest and caution during the installation process. The instructions follow a process while the rig is on the boat.
We have found this can be difficult to manage for a single person. Yes, some are more organized than others. We have done that and recorded some information that might be helpful to you. The following is suggested:
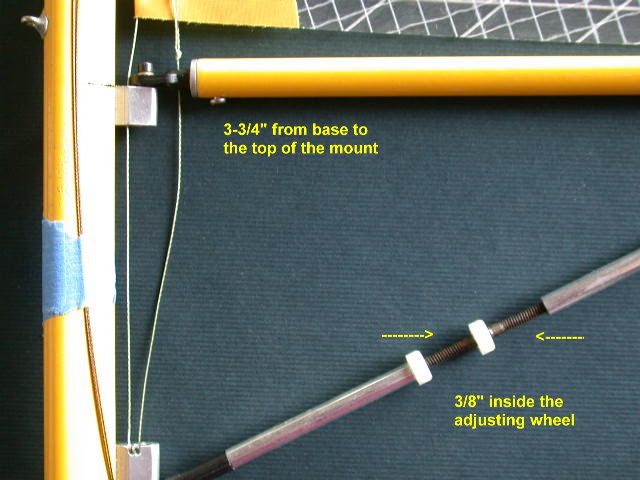
Install the Assembly on the Mast If you have followed the EC to this point, the mainsail is on the mast and ready to receive its boom. Slide the goosenecks onto the mast from the base. Do not force the gooseneck mounts; when aligned they will slide on easily. Set the top of the boom gooseneck mount 3-3/4" from the base and set the tiny Allen lock screws with the wrench provided in the Zellanack kit. Align the vang gooseneck cap screw (pointing down) 1/16" or just off the base. Set the locking screws.
You can remove the tape from the vang adjuster.
This vang positioning may not be optimum for your set up during the Pre-Tune section. Movement on the vang mount on the boom will be discussed at that the time of tuning. Its easy!
Install the Downhaul Bowsie Route and tie the line from the tack. (Note: there are two bowsies in the photo. one is for the sail jackline which is no longer used.) Use the outer hole at the vang gooseneck. There is not much adjustment needed here. This will control the tightness of the luff. The different downward tension between a light air setting and wind over 8 is nil to 4 ounces. You may want to mark the downhaul bowsie so that in the heat of battle you do not adjust the wrong one. It is Murphy's Law, should you adjust the wrong one, it will not be noticed till you approach the start line. To Late!
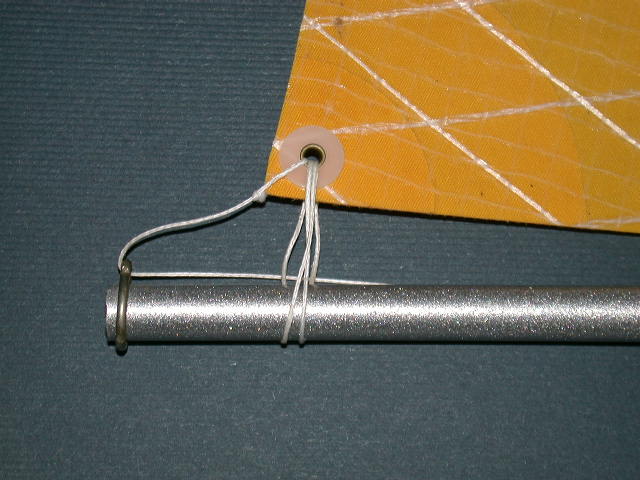
Install the Clew Attachment and Adjustment Lines The clew attachment is just a double loop through the grommet and around the boom. Tie this with a square knot and overhand finish. About 5/8" off the boom is a good height. Any closer and the foot drags deeply across the boom and too much allows the clew to swing away changing the shape of the foot. This loop also allows the clew to travel freely along the boom as adjustments are made to the camber.
The line attached to clew is passed through the guide on the end of the boom, through the center of the attachment loop and tied to the small loop on the rearward bowsie on the travel line. The clew needs little adjusting movement. Place the bowsie about one inch forward of the sheetline guide. Tie the adjusting line to the loop so the middle of the sail foot is about 1/2" off the boom to the side. This is a fairly flat sail setting and then as you move the bowsie aft, the sail will fill out more. It would be handy to have three hands but we don't. Tape something in the foot of the sail to help you out.
|