Deck Installation
![]()
![]()
![]()
![]()
![]()
![]()
![]()
|
Deck Installation
|
|
Last update, January 14, 2008
Installing the Molded Deck
Parts: Prepared deck
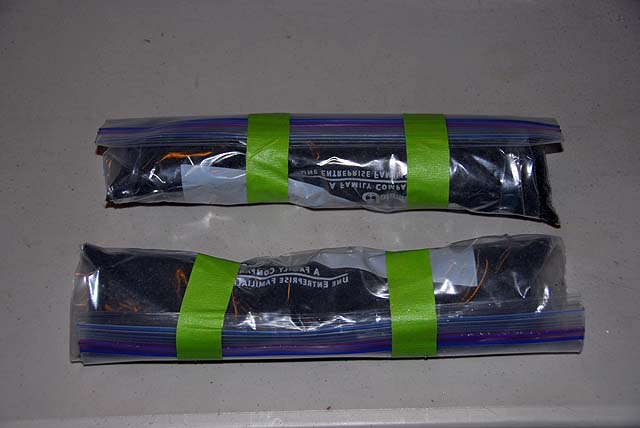
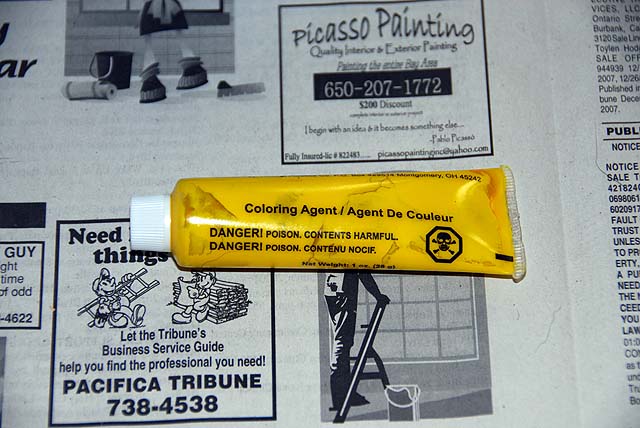
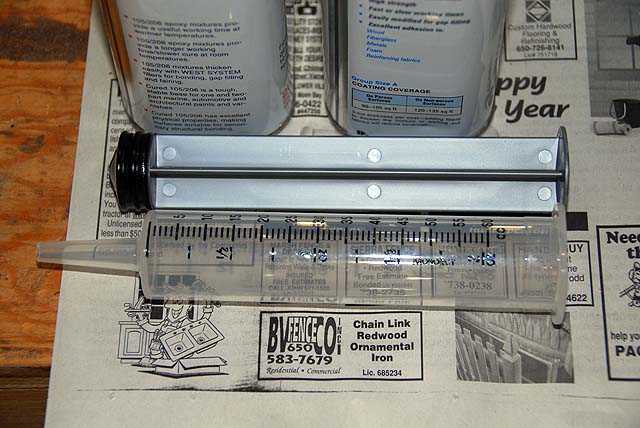
Supplies: Sand Sausages (20) West System resins #206 and 105 Micro Filler West System #402 Acetone of MEK Blue tape, lots Green Tape Rubber gloves tongue depressors or popsicle sticks Large syringe, Small Parts resin coloring, optional, West Marine or plastics store Small paper cups Newspaper Q-Tips
Tools: Orbital sander 5" file Sandpaper stock Hobby knife Dremel Saw
Glue Why do we us West System resins and filler fibers? First it is a good clear resin that has been used for years for finishing balsa decks and is well worth the money as a staple in the shop. It provides plenty of working time, about 30 minutes at room temperature and standard mix from the pump accessories. It mixes well with filler to form a glue with the consistency needed for use in a syringe and the working time to install a full set of ribs in the hull for a structured deck. Bonding to a clean surface has not been known to fail. It does not shrink, flows smoothly and if carefully placed on the sheer flange will not leave visible gaps. It is easy to sand. Shelf life is unknown here and not been a problem during 3-4 years use.
EC12 building with racing considerations has changed in the last few years. There are less structures in the hull and with the introduction of the molded deck less wooden decks installed. There is less call for this resin glue. Here it is a puddle for the rudder sleeve and bonding the molded deck at the flange.
Recap The previous pages should have been done. The deck has all items installed. The hull is sized and lined with paper towels. The hull has the ballast installed and the System Board has been completed, installed for testing and then removed. The rudder has been installed and there is nothing in the hull but the ballast and the sheetline retainer. The flange has been sanded. Good.
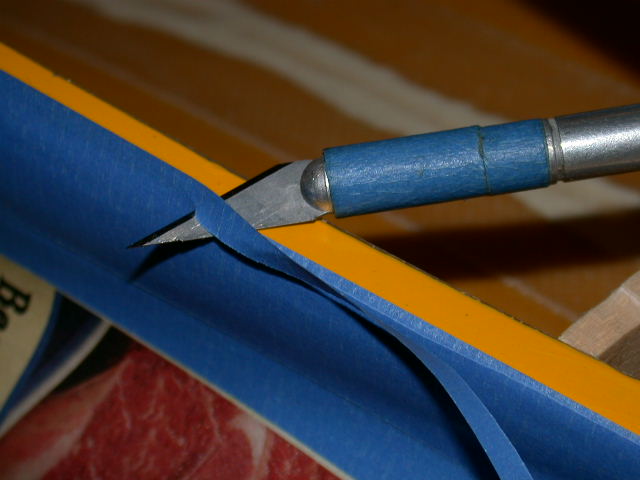
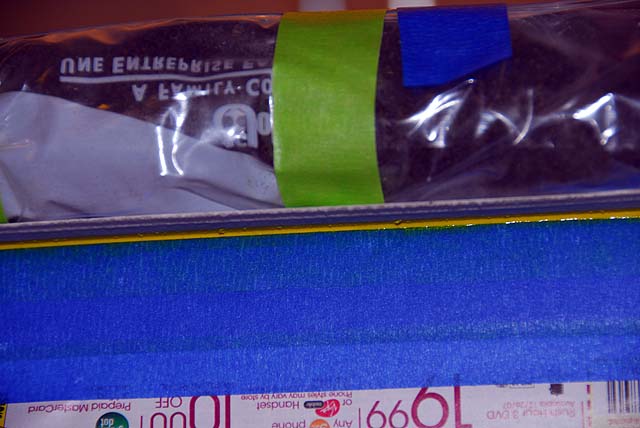
Taping Remove the strain tape from the sheer. Recheck your beam measurements are still in order. Line the sheer along the sides with blue tape just barely below where the deck will fit. This process is to provide a "sort of seal" to restrict the glue when weight is placed on the deck. This should be close enough to the top of the sheer but not allow the tape to become trapped by the deck.
If you have done this before you know the look. You can lay the tape above the sheer and trim it with a modelers razor knife at 45 degrees as shown in the photo. You can also test it with a tongue depressor to see the fit. Take your time with this first application of the tape to get it right.
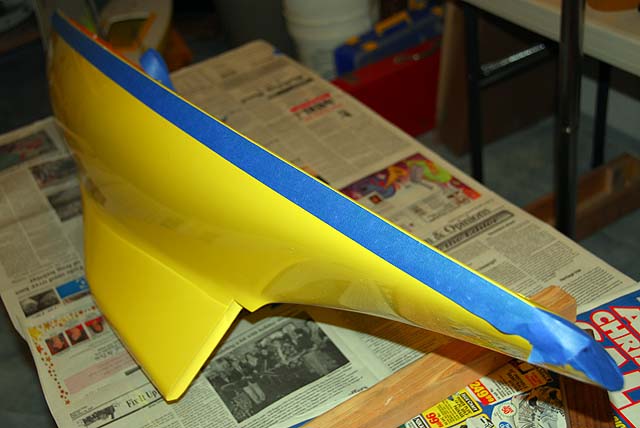
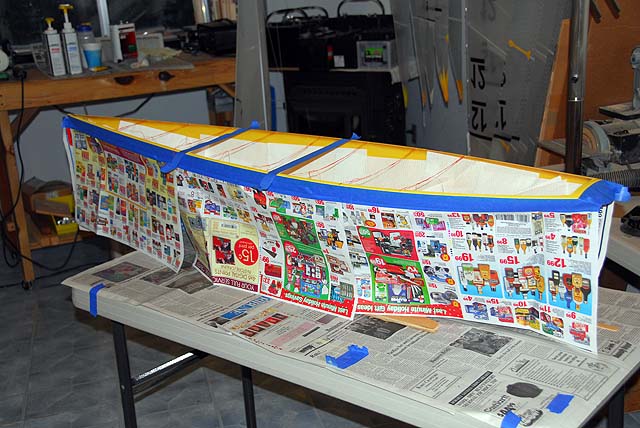
Take special care at the bow and especially across the transom. The transom should be covered with tape to protect the hull. Place a line extension down the transom from the center mark on the flange for sighting the stern node and centering the deck when you set it on the glue. Now tape newspaper to the sealing tape and so it will drape over your construction cradle. Lay paper around your working table just in case. Stand back and check your work.
Prep Assemble all the items you will need for this installation and prepare the place where it will be done. You will need to walk all around the table and should have nothing on the table but the hull in the cradle. Read over this page for when the process starts there is an even flow to conclusion and then monitoring...no time to read and get stuff.
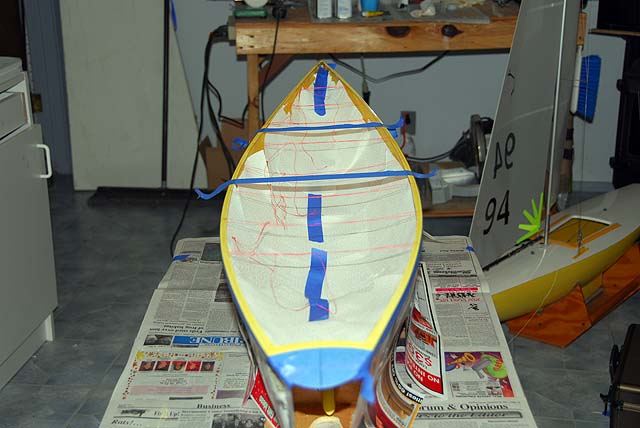
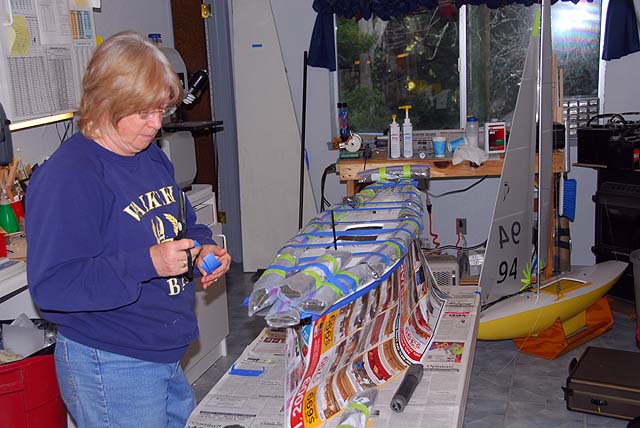
Installation Run a test setting of the deck. Use a couple of sand bags to steady things. Fuss with the nodes till they are well centered. Sight down the deck that all is on centerline. It is good to have your helper in on this so they know the drill. If you are not happy, now is the time to correct things easily.
Remove the deck and the straining tapes. Here the tie knots in the dental floss holding the hull in shape are centered so they can be felt in Brail after the deck is on.
Call for your helper, ignore the phone, the door bell, the "You Got Mail" voice and take the dogs out for a pee. You need generally 20 minutes of free time and your helper about seven.
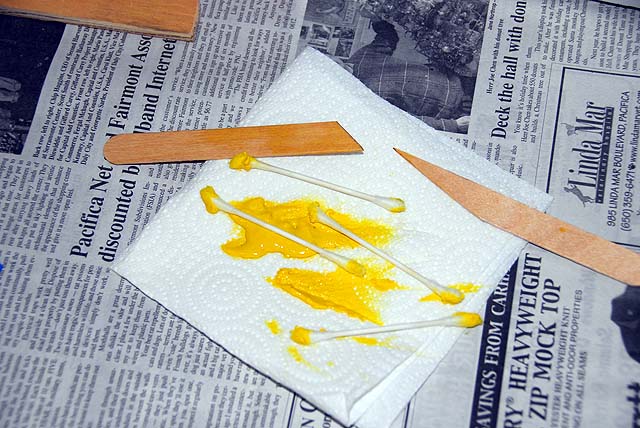
Understanding the process mix the goop you will need. two pumps from each resin part will do it and about half the coloring from the tube. Stir the coloring and the resin first then start adding filler till you have a thick toothpaste. Stuff all of it into the syringe careful to keep it level so the goop will not run down into the nozzle. Remove the air.
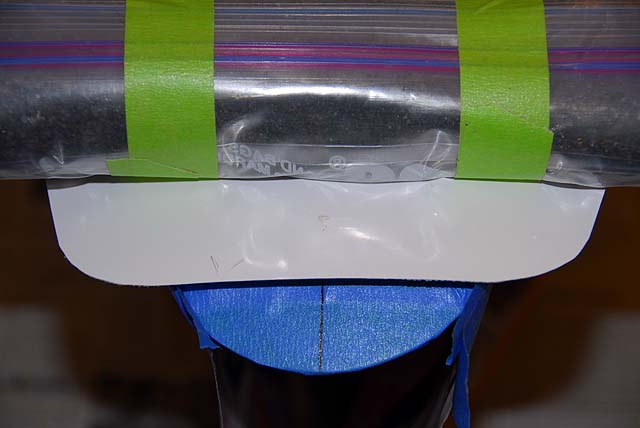
Lay a small bead down the flange about one third from the sheer edge, meaning you should be a bit closer to the sheer than center. Remember, the sheer edge will be pinched by the sand bags outside the sheer. You can test this dry in the first paragraph above.
Lower the deck onto the flange with both of you monitoring the drop so that it will be very close to center. One centers a end point, holds it while the other centers theirs. Remember, moving the deck around moves the goop. Also remember that hull measurements were made from the aft edge of the bow node. A pencil mark was made underneath and the deck was set on the goop there at the point of the hull.
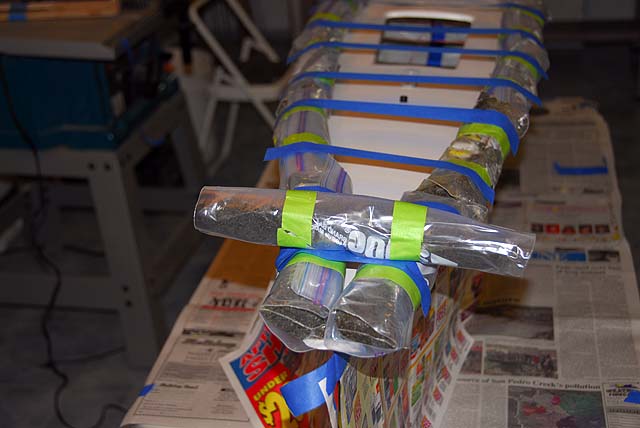
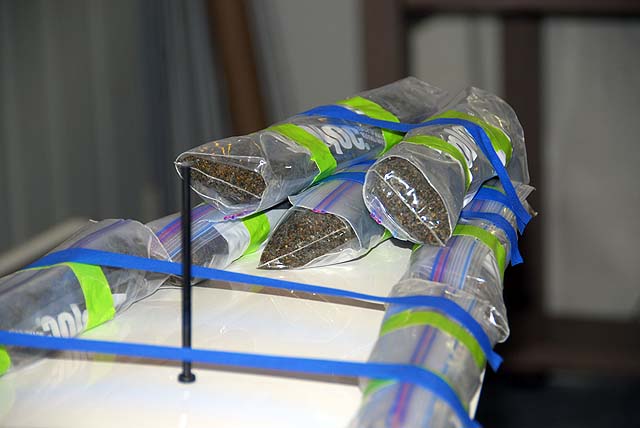
This is the process used here. Lay on a sand bag down the centerline hanging over the transom. Place two bags on each side of the overhang at the bow. Checked the alignment again. Then move aft placing bags on both side overhang and tape them together so not to roll off. Continued aft to the transom and placed two on the overhang outboard of the center line bag. Then place two more on the transom for a total of five. The bow received another. Now the bow and transom is checked from underneath to be down onto the flange at the outer edges. That is why the extra bags.
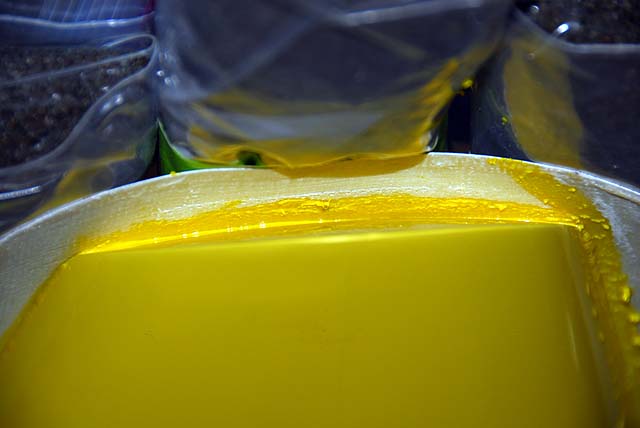
Using a LED flashlight the sheer is checked all the way around to see goop has filled the seam between the deck and the sheer and evenly. You will see some oozing onto the tape at this point. The tape for the bags was trimmed so they would not be in the way when using the squeegee.
Take a look that all is secure. Squeegee under the deck at the sheer all the way around with frequent wipe off on a paper towel. A sharper one is used on at the transom. Clean the squeegee.
In about 15 minutes make another squeegee run. For the next 20 minutes monitor oozing and squeegee if needed, all the way around. Monitor the stir stick for when the goop gets tacky. This should happen in about an hour. During this time the oozing will stop, usually two passes takes care of it but depends on how loose the goop is.
The goop should be stable for about 15 minutes before it kicks off in the stir cup. Take a Q-Tip soaked in MEK or Acetone and wipe the seam between the deck and the sheer. Don't let if build up too much on the tip so replace them often. Just wipe with no pressure. Forget the transom with the tip.
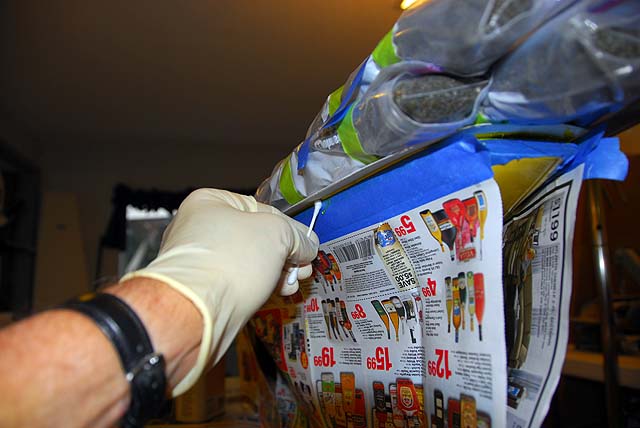
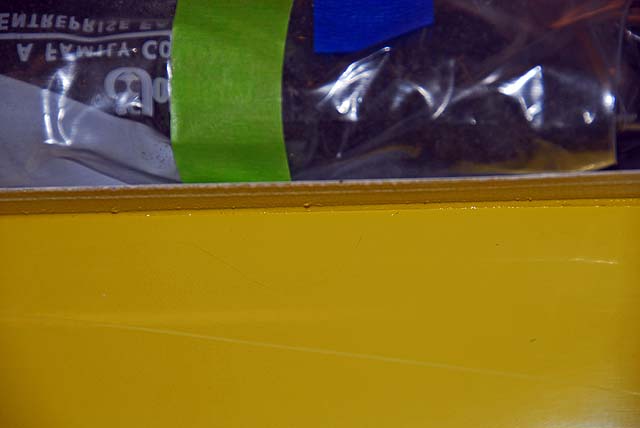
When you thing it is time remove the tape with the newspaper then carefully pull off the sealing tape. Here you see the before and after. There is no goop on the transom...it is a reflection. Study the seam with the flashlight that all is well. Go have a Kool-Aid and pee the dogs.
Check it all after about another 15 minutes and if all is still as it should be, leave it, don't touch and don't move anything. Let it cure overnight. Go to the movies.
We will trim and clean up on another page... |