Mainsheet Post
![]()
![]()
![]()
![]()
![]()
![]()
![]()
|
Mainsheet Post
|
|
Last update, December 28, 2007
Mainsheet Post and Fairlead
Parts: Roll wrapped CF tube, Aerospace Composite Products, #TUR-01. Bushings, found in servo parts packages. Grommets, found in servo parts packages.
Supplies: Model plywood, Lonestar Balsa or Hobby stores. Epoxy
Tools: Drill press or ability to drill perfectly square to a piece of wood. #7 drill bit. Dremel with saw bits. Sander
When it was mentioned that a mainsheet post would be installed in the Delta shop the comment was, "That is retro." Yes, but the thought is it needs another look.
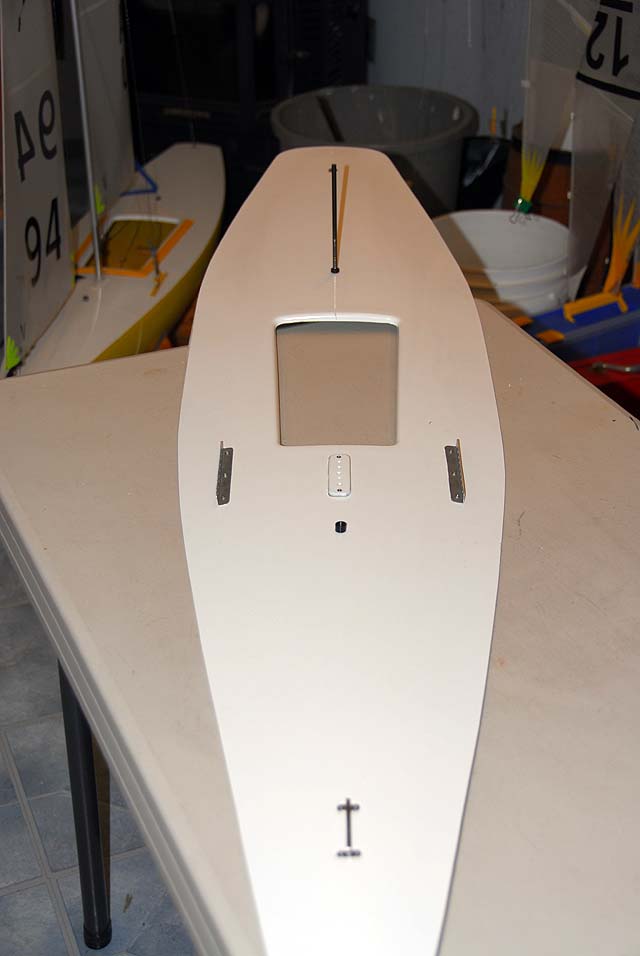
Currently with a fairlead flush on the deck, there can be about 5" of line to the boom and at an angle that sheet vanging pressures begin (pull down). This angle places the point of the boom slightly off the transom. While many like to sheet vang at times they also like to tune the sails, as they would likely be in the water, with the boom closer to the centerline. The pull down of the boom confuses this task.
The Post would allow tuning with the boom inside the transom and with only about 2-1/2" of line travel. The effect in the water is a matter of debate and so the proof may end up just the opinions of the captains that use it. While this may be the positive the negative side is that the Post is vulnerable to damage in a collision. This cannot be mitigated but repair is easy if one is prepared.
Building and installing the Post is simple and the weight penalty over a flush fairlead is 3 grams. Nothing really. The total weight of this unit is 7 grams and not including the glue.
The tube is much stronger that a standard CF fabrication. Considerable pressure was placed on a 160 mm piece to simulate side loads caused by wind pressure. A hard gybe is not thought to hit hard enough to break it. This should be avoided by the helmsman anyway. There is one report from the field that a carbon tube does not break but cracks and while at an angle will not tear off.
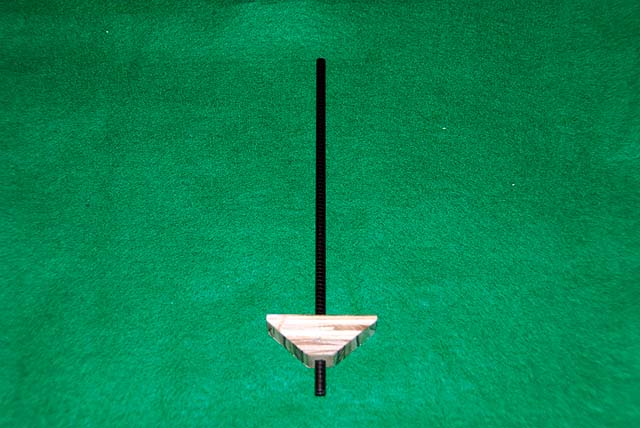
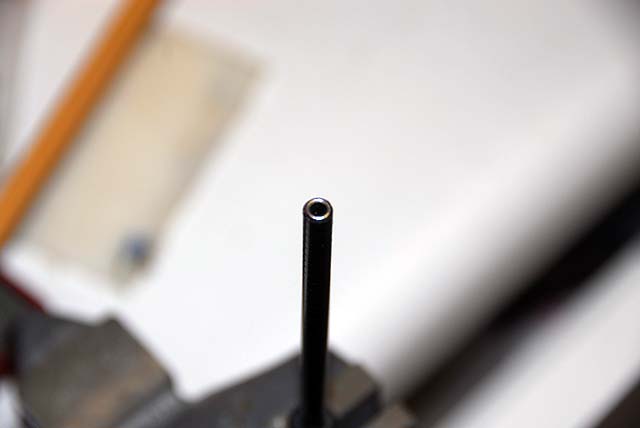
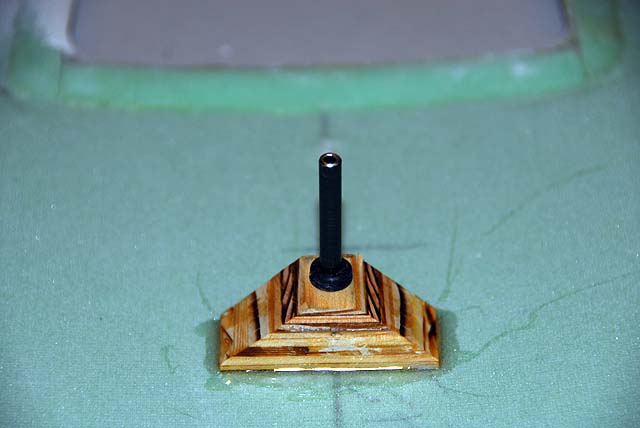
Installation The tube is .170" ID with a wall thickness of .025". The outside diameter is .201", which is dead on for a #7 drill bit. The tube was cut to 165 mm. It will be trimmed later when the A rig is installed on the boat.
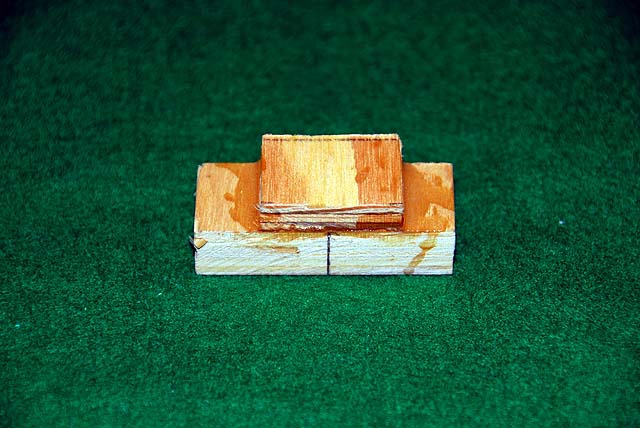
Two pieces of modeler's plywood were prepared, one about 51 mm x 19 mm from 1/2" stock and the other 19 mm square of 1/4" stock. They were centered and glued together. When cured overnight a hole was drilled down the middle with a drill press. This wood does not splinter and the wall of the cut is very smooth. The fit for the tube is very tight so that twisting is needed to move the tube through the long hole.
Sand the block down so you have the angles like shown here and near the exit hole inside the boat.
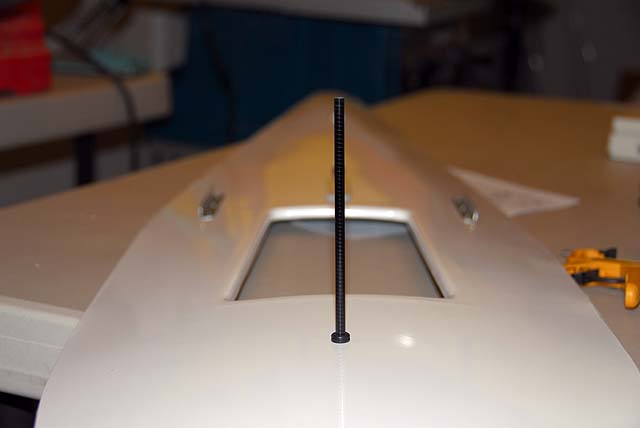
You pilot drilled the deck earlier for the main fairlead point. Now drill it out with the #7 bit. Prepare glue and place the mount it to the underside of the deck with the tube as your alignment guide. Place glue around the edges so it will flow a bit onto the decking material. Hold it firmly and twist the tube out. Do not touch till cured. Clean the tube with some MEK or Acetone on a paper towel.
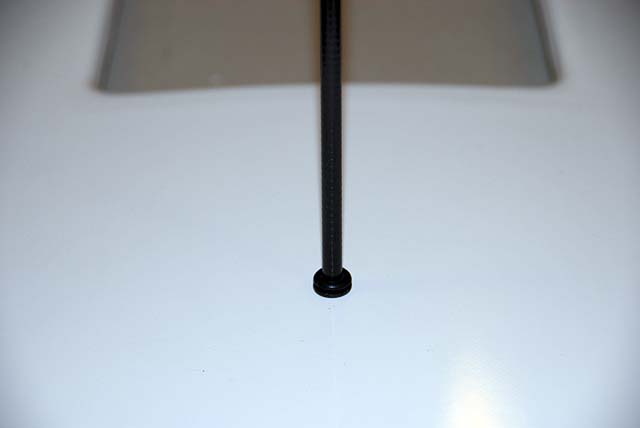
CA glue a bushing to what will be the bottom of the Post and let it cure.
Clean dried glue from the hole through the mount at the deck with several drill bits spinning by hand till you have a clean pass with the #7. Try not to use a drill so the hole will remain tight.
For show and tell force a grommet onto the tube and twist it through from the bottom then place the other grommet on and fit them to the top of the deck and the bottom of the mount. The Post is overly tall and it is figured it will end up about 3" when sized with an A rig. Looks nice, huh?
Repair A small inexpensive portable drill is nice on a road trip. Add a #7 bit and a fully prepared new Post.
Vola! You are finished with the hardware section. The deck is now complete to the point of installing it. The hatch will be installed after the gluing and curing. Press on... |