Deck Covering
![]()
![]()
![]()
![]()
![]()
![]()
![]()
![]()
|
Deck Covering
|
|
Last update, December 28, 2001 Covering The Deck With Balsa Sheeting
All internal control work is completed and installed. You have an internal sheet line system installed and functioning. You have the rudder linkage installed and calibrated to your rudder needs. The sheet lines are stored away into the keel and taped out of the way. Essentially, you should have a functioning boat.
If you are using a removable strut, it is installed to help support the weight of the deck sand bags.
This is a good time to pause and think. Mentally go over all that is in the boat. Did you forget anything? Review the EC that there are none of your notes left hanging.
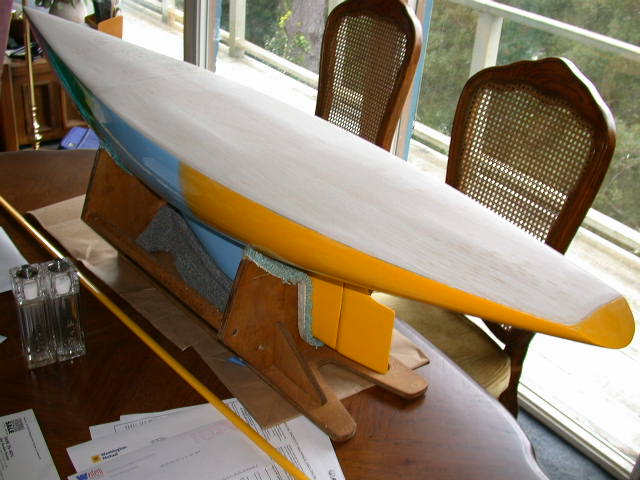
Prepared balsa sheet coverings
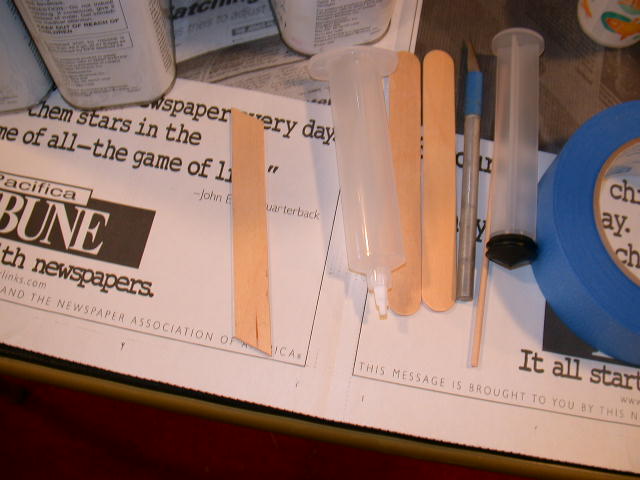
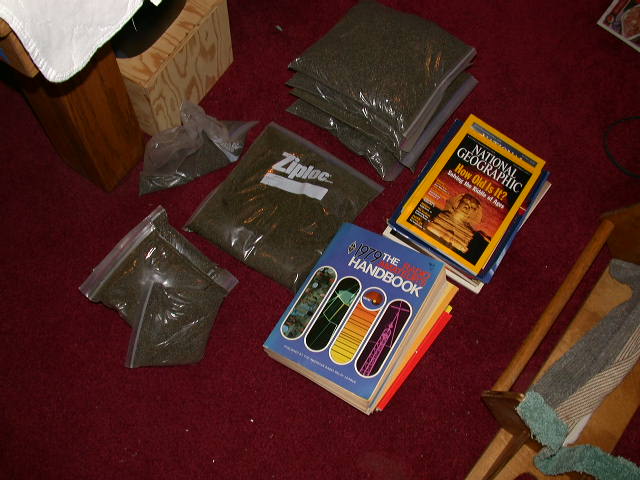
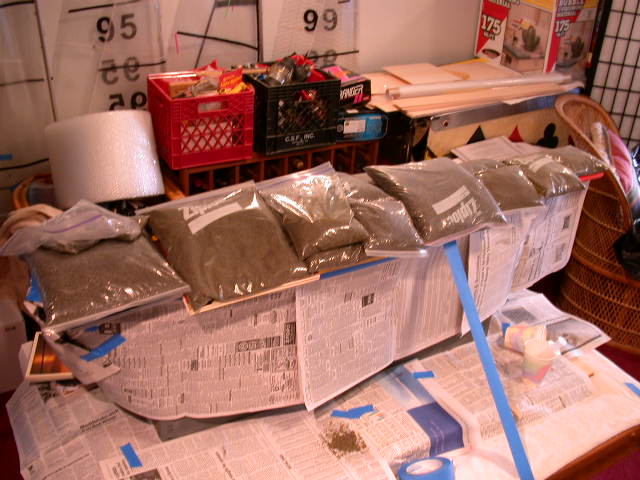
Tools: Paper towels Sandpaper and sanding block Palm sander, if you have one. Sand bags Books and magazines Blue tape Razor knife Epoxy resin Cabosil or filler Stir sticks, gloves, cups and syringes Preparation The interior of the boat is covered with paper towels to protect the lines and hull from drippings. Put in the compression strut. Make sure the stringers are smooth and shaped to the gunwale flange. Ruff up the flange with a heavy grit sandpaper. Get all your parts and pieces out in one place. Find a source for dry sand and get a big bucket full. A five-gallon pail would be good. Fill a mess of one-gallon Ziploc bags so they will lie flat about 1-1/2’ thick. Scrounge the house for soft backed books and magazines. If you hoard National Geographics, you are in fat city. We have an old Dumas cradle here that is worthless except for this process. You can stuff some rags in your cradle to prop up the boat higher away from the supports. Make a glue scraper out of a tongue depressor with a 30 degree cut on both ends. See below. Paper the table top. Think and think again. Be sure you are ready.
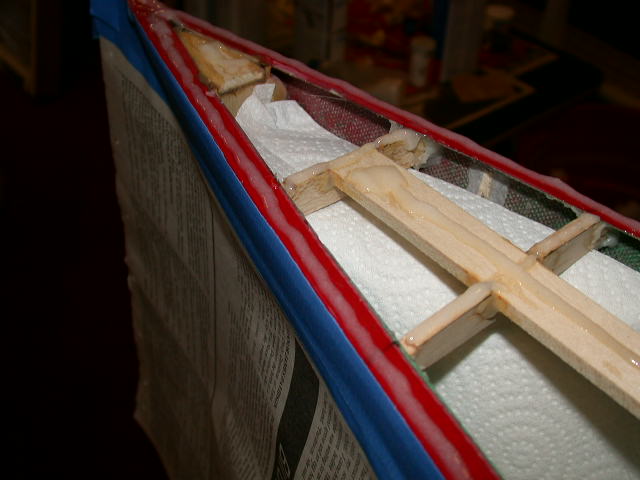
The process used here is to get as clean a glue edge at the gunwale as possible because we do not paint hulls. Therefore, we want to keep sanding to minimum, buffer the area with tape so as not to mar the gel coat finish below where the top deck fabric and resin will end. If you are going to paint the hull you can get a bit sloppy and move along faster.
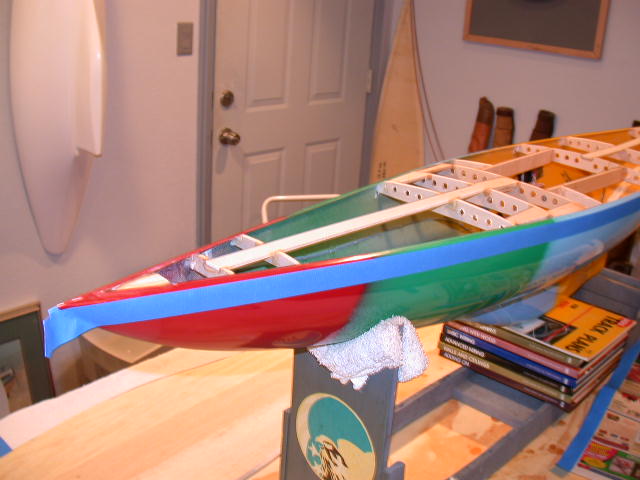
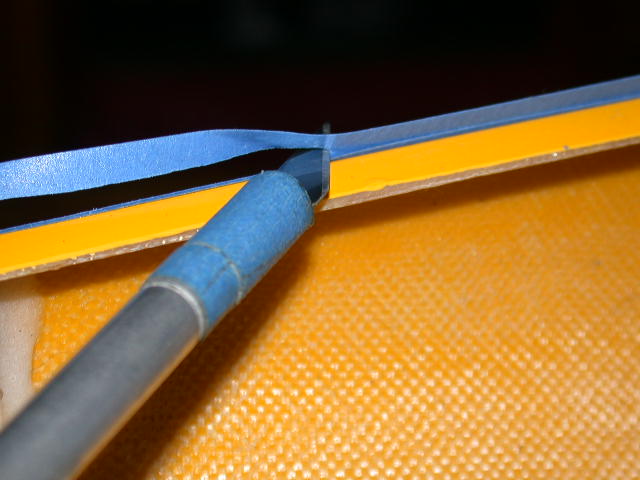
Place the boat and cradle in a place where you will be able to see under the deck overhang at the gunwale. Lay a long piece of tape just below the gunwale the full length of the hull on both sides. This should be about 1/8" below the rounded portion of the hull at the flange. Tape paper to this strip so that it will hang down to the table top.
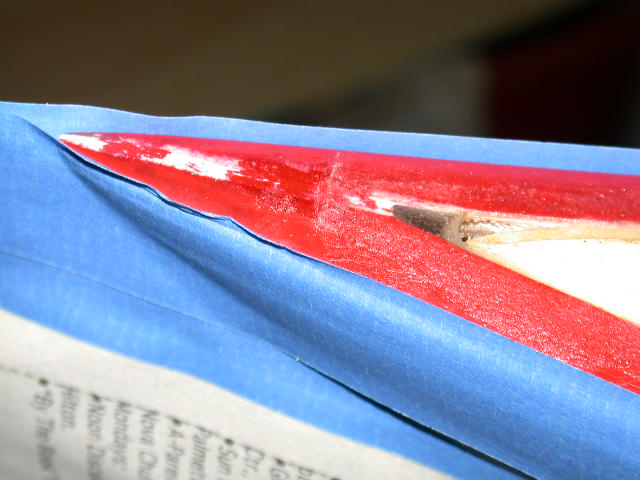
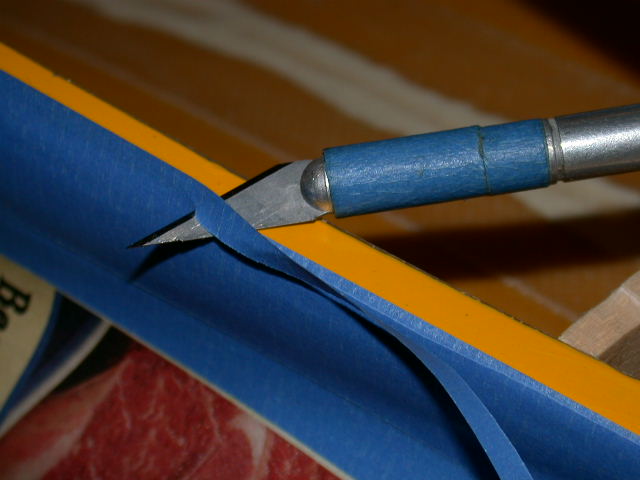
Over this, place another long piece of tape that a portion will be above the gunwale. The idea is to have enough above so that you can cut off some but still have just a hair left to meet the balsa sheet as it forms over the gunwale flange. This is the seal for the oozing glue that will force the filling of the seam all the way around. Glue will ooze out past it but we will take of that in a bit. Move the knife at an angle down from the edge with the blade resting on the edge. Hold the knife at an angle to the tape as well so that it will slice easily. Play with this to learn the technique. It is best to cut the entire side in one long cut so that there are no tears or breaks that can cause fibers to get into the glue. Test one side till you get the results you like. It will save a lot of work later. The plan is that this tape will be removed when the glue gets tacky. This way there will be no bonding of the tape with the glue and hence, very difficult to get out. The transom is taped where the wood will end, just as it leaves the flat of the flange.
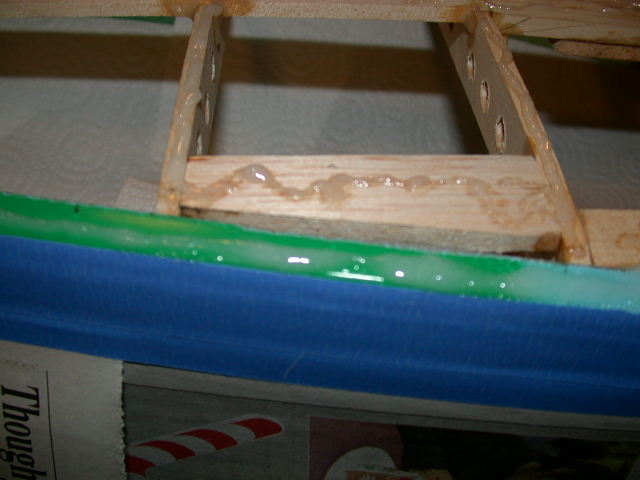
Install The Deck Mix 1 pump of resin and hardener into a cup with fiber filler till you have a toothpaste consistency. Fill a syringe and place a small bead over the stringers, king plank, hatch liner and deck support items. Not too much now, just enough to cover. One full large syringe will do the job. If you need, you will have time to spread it a bit with a depressor. Run a bead along the gunwale. Try not to break the bead and think about the need to have all the outer edges filled by the time the balsa sheet is depressed to the flange.
Place one balsa piece on and hold it in place with a small bag of sand and then place the other the same way. Do this so the glue does no ooze up through the splice. You do not want any glue topside and little, if none, in the splice. Put a wide piece of tape over the balsa splice and down to the table; just snug to hold the pieces together and down on the frame and hull flange. Now, work the sand bags over magazines with concentration on the outer edges to mate the flange at the very edge of the gunwale. Without pressing down, gently knead the bags so they will settle in nice and flat. Peer underneath and keep working till you think you have a nice seal. Then trim the under-gunwale of excess glue with the wood squeegee stick, always checking for pockets.
When finished, return every 30 minutes to squeegee off excess glue till you think you have it all and no more will ooze out. When you are sure the oozing has stopped and the glue is tacky and leathery, remove the upper piece of tape. If it looks real messy after the tape is off, swab the gunwale joint underneath with a rag and Acetone on your finger to remove excess glue on the gel coat. Careful now, you do not want to damage the bonding.
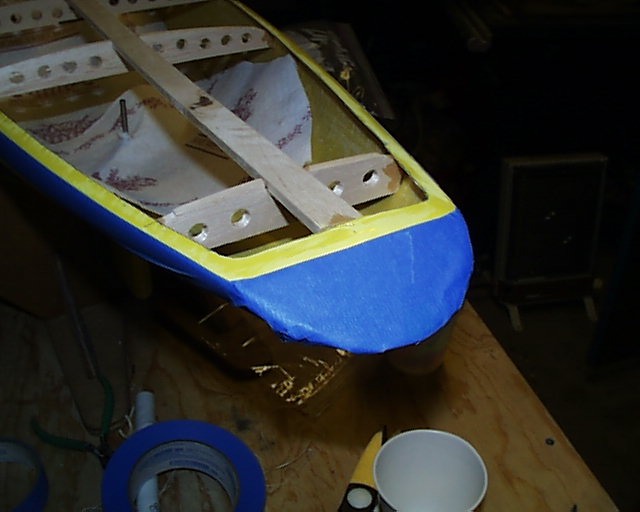
When you think you are done…you are done! Don’t mess with it till morning or a good 10 hours. At that time remove the sand bags, books, tape and paper skirts.
When the Jamaica boat was ready to be dug out of the sand bags, all the books and bags were weighed. Just curious. 75.3 pounds was on that deck all night. WOW! Scary!
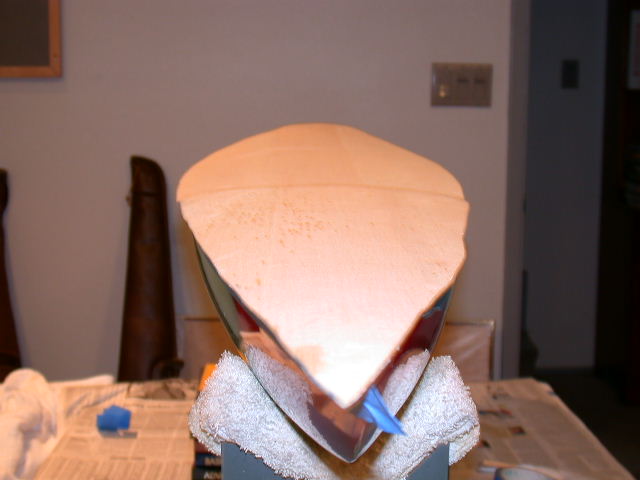
Trim and Sand the Excess A ruff trim of the balsa excess is made with a sharp razor knife. Move the knife against the grain so it will not track into the hull. Replace the tape under the deck edge for a sanding buffer. Then place another just below the balsa to form a second layer. Sand now with 60 grit at about a 45 degree angle to the flange. Go easy as this cuts fast. A palm sander is used here but block will work fine. Check the tape and add more if needed.
If using a palm sander, make long sweeping passes along the gunwale. This will cut more evenly and not dig in at one place. If you pause with any king of sander it will cut tot he hull in seconds. Be careful and use a light touch. Some are know to use a belt sander in this process but that is a bit scary for around here.
Change to 100 grit and work this down till you start to see the tape curling as the sander hit its surface. Now flatten the angle to the deck surface so the balsa surface runs straight at the roundness of the gunwale. Do this just at the edge so it does not get too thin. Now change to 220 grit and smooth it all out. Seek out any rough spots on the deck surface and smooth out the splice at station 24.
The transom is always the hardest place to work. Do the best you can. It is better to begin sanding here at a more shallow angle and go slow. Move in more tape it you need to keep the gel coat covered. In the final sanding straighten out the wood line across the transom deck and live with it. Remember, this is not a beauty contest and there are no craftsmen here.
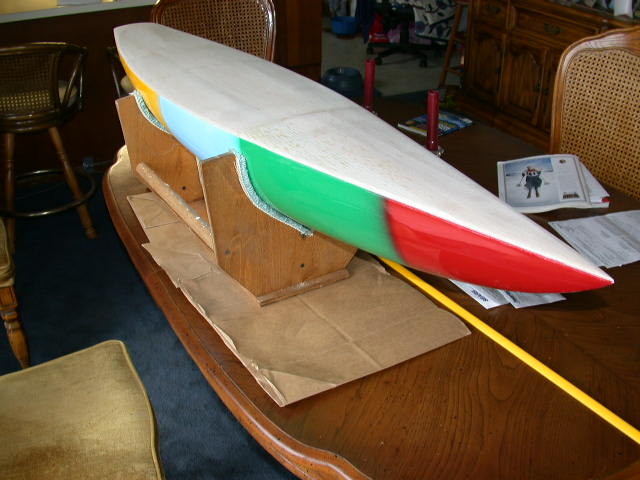
Relax…nice job! |