Install Hardware
![]()
![]()
![]()
![]()
![]()
![]()
![]()
![]()
|
Install Hardware
|
|
Last update, March 12, 2002 Installing the Deck Hardware
arts: Jib rack, Mike Zellanack, MMY, RMD Fairleads, 2, Mike Zellanack, 4 if installing a twitcher Mast step, Mike Zellanack, MMY, RMD Shroud racks, pair, Mike Zellanack, MMY, RMD Fasteners are included #269 eye plate, 1, MMY #4 wood or sheet metal 3/8" screw, 4, Stock Item 2-56-1/4" flat head machine screw, 2, Stock Item Epoxy resin
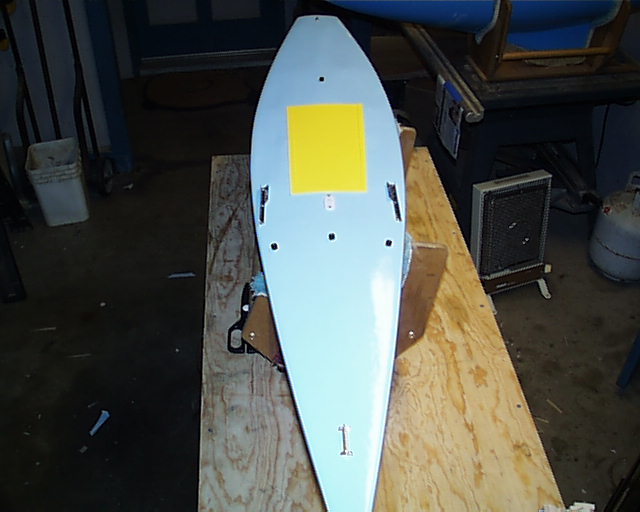
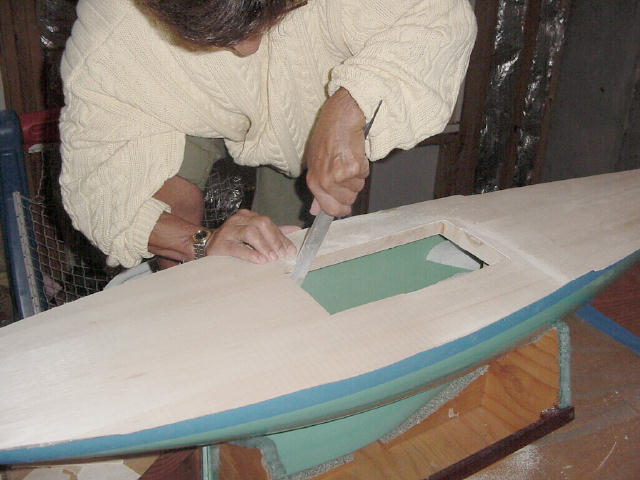
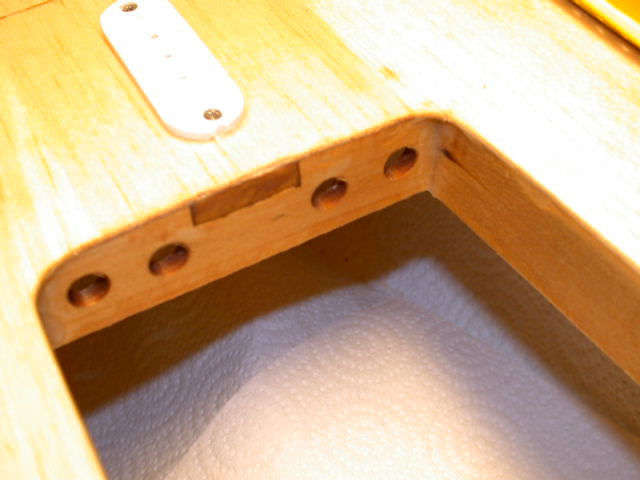
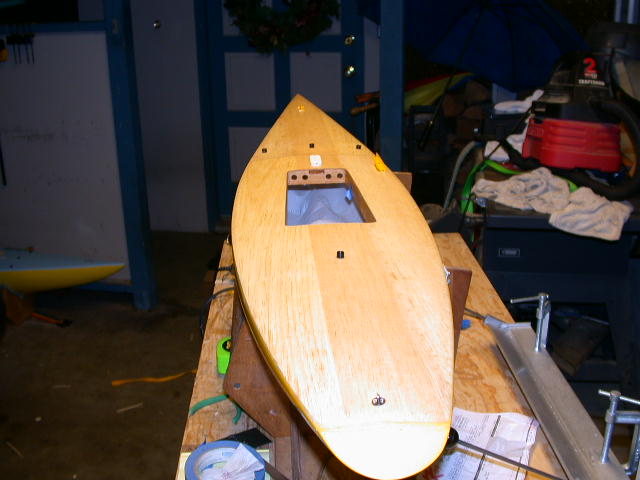
Tools: Drill and bits Silicon sealant MEK or Acetone Paint brush Screwdrivers Pliers Blue tape Pen or pencil Triangle Cutout the Hatch Opening Make sure you know where the opening is. Start with a small opening with a razor knife. Then start working over the the hatch liner ribs till you are close. Now sand and file till you have a nice smooth entry. Mix a small amount of resin and cut it 20% with MEK or Acetone. Paint the hatch liner making sure to seal the sanded balsa top deck and the holes in the ribs. This is a moisture protection move. If you have removed the tension line cleat, re-install it.
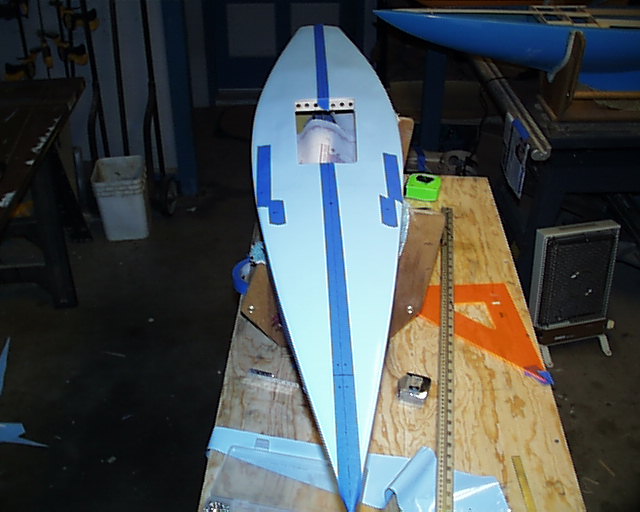
Measure and mark the center of the transom. Put a strip of blue tape down the centerline of the deck. Blue tape is used throughout this process because it will protect the finish of the deck and provide a clean entry of the drill into the finished wood. Use a measuring tape to mark the locations for the jib rack (7-3/8"), jib fairlead (22"), mast step (25-1/2") on center, the main fairlead (43") and the backstay mount at 56 inches. Tape a piece of string to the bow and center it on the transom. Mark the centerline at the hardware marks. It is important to get this right and precise. If you don't, you are going to see some funny things on the water. Centerline is very precise here and we use a 6" caliper to make sure the center is centered from the gunwale.
Marking and Installing Hardware
Go through and mark and drill holes first.
Jib Rack Center the rack at 7-3/8" to the middle hole and mark the drilling holes. This rack is installed with #4 sheet metal pan head screws. These are pre-drilled with a #58 bit to insure straight entry. Silicone sealant is dabbed over the holes and the rack is screwed to the king plank beneath. Jib Sail Fairlead Centerline a mark for drilling the fairlead guide. If you have a tap set you will know what size to drill the hole. We use a #8 bit for wood. It is suggested that you pilot drill ½ the diameter as a pilot and then finish the sizing. Otherwise, test drill in a piece of wood till you have something that will allow the Delrin fairlead to thread into the wood. The fairlead is a ¼ by 20 thread. Seal the unit with a clear silicon.
Twitcher If you are using a twitcher, the fairleads will be 3-1/2" toward the gunwale from the jib fairlead on center. That will mean that it is 90 degrees to the centerline of the boat. Place a strip of blue tape and mark the spot. Install the fairlead as above and seal. Shroud Racks The shroud racks need to be mounted parallel to the centerline of the boat. This stands to reason for you will need to move the shroud line connectors, fore and aft depending on conditions and you need to have stable tensions in the process. Those that you can trust will not change the mast beam positions you set in the beginning of the tuning. So, take your time here.
There are number of ways you can do this. Just know this, we would like for the #3 hole of the rack to be adjacent to the center hole of the mast step plate (25-1/2"). The forward hole of that rack should be 3/8" from the edge. The rack needs to be parallel to the centerline of the boat. What you need to do is obvious by whatever process. A right triangle will help. Place a piece of tape along that line and mark the holes. Drill for 2-56 bolts. Washer and nut these under the deck and seal with Silicone on the deck side. The forward bolt is a bear. Be diligent and calm. It is hard work here. You might like to use a 2-56 T-nut instead of a standard fastening nut. It is far easier to handle and a washer is not needed.
The Mast Step Now, while it is not in the way, position the mast step and mark the drilling holes. This procedure is the same whether you use a 3-hole of 5-hole step. Install these with 2-56 flat head screws and seal. These need to be flush or recessed in the step. Yes, this is not the kind of screw for wood but #2 flat head sheet metal screws are not available at Small Parts. The machine screw will act as a pin and that is all that is needed to hold the step. The Main Fairlead Centerline a mark at 43 inches. Installation is the same as the jib above.
Centerline a mark at 56 inches. The backstay mount may be a bit further aft than some like. But there are two considerations here. One, a boat climbing the stern and hooking your backstay or two, forward to prevent that and then the stay will brush the leech of the main. 56 inches is a compromise of the two.
We recommend the Great Basin deck fitting as listed above. Install this with sealant on the screws and long enough to penetrate through the king plank.
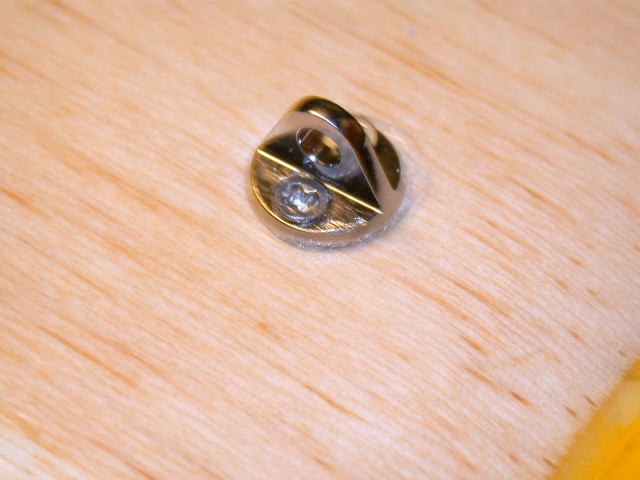
We are currently using the Pekabe #453 bolt because we have a supply of them and we understand them. That miserable story is below.
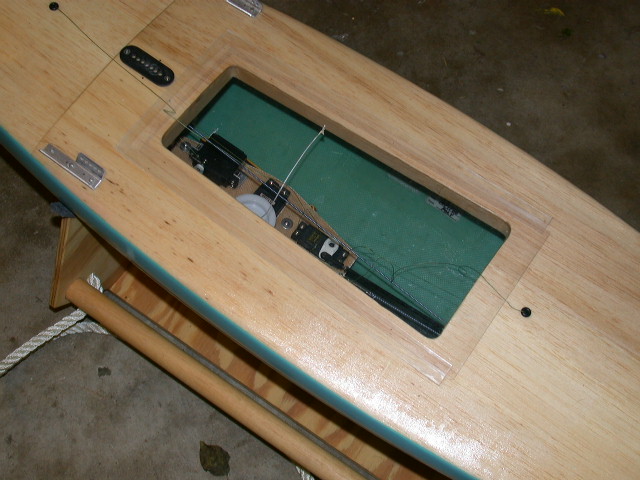
Remove all the paper towels, arrange the lines and vacuum the interior.
The biggest problem is that it is not understood to most that there are two shafts to this part, one within the other. The threaded shaft is not connected to the external eye. So, once the nut was on the shaft it could not be tightened easily and in the manner thought. Thin CA glue was worked into the separation of the shafts on the bezel and the stem of the threaded bolt. This was allowed to dry for 20 minutes.
It would help if the station 55 stringer was trimmed away about a half inch and several inches wide from the center. This will provide more working room. After a pilot drill, a #15 bit was used for the shaft of the mount. The mount was put into the hole without Silicone. The washer was not used. A piece of double stick tape was stuck to the tip of the middle finger. (This finger is a good choice and supports thoughts and expressions during the process) The nut is stuck to the tape and, with the palm up, the hand and arm is moved under the deck to the aft parts. Slide the finger nail along the keel till past the stringer. Carefully feel for the beveled shaft while holding the deck side portion down. The nut will go on easily. Now, keeping contact with the nut, roll the finger to the side while bringing up the fourth finger on the other side. The nut will then slide up to the threads. Turn the eye above the deck to start the nut onto the threads. Move very slowly. Keep this up till it is snug against the king plank. Now put pressure on it till the CA glue breaks and the eye will turn easily. With a small dab of Silicone sealant on the finger, go in again and put this on the threads up at the nut. This will prevent loosening. The word is that it will loosen without this. When you are done, it would not a good time to have a delicate conversation with your roommate.
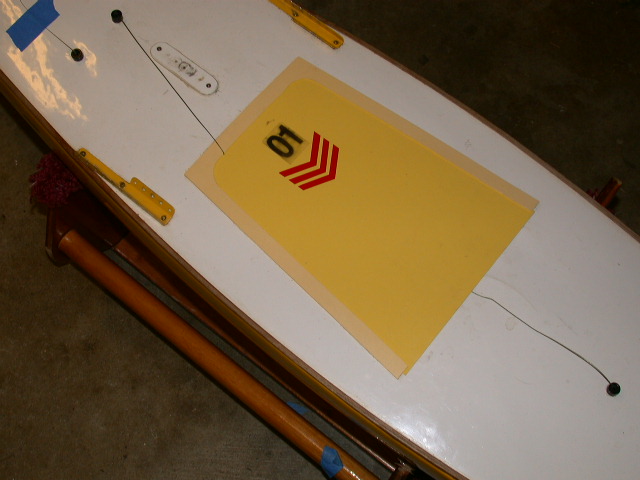
Hatch Cover This project can be done at any time and is listed here as part of the on deck work. Many will put the hatch cover on last when the boat is finished. The project and the timing is personal and you may find other ways you like than what is presented here. The key is to keep the rain out. Most covers with deal with sheeting water down the deck on the race course but rain is another deal.
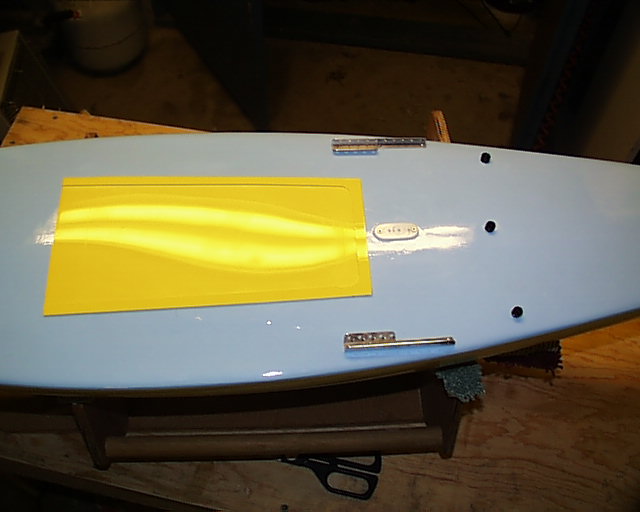
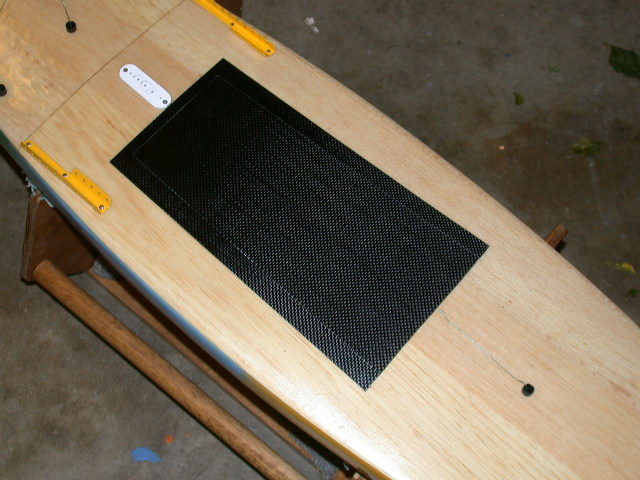
Materials are not listed above as there are many choices. We have mostly used Acetate here in the 30 mil range and found at a plastics store in various colors. Dark colors are not good in the sun. The dark hatch shown here is a carbon fiber composite accent panel material found at CST. This is expensive stuff but if you want dark this can handle a blowtorch. The best double stick tape we have found is at a trophy sales house. They use the stuff for name plates on plaques and trophy bases. You can get it in various widths and it is easily trimmed with scissors and/or razor knife.
Small strips will be taped down across the forward end and sides. A horseshoe cover holder is made to be taped over the strips and then the cover that will slide underneath the holder and guided by the strips. Got it? Good.
A horseshoe holder is cut to be 5/16 to 3/8" wide and to be 1" wider than the hatch liner. The length would be to provide enough hatch liner at the forward end to slide the cover over and about a half inch at the aft end. The forward end depends on placement and choice of mast step. If you are using a three hole step on center at 25-1/2" there will be plenty of room. If it is a five-hole step you will have to fudge a bit. You get the idea. Three strips of material 3/16" wide are made to fit the perimeter of the holder. Double stick tape is applied and taped to the underside of the holder.
Check the horseshoe holder for fit. We use blue tape to mark the outer location of the holder on the deck. Do this and get it aligned. Now, cut the hatch that will fit inside the perimeter pieces easily but with good coverage of the holder. Apply double stick tape to the perimeter pieces again, peel off the bottom and carefully lay this within the marks on the deck and seal it with pressure.
It would be best if you left the boat in the house for the day so the tape could settle in. Then slide on the cover and trim if needed. Make a spare cover for the toolbox. I know, you'll never drop one in the water...
Sheetlines Untangle the mess of lines where you had them taped in the hole and organize them. Thread the main sheetline through the fairlead and tape it to the hull so there is enough tension to lift it off the radio gear. A long doubled piece of crimped rigging wire can be fed down through the exit guide, put the sheetline in the loop of the wire and pull it through onto the deck.
Make sure the jib sheetline is still routed through the trim servo arm correctly. Feed it up through the fairlead and tape it to the deck.
There is no need to connect the sheetline bungee now. It should be in a storage location. The turning block tension line is connected to the cleat and the looped end organized out of the way.
How does it look in there? Starting to look professional?
Having read this far you have probable left to find an Odom kit. Well, life is sometimes hard in the EC12 shop then you have to go out and bully your way around with 30 other guys on the water.
|